Combining Charcoal and Pencil-What Happens When Used Together
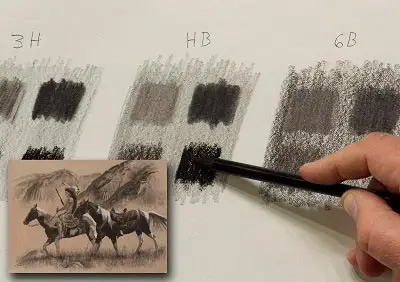
Can you use charcoal and graphite together? This is a question some artists may ask, especially if they want to combine the rich darks of charcoal with the precision of pencil. We will discuss if you can use charcoal and pencil together and how to do it.
You can use pencil and charcoal together but there are things you want to be mindful of. Charcoal applied over pencil works much better than the reverse. Also, charcoal works better over hard H-grade pencils than it does over soft B-grade pencils. White charcoal does not work well over graphite.
Below we will go into detail over combining charcoal and pencil and also show examples from experiments I did with different combinations over two types of paper.
Types of Paper and Pencils Used
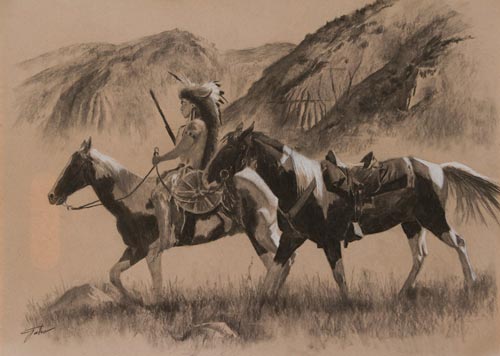
Vine charcoal is the purest form of charcoal. Vine charcoal is basically sticks or small branches that have been charred in really hot temperatures. I've bought charcoal from stores that still have remnants of knots on them. If you are interested in the process, check out this YouTube video on making charcoal.
I used two types of paper for all of these experiments, Strathmore 400 Series Medium Drawing Paper, and Strathmore 300 Series Charcoal Paper. From here on out I'll refer to them as 400 and 300 Series paper. The 400 is a fairly smooth paper with a natural tone. The 300 is a little whiter and has some tooth since it's made for charcoal.
I honestly don't know which brand of vine charcoal I used since I have about 4 different brands in my studio that are out of the box. If it's any consolation, the only difference I've noticed between vine charcoal is how hard or soft they are.
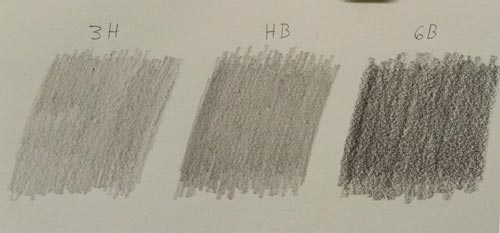
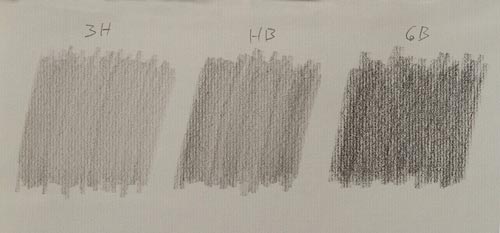
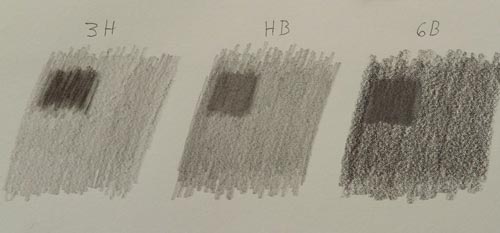
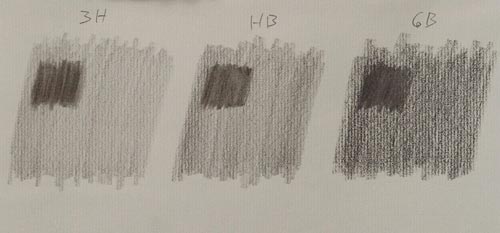
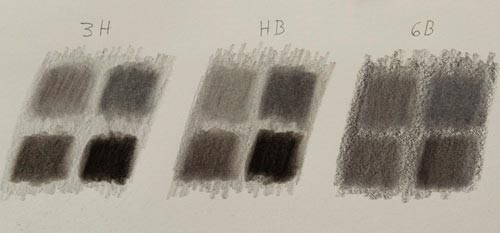
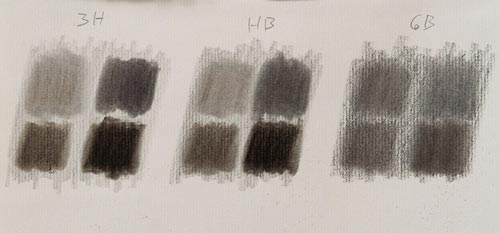
In this first photo below, I have applied three swatches of pencil on each paper. From left to right in each photo (unless otherwise indicated) The first swatch is a Derwent 3H, the second is a Koh-I-Noor HB, and the third is a Derwent 6B. I applied the graphic using the side of the pencil in a fairly light manner so as not to burnish the graphite.
Hard Vine Charcoal Over Graphite
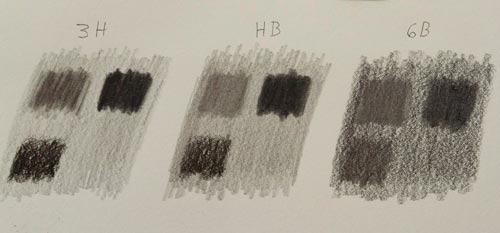
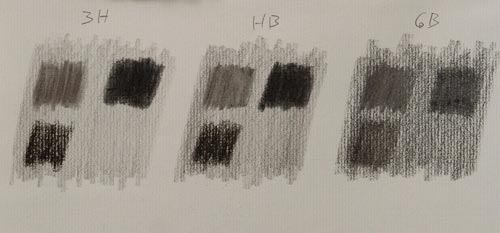
I began by applying hard vine charcoal to each of the swatches in the upper left corner of the swatch. The charcoal had a slightly abrasive feel going on and even caused a few scratchy strokes, but this is to be expected with hard charcoal if you are not careful.
You can see below that overall it applied well to both papers. As to be expected, it appeared darkest over the 3H swatch, partly due to contrast, but also because the 3H seemed to accept it better.
See the types of pencils, charcoal, and paper I use on the Drawing and Sketching Resources Page.
Soft Vine Charcoal Over Graphite
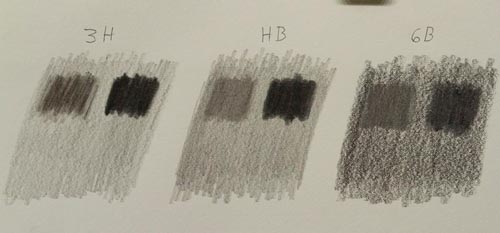
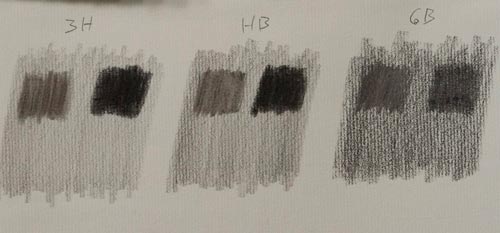
Next, I applied soft vine charcoal over the same graphite swatches in the upper right corner. It applied very nicely over the 3H as well as the HB.
While I was able to apply it over the 6B, it didn't do nearly as well. The soft graphite seemed to actually reject the charcoal. Since I was drawing upright, I saw charcoal falling down from the swatch as I applied it. You'll also note that on the 6B swatch I was unable to achieve that nice dark tone that charcoal is known for.
Hard Compressed Charcoal Over Graphite
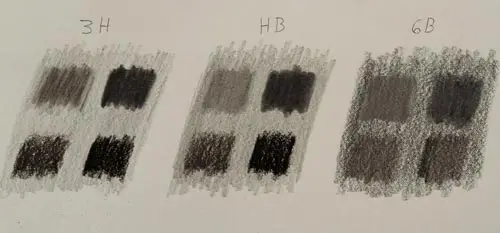
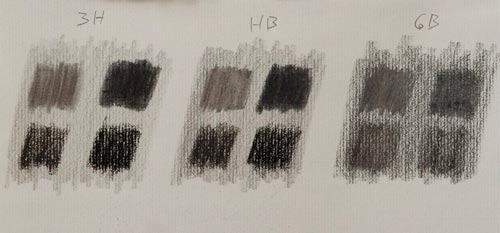
The next step was to try compressed charcoal over the same swatches. I started with a Mont Marte Woodless Charcoal Pencil, Hard Grade. Don't be thrown off by the term woodless, this just means that the charcoal is encased in plastic rather than wood which results in a larger amount of exposed charcoal for drawing.
The compressed hard charcoal went well over the 3H, but it did not do as well over the HB and 6B. It did cover somewhat, but not nearly as much as the over the 3H. Refer to the lower-left corner of each swatch to see how the hard compressed charcoal did over pencil.
Soft Compressed Charcoal Over Graphite
This time I applied a Mont Marte Woodless Charcoal Pencil Soft Grade, over the lower-right corner of each swatch. It worked beautifully over the 3H and the HB, but once again the 6B resisted acceptance of the charcoal which resulted in a subtle darkening at best.
Blending Charcoal Over Pencil
Using a standard blending stump, I wanted to see the effects of blending the charcoal I had just applied over the pencil. You may think that the only result would be a softening of the charcoal and pencil, and while that is basically what happened for most of the combinations, there are a few things that you should be aware of.
The first is that I was not able to blend away the scratchy strokes I had made with the hard vine charcoal over 3H graphite. I'm not too surprised because while hard-grade pencil and charcoal can be easy to erase if applied lightly, it can be almost impossible to erase them if applied with a heavy hand.
When I got down to blending the compressed charcoal (two lower swatches) something very interesting happened: blending the combination of compressed charcoal over graphite had a slight warming effect; it almost took on a slightly brownish tone, especially near the edges of where it was blended. It may not be as noticeable in the photos but believe me, this happened for both the hard and soft compressed charcoal.
This browning effect could be an issue. If you blend a small section of your drawing and this occurs, it could read as a mistake or a stain, given that charcoal on white paper tends to have a cool temperature. Depending on your technique and subject matter, you could also make this work for you in some way. But just be aware that blending compressed charcoal with graphite can have a warming effect.
You will also note that when I blended the soft compressed charcoal (lower right swatch), it darkened very nicely over the 3H and HB, but ended up being much lighter over the 6B.
Erasing Charcoal Over Graphite
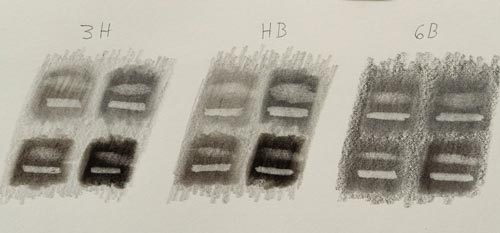
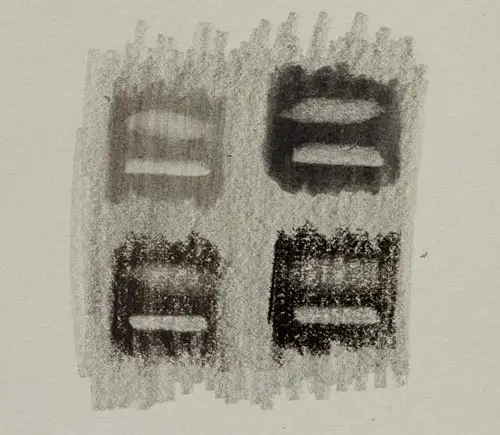
Using a kneaded eraser and an electric eraser I attempted to erase a small part of the swatches I had made. The kneaded did not have that much effect. The electric eraser is one of the most aggressive erasers I have used and it did remove more charcoal and graphite, though not all. In the photos below I used the kneaded eraser on the top part of each swatch and the electric eraser on the bottom.
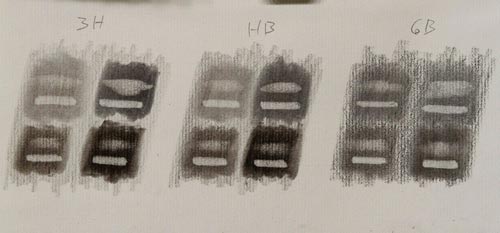
Since the above swatches had been blended, which can grind the graphite and charcoal into the paper, I made another swatch of charcoal over graphite which I didn't blend. The results were only slightly better as you can see below.
Pencil Over Charcoal
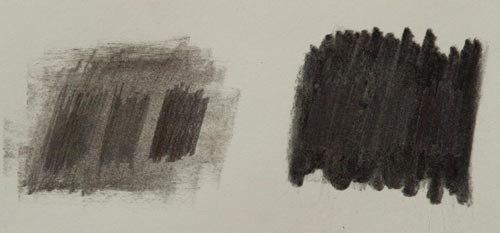
Just for kicks, I decided to try pencil/graphite over vine charcoal. I didn't think this would work too well and for the most part, I was correct. It actually worked OK using pencil over hard charcoal, but when used over soft charcoal, it basically made no impact at all except to burnish the pencil and cause that annoying glare. Once again, you may find a way to use this to your advantage.
White Charcoal Over Graphite
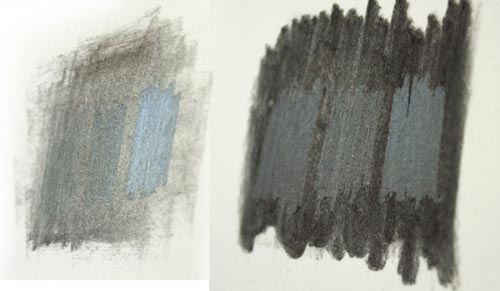
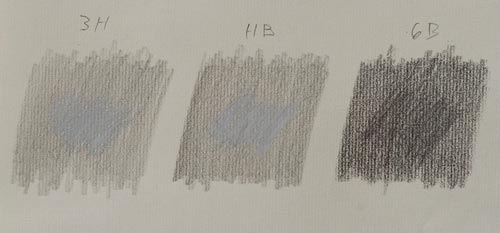
My final experiment was to try compressed white charcoal over graphite. As I suspected, it didn't work very well. You could barely make out the charcoal on 3H and HB graphite. The only effect it had on 6B graphite was to spread the graphite in different directions. The 6B graphite didn't accept the white charcoal at all, but my charcoal stick did pick up plenty of graphite.
Final Thoughts About Using Charcoal over Graphite
So the takeaways are that if you are going to use charcoal over pencil, you will get better results if you use an H-grade pencil. Not only does H-grade graphite accept charcoal better, but it also allows the charcoal to retain a darker value than does soft graphite.
You also want to make sure that you have your pencil drawing exactly how you want it, or at least very close before you apply charcoal. Once the charcoal is applied, erasing will be more difficult.
As for applying white charcoal over pencil, forget about it. You will only mess up your white charcoal stick or pencil. But once again, you may find a use for this that I'm not aware of.
Of course there are many other brands and combinations that were not covered in this article. Don't even be afraid to experiment, just don't do it on that nice masterpiece you have been working on. My hope is that this will give you some information to work with.
Please leave your thoughts or experiences below.
Keep Drawing!
Jason Tako is a nationally known fine artist who specializes in western, wildlife, plein air, and Historical Native American subject matter. He spent his learning years sketching the wetlands and wooded areas of rural Minnesota. He has been featured in Plein Air Magazine and Western Art Collector Magazine and he was the Featured Artist for the 2020 Southeastern Wildlife Expo. See his work at www.JasonTako.com and his demonstrations on his YouTube Channel.
Warning: Undefined array key "preview" in /home3/mysketc2/public_html/wp-content/plugins/oxygen/component-framework/components/classes/comment-form.class.php on line 75
Warning: Undefined array key "preview" in /home3/mysketc2/public_html/wp-content/plugins/oxygen/component-framework/components/classes/comment-form.class.php on line 79