Artists call it different names, sinking-in, dead spots, ghosting, blotchiness, and it can be one of the biggest frustrations for oil painters. When your beautiful painting dries, certain spots appear dull and devoid of color. So how can you prevent dull patches from happening in your oil painting?
You can prevent oil paint from sinking-in by using a thick over thin or fat over lean painting technique, and by painting on properly prepared substrates to prevent absorption. If sinking in still occurs, the problem can be corrected by oiling-out the painting surface.
Let's take a look at how sinking-in occurs and what to do about it.
What is Sinking In?
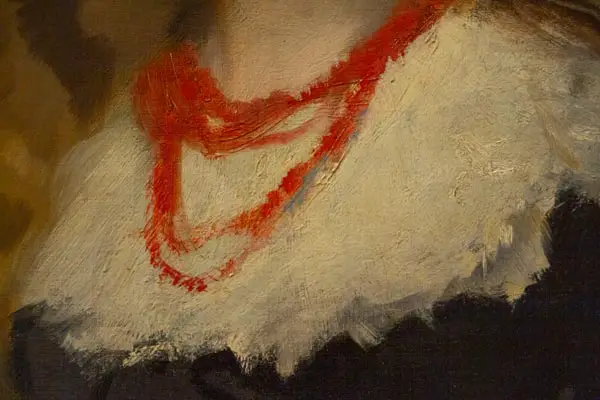
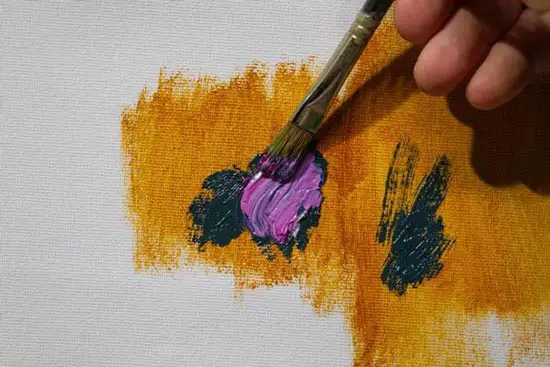
Sinking-in, or ghosting is when the oil in the upper layers of an oil painting gets absorbed into the layer beneath during the drying process. Once the painting is dry, this leaves spots in the upper layer looking very dull, matte, and even devoid of color. This is usually more evident in darker colors.
In most cases, the entire painting surface is not affected, though this can be the case depending on how it happened. Most of the time you will have normal and even glossy spots combined with completely dead spots, resulting in a very uneven appearance.
If you are new to oil painting, this phenomenon may catch you off guard. The good news is this is quite common, even among seasoned professionals, and it's an easy fix.
The Causes of Sinking-In
As stated above, what happens during sinking-in is the oil in the top layer is absorbed into the layers underneath, but how does this happen?
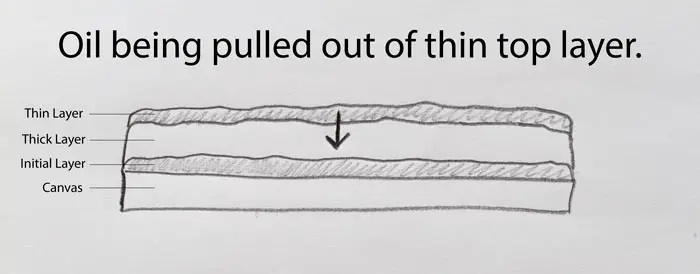
The most common cause of sinking-in is the improper application of oil paint, painting thin layers over thick layers, or painting lean paint over fat paint. If you do either of these, you are almost certain to have ghosting in your work. In either of these cases, the higher oil content in the underneath layers absorbs what little oil is in the top layer.
Another cause can be painting on a highly absorbent surface that has not been properly sized and or primed. For example, if you paint on a bare wood surface, the unprotected wood will absorb the oil like a sponge, leaving little in the pigment. This can be prevented by properly sizing and priming the surface, or glue primed canvas onto the surface.
Let's look at each cause in more detail and how to prevent it.
Keeping It Thick On Top
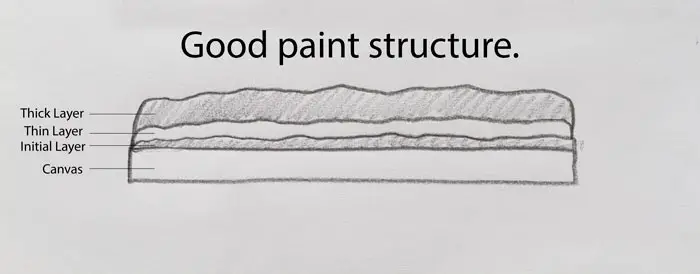
One of the easiest ways to prevent sinking-in is to make sure that your initial paint layers are thin and subsequent layers are thicker. This not only prevents ghosting, but it also results in a more stable painting.
Let's say you like to thin your paint with solvents (mineral spirits or turpentine) to achieve lower viscosity (thinner paint with more flow). This is fine but just make sure that you only do this with the initial layers, using less and less solvent with each subsequent layer.
Once you get to the point of tube consistency (using paint as it comes straight out of the tube), you should cease to use solvent in any subsequent layers.
Bear in mind that you don't need to obsess over how much mineral spirits you are adding or your ratios. No artist uses measuring spoons for this process. Just casually lessen the solvent with each additional layer and keep it out of your top layers.
Keeping It Fat on Top
The second thing you will want to do is make sure that you are painting fat over lean. Fat over lean is sightly different than thick over thin as the term refers not to how thick the paint is, but how much oil it contains. Fat paint has more oil, while lean paint has less oil.
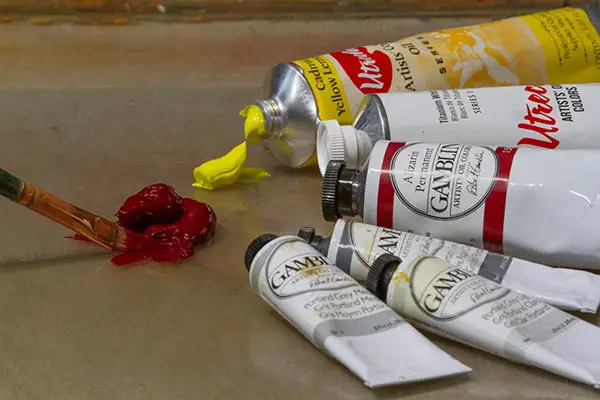
If you are new to oil painting you may think that all oil paint contains the same amount of oil, but this is not the case. Certain pigments have a higher oil content than others and this can also vary depending on the brand of paint. Basically, the shinier the paint, the higher the oil content. Many times you can notice this by looking at the paint itself when you squeeze it out of the tube.
If you stick to the thick over thin principle, you will usually, by default, achieve the fat over lean principle. However, since all pigments do not have the same oil content, there are times when even painting thick over thin may result in some sinking-in.
Some artists will get around this by using an oil-based medium such as linseed oil, Liquin or Galkyd in all of their layers. But this is not necessary as sinking-in can be easily corrected. Also, this may not solve the problem as it's difficult to assess whether you used more or less medium in your previous layers.
While this is not something you want to obsess about while painting, try to avoid using a very oily color, such as Ivory Black, on your initial layers, unless you thin it with a solvent to lessen the oil content. And whatever you do, don't ever thin your initial layer of paint with oil or an oil-based medium such as Liquin or Galkyd. This would necessitate adding tremendous amounts of oil in your subsequent layers.
How to Paint Thin Over Thick
There are times when an artist would need to paint a thin layers of oil paint over a thicker layer. Techniques like glazing require thin paint to be used as a means to shift a color or value. This technique has been utilized for centuries and if done correctly, it will not result in sinking-in.
To properly glaze over thick paint, use oil or an oil-based medium to thin the paint before application. This will ensure that this subsequent layer is fatter than the layer it's being applied to and will prevent sinking-in. You may need to experiment with how much to thin your paint. I recommend testing this on a piece of scrap canvas to make sure the result isn't too shiny or dull.
Make sure you don't thin your painting with a solvent to glaze, unless you are glazing over very thin subsequent layers, and even then you may get sinking-in. Basically the rule is that you can paint thin over thick, but rarely lean over fat. I say rarely because there are caveats even to this rule that we will discuss below.
Substrate Priming and How It Affects Your Painting
One more cause of sinking in that we will look at is painting on very absorbent surfaces. Surfaces like bare wood and untreated paper are highly absorbent. Traditional gesso is also highly absorbent and using it will result in a very matte appearance. Painting on high-absorbent surfaces increases your chances of sinking in.
Acrylic gesso, while less absorbent than traditional gesso, is still fairly absorbent. Oil-primed surfaces are mostly non-absorbent and will result in a glossier finish. With oil-primed surfaces, the more layers of primer there are, the less absorbent the surface will be. So three layers of oil primer will be less absorbent than a single-primed canvas or wood surface.
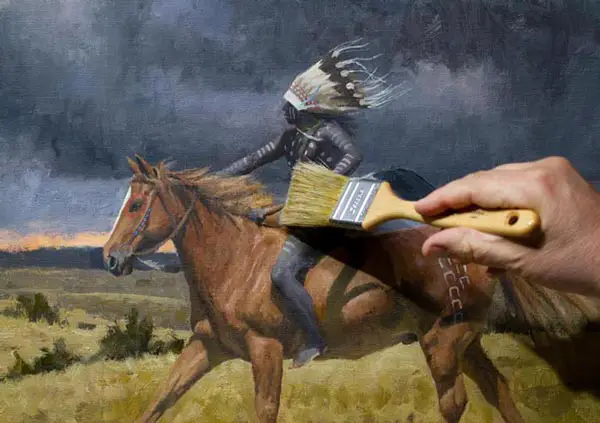
Oiling Out-The Cure All For Sinking In
So you've done everything right (or perhaps not) and you still have dull spots on your painting. Never fear, that's where oiling-out can come to the rescue.
As stated above, those dull spots don't have enough oil in them. So all you have to do is put more oil in them and they will come back to life again. So let's talk about how to do this.
The first thing you need to do is make sure your oil painting is dry to the touch. It does not have to be completely cured, nor does it require the minimum 3 to 6 months of drying time that some varnishes require. Oiling-out does not seal the surface as some varnishes do, you are merely adding more of what is already there. You also don't need the entire painting to be dry, just the dull part.
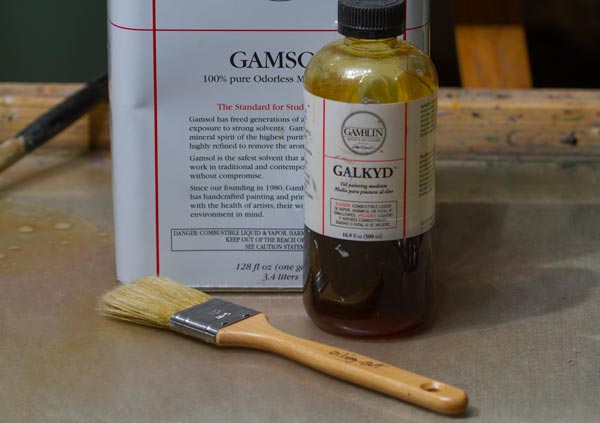
Next, you will want to get a hold of some pure, odorless mineral spirits. Do not use the mineral spirits from the hardware store as this stuff usually has additives that you will not want in your painting. Make sure it's an artist-grade mineral spirit like Gamsol or Turpenoid.
The third thing you will need is some type of artist-grade oil or a drying oil-based medium. You can use linseed oil, but remember that linseed oil can yellow over time so you may want to avoid using it over cool, light areas such as white, light blue, or pink. For these areas, you may want to use safflower oil. Keep in mind that if you use a natural oil it will probably take several days or more to dry.
Rather than using natural oil, most artists will use a quick-drying oil medium such as Galkyd by Gamblin or Liquin by Windsor & Newton. These do not yellow and they dry much faster than regular oils. Please note that I have never used Liquin and I'm not sure you can thin it with solvents. I suggest Glakyd by Gamblin as I know this can be diluted with mineral spirits. See the Resources Page for more info.
Next you will need is a clean, soft bristle brush to apply the mixture. A 1 or 2 inch brush from the hardware store usually suffices, as long as the bristles are not real stiff. You don't want to damage and open any thicker paint strokes that may still have wet paint underneath.
The last thing you will need is some clean, lint-free cloth like cheesecloth.
Here is a list with the materials reiterated:
- Artist quality mineral spirits
- Artist quality oil or quick-drying oil medium
- Soft bristle brush
- Lint-free cloth such as cheesecloth
- Jar big enough to fit the paint brush
The Oiling-Out Process
In a jar, blend one part mineral spirits and one part oil medium (or oil) to a 50/50 ratio. You can adjust this ratio if you want less gloss or more gloss. I've known some artists to use just oil medium with no solvent. I don't usually recommend this because if you want to paint over it, you will need to add that much more oil to the subsequent layers.
Apply a very small amount of this mixture to your bristle brush, then lightly apply the mixture with a quick, circular motion over the areas that need oiling, or over the entire painting. Leave the painting stand for about a minute, then wipe off any excess with a piece of cheese cloth.

Be sure not to apply too much, just enough to re-saturate the area. If you are unsure, apply a small amount, wait for it to dry, then repeat if necessary until the area no longer looks dull or blotchy.
Once this area has dried, you can paint over it. Just make sure that any subsequent layers have oil or oil medium added to them to prevent the exact problem you just corrected. If you do encounter more sinking in on the same painting, don't stress, just repeat the oiling out process again.
Sinking-In While Painting Wet on Wet
I've been talking a lot about painting in layers, but what if you don't paint in a grisaille-type manner with complete layers? Basically all this still applies whenever you place any paint over previously applied paint, even if it's in just one spot on your canvas.
It can also apply, though not as much, when painting wet on wet. You may think that since you are laying down wet paint over wet paint, it will all just blend together, but this is only true if you blend the new layer with the initial layers. If you are gently laying down a subsequent layer, while it will stick to the previous layer, it will remain its own layer and could result in sinking-in.
There are times when you can break the rules. One of the most common is dry brushing a small amount of thin, tube-consistency paint onto thicker paint with a very light hand, leaving little openings to the previous paint layer. An example of this may be thin winter tree branches. In this case, you are applying so little paint that any sinking-in will not be noticeable, and since it's a thin stroke of already broken paint, cracking should not be an issue.
Using Varnish to Solve Sinking-In
Since sinking-in results in a dull, flat appearance, you may think that varnishing alone will solve the problem. This is not true. Varnishing will mask the problem by adding a glossy surface over the area that is sinking-in, but it doesn't solve the fact that the sunken-in area still lacks sufficient oil content.
Depending on the type of varnish and how much you apply, you may still have an uneven surface appearance. And even more, concerning is that this area is still brittle. Varnish will not re-saturate the paint, it just sits on top. That brittle area will probably end up cracking someday. Get the surface appearance as even as possible through oiling out before you varnish.
Oiling-Out As a Varnish
That brings up another point. You can use the oiling-out method as a type of varnish for your paintings. There are two great reasons for doing this. The first is that you don't have to wait several months for your painting to dry as you do with many traditional varnishes. You can achieve a glossy surface right away. This is great if you have to display the painting sooner than it can be varnished.
Another good reason is that oiling-out provides a permanent, protective layer of oil over the painting. You can still rework the painting, or varnish it. I like this method better than using retouch varnish since if I have to rework the painting, I'm not adding a layer of varnish between the layers of paint.
To use the oiling-out method for a varnish replacement or a pre-varnish treatment, just follow the instructions as listed above. If you are confident that the painting will require no further working, you can skip wiping off the excess oil-out mixture with cheesecloth (unless it's pooling up somewhere, which would result in an uneven appearance). You can also use a higher oil/solvent ratio for a glossier finish.
Even with the higher oil/solvent ratio you can still retouch the painting, just make sure you have a lot of oil in the paint when retouching.
My Oil Painting Process
I thought I would briefly share with you my typical painting process. While it used to happen a lot, I now rarely have occurrences of sinking-in.
I paint on Classeans Oil-Primed Linen and for the most part, and I use Utretch and Gamblin oil paint (see the Resources Page for more info and where to get these materials). Sometimes I will tone the canvas with Gamblin's Fast Matte oil paint, other times I'll just paint right on untoned canvas.
My first layer of paint is almost always thinned with Gamsol Odorless Mineral Spirits. In most cases, I don't make it too soupy. Once the canvas is covered, I'll either reduce the amount of Gamsol that I add to the paint or start adding thin layers without any solvent. Once I add layers without solvent, I cease adding solvent to any subsequent layers.
I will continue to add thin layers of paint, straight from the tube with no solvents or medium. I add thin layers until I'm confident that my colors, values, and shapes are correct. At this point, I may add some thick paint for texture or surface interest.
With this method, I rarely encounter any sinking-in. The exception is when I have to apply dark paint over dried paint. Knowing this I will usually add a little bit of some type of oil-based medium such as Galkyd. If sinking-in does still occur, then it's time to oil-out.
I hope that helps. Please leave any questions or comments below and keep painting!
Jason Tako is a nationally known fine artist who specializes in western, wildlife, plein air, and Historical Native American subject matter. He spent his learning years sketching the wetlands and wooded areas of rural Minnesota. He has been featured in Plein Air Magazine and Western Art Collector Magazine and he was the Featured Artist for the 2020 Southeastern Wildlife Expo. See his work at www.JasonTako.com and his demonstrations on his YouTube Channel.
It professional art circles it's called Alla Prima, others call it wet on wet. But no matter what you call it, wet on wet oil painting can give you results that cannot be achieved with other techniques. So what is wet on wet oil painting and how it is done?
A wet on wet oil painting is usually completed in one session. For the best results, the artist should start with a thick over thin technique. Subsequent layers of paint can be applied over thick wet layers by utilizing a gentle paint application with a soft brush or even a bristle brush.
Let's dive into what wet on wet painting is and how to do it without making a big mess.
What is Alla Prima or Wet on Wet Painting?
Wet on wet painting was utilized by Early Netherlandish painters in the mid-15th and 16th centuries, along with Diego Velázquez and Frans Hals. But it really seemed to take off after the invention of the paint tube, which allowed the Impressionists to head outdoors and capture light on location. John Singer Sargent, one of the realist masters of this technique, deserves intense study for wishing to learn alla prima.
The term alla prima is Italian for at first attempt. With most oil painting methods you apply a layer of paint, then wait for it to dry (which can take a while) then apply another layer and repeat until it's done. Wet on dry can drag the completion time of a painting out to days, weeks, or even years depending on the size, subject, and style of the painting, (check out my article on 9 Ways to Make Your Oil Painting Dry Faster.)
With alla prima painting, the paint is applied wet on wet. And while not necessary, the painting is usually completed in one sitting. For larger studio works that take days or even weeks to complete artists can still utilize a wet on wet technique despite the longer completion time. We still discuss this below in more detail.
The Benefits of Wet on Wet Painting
The most obvious benefit of wet on wet painting is that you don't have to wait for days on end for the paint to dry before you add another layer. This not only means you can complete a painting in one sitting, but it also means you can complete more paintings period. While oil painters working wet on dry may only complete a handful of paintings in a year, an artist who paints alla prima can finish hundreds of paintings in a year.
This quick completion time is also great for plein air (on location) painting. Outdoor light can be very fleeting. Even with stable sunlight, you have a maximum of about 3 hours before the light has changed to such a degree that you either have to stop painting or paint from memory. This makes alla prima a very essential option for outdoor painting.
Another benefit of wet on wet painting is that it takes advantage of the beautiful blending opportunities that oil painting has to offer. You can blends different colors together to an almost glassy consistency. You can also easily scrape off mistakes and start again.
The Challenges of Wet on Wet Oil Painting
There are several challenges with wet on wet painting. The first is control. Piling on wet layers of paint can eventually make it difficult to control what is happening on your canvas, especially if those layers are really thick. If you play around too much with those thick layers you will end up with a big mess on your canvas.
The second challenge is over-blending of colors. Since the paint on the canvas is still wet, any paint you put over that can blend into it. This can be advantageous as you can mix colors right on your canvas, but if you are not expecting this, it can be a real problem. We will discuss more about mixing colors on the canvas further below.
The third challenge has to due with judgement and analysis of your work. While completing a painting in one session can give you a feeling of accomplishment, it can also deprive you of the time needed to really analyze your painting for any mistakes or adjustments that need to be made.
When I first got into alla prima painting, I let myself get too hung up on completing the painting in one session. I placed completion time over quality, priding myself that it was all done within several hours. I've since changed my approach. I would rather spend weeks, months or even years on making a painting the best it can be. Who cares if it was done in several hours if it looks bad.
If you are going to work wet on wet, be sure to take as long as needed to make a good painting. What I mean by that is make the fundamentals of good painting your priority. These fundamentals are: composition, drawing, values, color and edges. None of these should ever take a back seat just so you can work within a certain technique or method.
Remember, techniques and methods are the servants of good fundamentals and good results, not the other way around.
Starting Thin and Getting Thick
One of the keys to alla prima painting, and really for any oil painting, is to make sure you keep your first layers thin. While some very experienced artists will start with thicker layers and keep piling it on, it can be maddening to try to make adjustments to thick layers of paint, and unless you know what you are doing, it can turn into a big mess.
A good strategy is to slightly thin your first layer of paint with mineral spirits, or lightly scrub a thin layer onto the canvas with a bristle brush. Get your values and color masses established before your proceed to thicker paint.
One caveat is don't make your initial layer too thin or soupy. Adding paint onto a surface that is saturated with mineral spirits will result in poor adhesion to the canvas and usually leads to a big mess. If the surface is too wet, you may want to let it dry some.
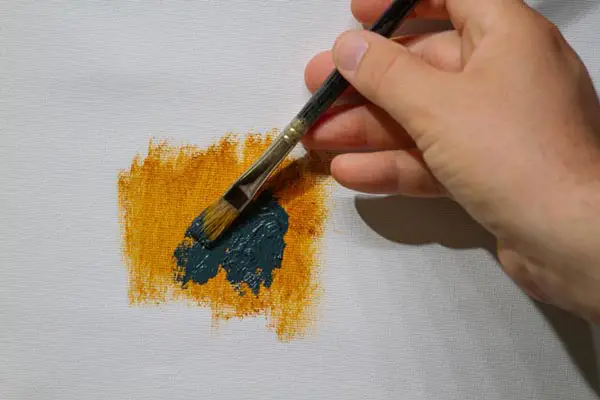
Using a Gentle Hand
When laying down the initial layer of paint onto the canvas, especially heavily textured canvas, you may need to scrub in the colors somewhat aggressively to get the paint to cover the canvas completely. But once the initial layers are on, you will want to use a very light touch when applying the subsequent layers of paint, especially if you don't want the subsequent layers to blend with the initial layers.
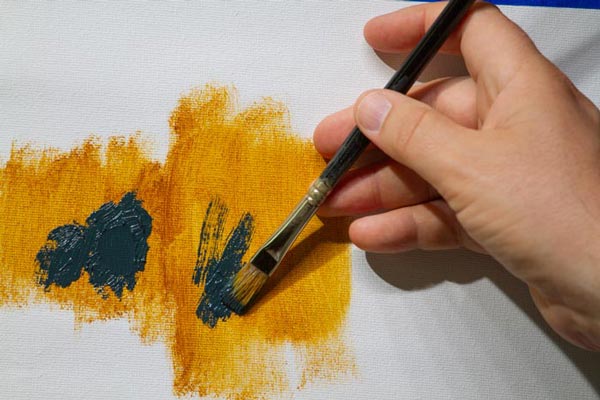
For very gentle applications of paint, I like to use what I call the Underhand-Downward Facing Grip. This grip allows you to use the side of your brush to apply the paint (see below). It's nice because you can pile the paint on the brush and gently drag the brush across the canvas. If done right, you will hardly disturb the paint underneath. See my article on different ways to hold a pencil for more ideas. These ideas can apply to painting as well.
Blending and Marbling
As stated above, wet on wet painting allows you to do some nice blending techniques that are not possible when painting wet on dry. Of course, we have all seen Bob Ross and his famous fan brush blending techniques. But that is not the only way to blend. You can use other types of brushes, palette knives, paper towels, and even your fingers to blend wet paint.
Another cool technique is to paint one color gently and smoothly into another color causing them to merge in a way that doesn't actually blend them into a new color, but rather marbles the paint together for an awesome multi-color effect.
Types of Brushes
Any brushes you use for oil painting can be used for wet on wet painting. Many oil painters tend to favor hog bristle brushes. However, alla prima painting works nicely with softer, badger hair or imitation badger hair brushes. These soft brushes work well with wet paint and are wonderful for blending and that gentle paint application discussed above.
See the Resources Page for my recommendation on oil painting brushes.
Palette Knife Painting
Wet on wet painting is great for palette knife painting. When you paint with a palette knife, the paint you apply must have some body to it, in other words, it cannot be thinned since it won't stick to the knife to be applied to the canvas. Applying nice, buttery paint to canvas can seem a bit like frosting a cake, and it's a lot of fun.
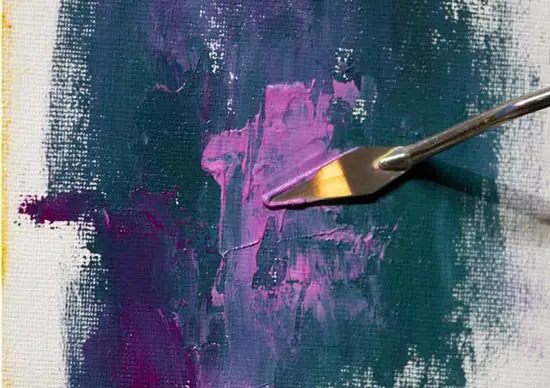
The palette knife can also give you textures and effects that you cannot get with a brush. I've done entire paintings with a palette knife and for some artists it's their entire arsenal. Give it a try when painting alla prima, especially for vegetation.
Mixing on the Canvas
While most mixing is done on a palette when working wet on wet you can mix your oil paint right on the canvas instead. However, if are you still new to oil painting I would recommend mixing on the palette for a while until you are confident with your color mixing, or experiment with some scratch-canvas so you don't ruin a painting you want to turn out well.
I usually mix on the palette, but I will mix on the canvas to make slight adjustments to my colors.
Compensate For What's Already on the Canvas
When painting wet on wet, if you are going to do any type of mixing on the canvas, or if you are going to apply new paint onto wet paint with any amount of pressure, be sure you are compensating for what's already bee laid down.
For example, let's say you want to make your sky, which is still wet, a little darker blue. Since the applied sky color probably has a lot of white paint in it, that wet white paint will lighten any color that is added to it. So you will want to mix a slightly darker blue than what you think you will need. This can be a little tricky and many times requires some adjusting before you get the color correct.
Use High Quality Paint
You will have much more success with wet on wet painting, and painting in general if you use quality paint. Trying to paint with stiff paint or paint that has the consistency of whipped cream will make alla prima painting more difficult and even a miserable experience.
If you are not sure where to find good, quality oil paint, check out my resources page to see what brands I use.
Using Slow-Drying Oils
Artists working alla prima usually like to keep their paint wet for as long as possible. You can make this happen by using paints that are made with safflower or walnut oil. These oils dry slower than linseed oil. M. Graham oil paints are made with walnut oil and tend to stay wet longer than other brands.
Another technique is to add poppy oil to your paint. Poppy oil has the slowest drying time of all other oils. So if you want to keep your oils wet for as long as possible, add some poppy oil to them.
Working Wet on Wet and Not Alla Prima
I've been using the terms wet on wet and alla prima interchangeably. While they usually do mean the same thing, there is a slight distinction. Almost always an alla prima oil painting is done wet on wet, but not all wet on wet oil painting needs to be done alla prima.
If you want to paint wet on wet on an oil painting that cannot be completed in one session, there are some techniques that will allow you to still paint wet on wet.
The first is scraping and reapplying. Many suspect this is how John Singer Sargent was able to complete such large canvases in what appears to be a wet on wet approach. Let's say your painting session is over and you have your sky blocked in but the mountains have to wait. You just scrape off the part of the sky colors that adjoin the mountains. Then on your next session, you repaint that section of the sky and proceed to the mountains.
This approach allows you to have the benefit of being able to manipulate the sky and mountain edges with wet paint. Since the sky is generally one color, you don't have to worry as much about those edges, you just have to remix the sky color exactly. Scraping off some of the sky paint during the previous session keeps one area from have thicker textures than the other area.
The one drawback to this approach is that it basically forces you into a finish as you go approach. To work with wet paint at all times on a large, complex canvas, you have to work in smaller sections and complete those sections before the paint dries.
Of course, you are not restricted to a wet on wet approach. If you need to make adjustments on dry paint then do it. Remember that technique should always be the servant of the results, not the reverse.
There are artists who will complete very large canvases in one session. Joaquin Sorolla became a master at this. But I've known artists today who use this same approach. Tim Bell is a modern master of this technique, completing very large plein air canvases withing several hours or less. Bear in mind that this requires a loose approach that focuses more on light and form rather than tight drawing and detail.
Another option, though a bit riskier is to store your unfinished painting in a very cool place, or even in a freezer, provided you have a freezer large enough. Freezing greatly slows the oxidation process that dries oil paint. I store my unused paints in the freezer and some pigments will stay wet for weeks (see my article).
If you decide to try this approach, be sure that the support you are painting on can handle storage in freezing temperatures. Do this by taking perhaps an old painting that is destined for the garbage can and placing it in the freezer. Take it back out after several days, or however long you intend to use this method and see how it holds up.
I would not recommend storing your painting outside in the winter time unless it's in an unheated shed where it will have some protection from the elements. Again, test this approach with an old painting you don't care about.
Creating a Wet on Wet Style
As stated above, wet on wet painting can give you effects and options not possible with wet on dry painting. Many artists who use the wet on wet approach tend to paint in a looser, more impressionistic style. Those who like very tight detail may find wet on wet painting to be a hindrance. Also, painting lots of detail takes time, and time dries paintings, no matter what.
If you are going to paint wet on wet, allow yourself to be open to the looser style that wet on wet painting offers. If you are a tight painter, wet on wet can still offer subtle blending techniques not possible with wet on dry painting. I personally use both approaches. Whichever approach gives you your intended results is the approach you should use.
The most important thing to do is experiment with an open mind that is not obsessed with results, but rather with discovering. Give yourself the freedom to destroy some canvas without having the justify the results. It's not wasting money. Learning is never a waste of money. Every good artist throughout history has done this. And you may find a whole new world of possibilities.
Keep painting!
Jason Tako is a nationally known fine artist who specializes in western, wildlife, plein air, and Historical Native American subject matter. He spent his learning years sketching the wetlands and wooded areas of rural Minnesota. He has been featured in Plein Air Magazine and Western Art Collector Magazine and he was the Featured Artist for the 2020 Southeastern Wildlife Expo. See his work at www.JasonTako.com and his demonstrations on his YouTube Channel.
Waiting for oil paint to dry can try an artist's patience, especially those who are used to faster-drying paint such as watercolor or acrylic. In this article, we will look at 9 different techniques to make your oil paints dry faster.
Paint In A Dry Well-Ventilated Area
As stated above, oil paint dries through a process of oxidation. It actually doesn't dry as does acrylic paint when the water evaporates from the pigment. Rather, oil paint undergoes a chemical reaction that causes the oil to harden.
Painting in a dry, well-ventilated area can significantly speed up the drying process. Exposure to natural light is also said to help. Having a fan run in your studio or on your painting, opening the window (provided it's not humid out), running a ventilation fan (always a good idea when using solvents), and running a dehumidifier can help speed up drying. The constant exchange of air aids the chemical change.
If you run a fan that hasn't been used in a while, be sure the clean any dust off of the fan blades, especially ceiling fans. You don't want all that dust circulating in the air and getting into your painting.
Expose Your Painting to Heat-But Be Careful
You have to be careful with this one, but it works and works well. Exposing your painting to heat can significantly speed up the drying process. The higher the heat, the quicker it dries. The opposite is also true, cooler air will slow down the drying process (see my article on storing unused oil paint in the freezer).
There are different ways to heat up your painting. One safe way is to stick it in a window on a warm, sunny day. Both the light of the sun and the warmth will speed up the process. Another is to just set the thermostat to a higher temperature in your studio overnight, or during the day if you like it hot.
When I used to do summer plein air events I would place a completed painting that was done on linen glued onto plywood in the back window of my car. However, I learned the hard way that you must be very careful with this process. Sometimes the inside of my car got so hot that the linen began to separate from the plywood, and the plywood warped. Keep in mind that many painting panels are made with heat-activated glue.
Some advocate using a heat gun on your oil painting. I have never tried this as I usually work wet on wet, but they claim it works. If you use a heat gun, be sure to keep the setting under 130 degrees Fahrenheit as higher levels could result in yellowing or even cracking the paint. Move the gun slowly over the painting keeping it several inches away. Be sure the gun never touches the painting during this process.
I've experimented with other heating methods that I will not mention for fear of inspiring you to accidentally set your house on fire. Just be certain that if you use any kind of heating technique, don't go overboard and keep it safe. Better to wait a few days for paint to dry than to ruin your painting or burn your studio down.
Apply Your Oil Paint In Thin Layers
Now we move away from environmental factors and onto technical and chemical methods to speed things up. The first being paint application.
Thicker paint takes longer to dry. Oil paint drys through a process of oxidation which changes the paint's chemistry when it's exposed to air. The thicker the paint application, the longer this process takes since the entire mass of paint is not evenly exposed.
There are numerous ways to thin oil paint. Solvents are probably the most widely used method, but you can also use different types of oils, dryers (discussed below) and thin paint application. Bear in mind that if you thin your paint with oil, you will extend the drying time rather than shorten it. You can also thin the paint by just scrubbing it aggressively onto the canvas with a bristle brush without using any thinners (AKA tube consistency).
When painting with thin layers, always make sure the initial layer is the thinnest and has the least amount of oil content of any subsequent layers. This is the thick over thin/fat over lean principle which must be followed if you want to avoid having your painting crack, ghost (produce dull spots, learn more in my other post), or worse.
When painting in layers, I'll start by applying a very thin layer of paint with maybe just a touch of Gamsol Odorless Mineral Spirits (see Resource Page for more info on Gamsol). Slightly thicker layers can be added with tube-consistent paint, leaving the thickest for last.
The great thing about this approach is that the initial layer of thin paint will speed up the drying of the subsequent layers. In many cases, it's the initial layer that takes the longest time to dry.
Knowing this you can tone your canvas with maybe a warm earth tone like Transparent Red Oxide, let it dry, then start painting. If you apply thin layers of paint, many times they will be dry within a day or two depending on other variables which we will discuss below. Just be sure to follow the thick over thin/fat over lean principle.
If you have sensitivity or health issues with solvents, check out my post Oil Painting Without Solvents-What Artists Need to Know.
Use Dryers Such as Galkyd or Liquin
Chemical drying agents such as Galkyd, made by Gamblin, or Liquin, made by Windsor & Newton is a great way to speed up the drying of subsequent layers of paint. Notice I said subsequent because these products and others like them have a petroleum distillates base which acts like oil and therefore must follow the fat over lean principle described above.
Dryers are used by adding a small amount into your paint mixtures prior to applying them onto the canvas. Thin layers of paint can start becoming tacky within an hour, while thick strokes of paint may still take one to several days to dry.
Gamblin makes several different versions of Galkyd with different rates of drying. These dryers also give the paint a glossy appearance. Just be sure to use them as instructed since they generally do have some toxicity.
I've found that Walnut Alkyd, made by M. Graham is probably the fastest of all when it comes to drying time. The nice thing about walnut alkyd is that it's non-toxic, boiled walnut oil. Whenever I want something to be dry the next day, this will be my best bet.
NOTE OF CAUTION: be sure to clean your brushes thoroughly after using any chemical drying agents. Failing to do so will leave you with hardened, unusable brushes. If this happens try Turpenoid Natural for cleaning and restoring your brushes. See more information on this and the mediums mentioned above on the Resources Page.
Use Oil Paints that Contain Linseed Oil Only
Linseed oil dries faster than safflower oil and walnut oil, and poppy oil dries the slowest of all. Most oil paint is made with linseed oil but some manufacturers may use safflower oil in their white paint or in light-valued cool colors since linseed oil has a tendency to yellow after it dries. This will cause these colors to dry at a slower rate.
Some manufacturers may use strictly walnut oil or even safflower oil in some or all of their pigments. M. Graham for instance uses walnut oil almost exclusively in all their pigments. It's a wonderful, high-quality paint, but it's not going to dry as fast.
So if you want to speed up the drying process, avoid paints that use safflower, walnut, or poppy oil and stick with paints made with linseed oil.
Use Alkyd Paint With Your Oil Paint
Alkyd paints are just oil paints made with a quick-drying oil, similar to the walnut alkyd described above. While not as fast-drying as acrylics, alkyds usually dry within a day.
The great thing about alkyds is that you can mix and match them with oil paint or do an entire painting strictly with alkyds. A painting done entirely in alkyds will usually dry overnight, even with thicker paint applications.
If you want to mix and match, a great strategy can be to use alkyds for slower drying colors like whites and cadmiums and stick with regular oils for the rest of your colors. I use this approach for painting trips when I need paintings to dry relatively fast for transportation purposes, but it can also be utilized in the studio.
If you do use alkyd paints with painting mediums, especially dryers, be sure that those mediums are compatible with alkyds.
Paint With Faster Drying Pigments
All else being equal, certain colors or pigments will dry faster than others. Since many different color combinations can achieve the same results, you can utilize some of these faster drying colors on your palette. Also, toning the canvas with a quick-drying color can help speed up the drying time of the subsequent layers.
Colors that dry fast include:
- Raw and Burnt Sienna
- Burnt and Raw Umber
- Prussian Blue
- Cobalt colors such as Cobalt Blue, Cobalt Yellow and Genuine Aureolin
- Manganese colors such as Manganese violet, Manganese Blue and Manganese Black.
- Colors that contain lead including Lead White, Cremnitz White, Flake White
- Chrome Yellow and Red
- Naples Yellow
Colors that dry very slow include:
- Cadmium colors such as red, yellow, green, etc.
- Blacks such as lamp, carbon, charcoal and ivory.
- Vandyke brown.
- Vermilion.
- Alizarin Crimson
- Zinc White
Bear in mind that with the faster drying colors, some manufacturers will make them with a slower drying oil such as safflower to slow the drying time.
IMPORTANT NOTE: Be sure to avoid using very slow-drying colors listed above for your initial layers of paint. Adding a quick-drying color over a slow-drying color can result in cracking.
Paint On an Absorbent Surface
When it comes to canvas and painting surfaces, many beginning artists do not realize that there are other options besides the universal-primed canvas you see in stores like Michaels and Hobby Lobby which tend to result in slower drying time for oil paint. Here is a list of some options:
Lead-Primed Linen
On of my favorite surfaces to paint on is Lead-primed linen. Painting on a smooth canvas that has been double or triple primed with lead white is a beautiful experience.
The surface will slightly cling to the wet paint, which makes it great for wet on wet painting, but it will not stain and it's non-absorbant, so you can wipe wet paint completely off. Despite it being non-absorbant, oil paint dries much faster on lead-primed linen than it does on universal or regular titanium oil-primed canvas.
Bear in mind that lead is toxic, so be sure not to ingest it in any way. Also, its toxic nature makes it difficult to come by and it's expensive. There are a few manufacturers that make it but it may take some research. Some vendors will say their linen is lead-primed when it's really not, so inquire specifically before buying.
Lead white also has a tendency to yellow over time. So don't be surprised if you buy some lead-primed linen and see it's slightly yellow in appearance as compared with titanium-primed surfaces.
Alkyd-Primed Surfaces
Alkyd is more absorbent than titanium/oil-primed and lead primed surfaces. Paint will not spread as easily and it soaks in more, but it does dry faster.
Gesso-primed surfaces
There are two types of gesso, traditional gesso which is made with rabbit skin glue (poor bunnies), and acrylic gesso. Traditional gesso is meant for rigid surfaces due to its brittle nature, so only use it on something stiff like wood panels. Acrylic gesso is not a true gesso but just an acrylic primer. Glue chalk gesso-primed surfaces have an absorbent surface that will help oil paint dry faster.
Use Acrylic Paint for Initial Layers
This process may not speed up the drying time of your oil paint, but it can speed up the entire painting process. Many paintings are built up with a layering process which allows the artist to more easily establish color and value masses from which to work off of. Rather than using slow-drying oils for the block-in, you can use acrylics that dry in a matter of minutes. Once you are confident that the colors and values are correct, use oil paint for your final layers.
The great thing about this process is that there is less of a change of ghosting, those dull spots that happen when layered oil paints dry. This is especially true if you save the oil for your final layer. Not only will your initial strokes be thin, but they will contain no oil, so the fat over lean/thick over thin rule will be adhered to.
It's important to note that you must use a universal/acrylic-primed surface for this technique. You can always put oil-based paint over water-based paint, but never the reverse. So never use oil-primed canvas with this approach and never paint acrylic over oil.
Additional Factors That Influence Drying Time
As you can see, there are a number of factors that can influence the drying time of oil paints. So if one of the above approaches is not working, it could be due to another variable. For example: let's say you are painting on an absorbent surface but the paint is taking forever to dry. It may be that the paint is a pigment that normally takes longer to dry such as cadmium. And if that cadmium is made with safflower oil, it will take even longer.
I once used a brand of titanium white that was made strictly with safflower oil. I had a thick stroke of almost pure white paint in one spot on a painting that was supposed to go to a show. I was also storing the painting in our dark, unheated basement during the winter while it dried. Because of this combination of factors, thick paint, safflower oil, and a cold, dark environment, it literally took over a month before that one spot on the painting dried.
Other variables that can affect drying time are the brand of paint used. One brand of cobalt blue may dry faster than another brand, especially if the one brand has a lot of additives.
You also need to consider the age of the paint. If a particular tube of paint has been in a retail storeroom for years and it wasn't sealed airtight, it will probably dry faster since the oxidation process had begun prior to you receiving it; it may also be very stiff. The next time you order that same type, it may be a newer tube that will take longer to dry.
Given all the variables listed, it's impossible for anyone, even paint manufacturers, to offer 100% assurance on how long it takes oil paint to dry. The best thing to do is experiment with some of the options listed above until you determine what works best for your painting method, style, and environment.
I hope that helps. Please leave your questions, comments or experiences below. Thanks and keep painting!
Jason Tako is a nationally known fine artist who specializes in western, wildlife, plein air, and Historical Native American subject matter. He spent his learning years sketching the wetlands and wooded areas of rural Minnesota. He has been featured in Plein Air Magazine and Western Art Collector Magazine and he was the Featured Artist for the 2020 Southeastern Wildlife Expo. See his work at www.JasonTako.com and his demonstrations on his YouTube Channel.
So you have a nice drawing that you would now like to paint, and you want the painting to be bigger than the drawing. How do you turn your small drawing into a larger painting and enlarge the drawing onto the canvas?
There are several ways to transfer a smaller drawing onto a larger painting surface. The Grid Method breaks the drawing down into squares, and each square is copied onto the larger surface. You can also use the Measurement Method, an opaque projector, or enlarge the drawing digitally.
Below we look at each process in detail so you will have the best success with enlarging your drawing and turning it into a painting.
Enlarging Your Drawing with the Grid Method
This is the most time-honored approach, and probably the most painstaking. Yet it works well for those who don't have an opaque projector or the means to do digital enlargements.
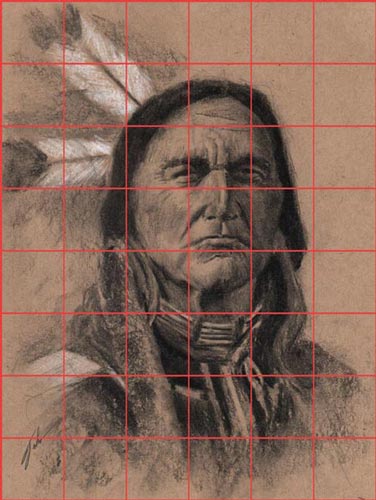
The basic principle is that you subdivide both the drawing and the painting into small squares. Then you can replicate the shapes in each square on your canvas. Once they are all replicated, you have a larger version of your drawing complete with correct proportions. It's a great method, especially for complex compositions where accuracy is a must, though it does have drawbacks you must be aware of.
How to Create a Grid
To do this right you must make sure that your larger painting surface will be the same proportion as your drawing. So in other words, if your drawing is 6 x 8 inches, your larger painting can be 9 x 12, 12 x 16 or 18 x 24 inches, since those proportions are the same.
In order to make sure your proportions are correct, you can buy a Proportional Scale at an art supply store for around $7 (see Blick Art Materials for current price), or you can just visit a free online proportional calculator such as this one at http://www.madametalbot.com/13/scale.htm. There are also apps that you can download onto your phone.
First, you will want to start by making 1-inch squares over your drawing. If you don't want to draw lines over your original drawing or sketch, you can create a replica by tracing over it with tracing paper and drawing the grid lines on the tracing paper. You can also print a photocopy and draw the grid lines on the copy.
Whatever you do, just make sure your lines are straight. Use a ruler to make 1-inch marks on all four sides of your drawing, then use a ruler to connect these dots by making perfectly straight lines.
IMPORTANT NOTE: If your drawing has shading and tone and it not just an outline, you may want to create an outlined version of it with tracing paper since you may have a difficult time seeing gridlines on a fully shaded photocopy. Another option is to lighten the photocopy with photo-editing software like Adobe Photoshop.
Now you need to figure out what size to make the squares on your larger painting surface. There is a simple formula to figure this out: Divide the dimensions of the painting by the dimensions of the drawing.
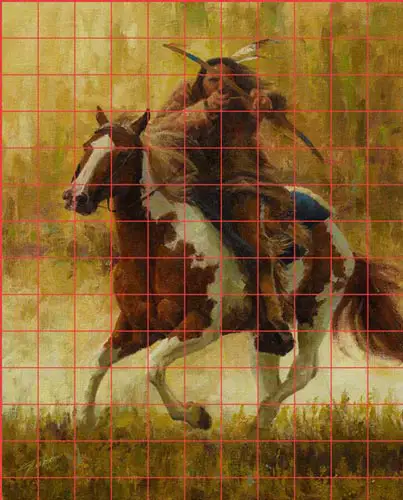
For example, let's say your drawing is 6 x 8 inches, and you want to enlarge your drawing onto an 18 x 24-inch canvas (or a 13.75 x 11-inch drawing into a 20 x 16-inch painting as illustrated below). Divide the height of the painting by the height of the drawing, then divide the width of the drawing by the width of the painting. So 18 divided by 6 equals 3, and 24 divided by 8 also equals 3. In reality, as long the proportions are the same between the drawing and the painting, you only need to divide either the height or the width, not both.
So in the above-written example, the squares on your painting will need to be 3 inches while the squares on your drawing are 1 inch.
Applying the Grid Onto Your Canvas
The process of getting the grid onto your canvas is essentially the same as getting it onto your drawing. Still using an 18 x 24-inch canvas as an example, with a pencil, create dots 3 inches apart on all four sides of the canvas. Then using a yardstick, draw straight lines to connect the dots and create squares.
If your painting is larger than the yardstick, you may need to create dots 3 inches apart (or whatever spacing is required) somewhere in the middle of the painting. Line up your ruler or yardstick by using the dots on the side of the painting with the dots in the middle, draw your lines, then repeat on the other side of the canvas to complete the lines.
Once you have the grid on your canvas, you can start replicating the drawing. Below is another example, this time taking a nonstandard-sized drawing (13.75 x 11-inches) and converting it into a 20 x 16-inch painting. The grid for the painting ends up being 1.45-inch squares. Notice how I had to cut off the row of squares at the bottom due to the unusual layout of the drawing.
Other Helpful Tips for Using a Grid
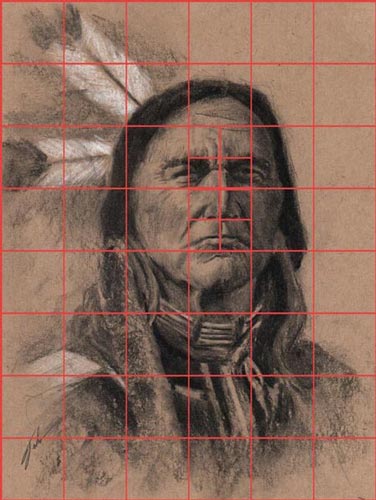
Subdividing Squares for Details and Precision
If your subject matter contains parts that are very detailed or require absolute precision, you can subdivide the squares in those areas to get more precise shapes. I do this when it comes to certain things like faces or hands. Using the 18 x 24-inch canvas as an example, in complex areas subdivide the squares on your drawing to be 1/2 inch, and the squares on the painting to be 1 and a 1/2 inch in size.
Numbering The Squares
If your composition is complex and/or you have a lot of squares to deal with, numbering the squares can help you keep track of which square you are actually working on. Nothing can be more frustrating than spending a couple of hours transferring your composition only to learn that you were off by one square and you need to erase everything and start over, leaving your canvas with messy, residual graphite.
Creating a Grid on Tracing Paper for Repeated Use
If you plan to use the grid method in the future, you can save yourself some time by creating a grid of 1-inch squares on a sheet of tracing paper or a sheet of acetate which you can then lay over the top of your drawing. Just make sure that the grid doesn't get moved once you have it lined up. Paper clips or mounting the grid and the drawing together on a clipboard can help.
The Pros and Cons Of Using the Grid Method
The pros of using a grid are that it's probably the most cost-effective method available. All you need is a rule or a yardstick and a pencil. It also gives you the confidence of replicating your drawing with correct proportions. You can make all your corrections, erasing, adjustments etc. on a smaller piece of paper, and accurately replicate that drawing.
The cons of using a grid are that once the drawing is transferred, you still have all those squares on your painting surface. You can erase those squares, but depending on your medium that could prove difficult. Plus you may end up accidentally erasing some of the actual drawing. This is why the grid method is best used for opaque mediums such as oil.
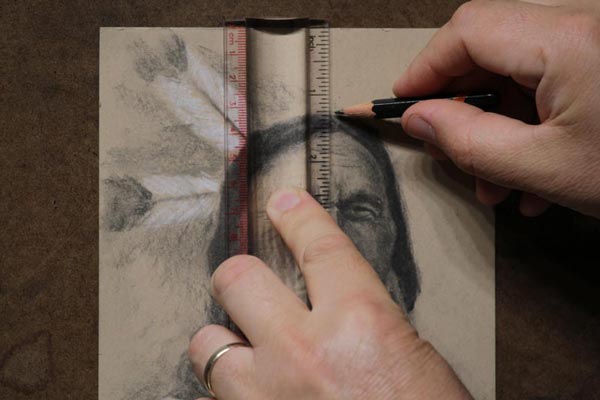
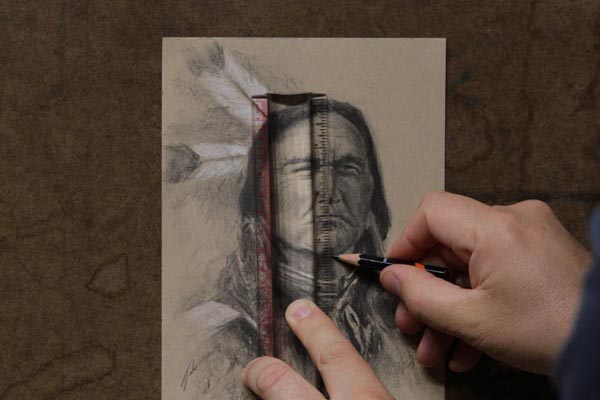
Transfer Your Drawing by Using the Measurement Method
This method is similar to using a grid yet without all the lines. Instead of drawing a bunch of squares, you measure the primary shapes on your drawing, increase their size proportionally, draw measurement dots on your canvas, and freehand draw the larger shapes on your canvas. Let's look at an example below.
Let's say you want to paint a human figure. We will once again use the example of taking a 6 x 8-inch drawing and transferring that to an 18 x 24-inch canvas in vertical format.
First, you will need to determine the starting point. Let's say the top of the head is 1.25 inches down from the top edge of the drawing. Use the above formula of dividing the size of the painting by the size of the drawing, 24 / 8 = 3. So all of your shapes will need to be increased three times. Moving to the canvas, the top of the head will be 3.75 inches down from the top edge of the canvas. Make a dot or small line on the canvas to mark this spot.
Repeat this same formula for determining the distance of the left side of the head from the left side of the canvas, then repeat for the right side, making small dots or lines to mark these spots. You should now have the correct placement of the head on the canvas.
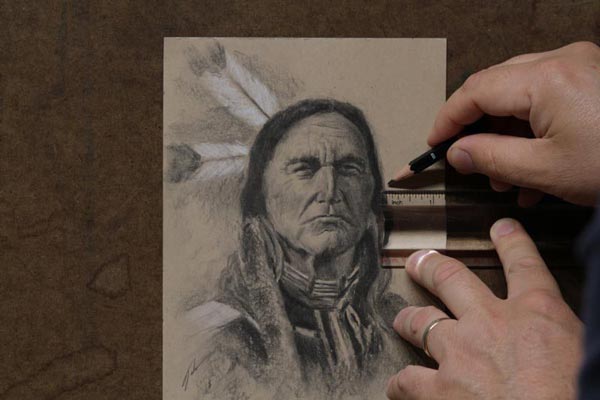
Now you can work on measuring the distance from the top of the head to the bottom of the chin. Let's say this distance is 3.25 inches on your drawing. Once again multiply that by 3 which will tell you that the distance from the top of the head to the chin is 9.75 inches. Now you have the correct size of the head measured out.
You can do this for the distance between the eyes, the length of the body, and so on. You can even use it to figure out proper angles. Say you have a slanted leg in your drawing and you want to figure out the proper degree of the slant. Measure the distance of the top of the slant from the edge of the canvas then repeat with the bottom of the slant. Mark each spot and draw a line to connect the dots.
At some point you may want to pause your measurement process and start drawing some rough outlines so you don't forget what each dot or dash represents.
The Pros and Cons Of Using the Measurement Method
The Measurement Method is just as cost-effective as the grid method, all you need is a ruler and a pencil. It has one big advantage over the grid method in that you are not creating a bunch of excess lines that will need to be erased or painted over. This makes it more attractive for transparent mediums such as watercolor.
The disadvantage is that since you are only marking measurement points and not replicating shapes in small squares, your drawing skills will need to be on par for the task. The silver lining is that if you are confident in your drawing skills, you have more freedom of expression and feel less like a machine copying little squares.
I like using this method for simple composition that requires accuracy, like single a horse with a rider, or even portrait-type work. It can work great for landscapes also.
I will also use this method when creating my original drawing from a photograph. I don't use any math, I just compare the shapes with one another using a drawing compass to measure. I may also make the drawing the same size as the photograph and use the drawing compass to measure the subject matter in the photo and make measurement marks on my drawing. I get correct proportions without the scruples of tracing.
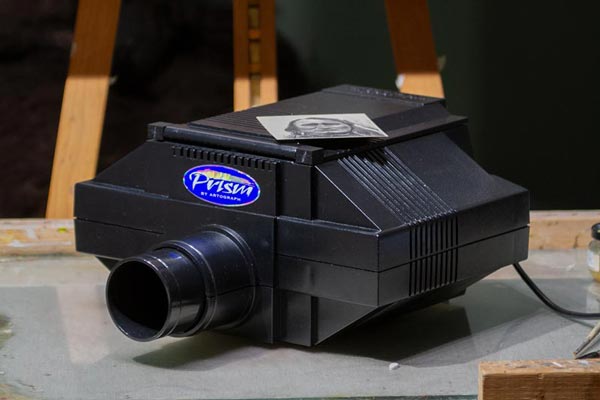
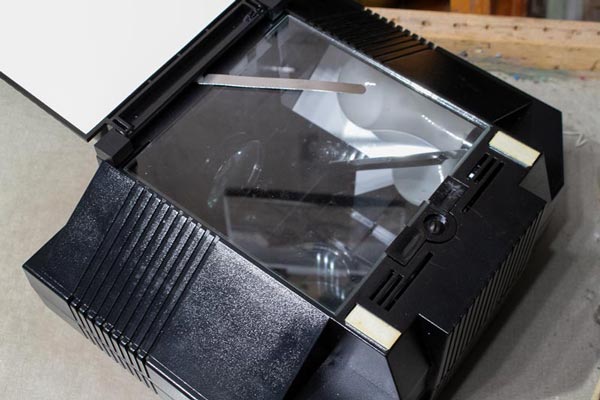
Enlarging Drawings with Opaque Projectors
Probably the quickest and cleanest enlargement and transfer method available to artists. An opaque projector will project an image of your drawing onto a larger surface allowing you to trace the illuminated image onto your canvas.
The Pros and Cons of Using an Opaque Projector
The great thing about it is you don't need to do any math, create grid lines that later need to be erased, or do numerous measurements. You just place your drawing on the projector, turn off the lights, project it onto your canvas and trace it. Once done you have an accurate enlargement of your drawing and nothing else. Some projectors like the Artograph Prism will also reduce drawings as well as enlarge.
Some things you should be aware of with projectors. First of all, this is one of the more expensive method for enlarging your drawings. There are some cheaper options out there but they are more limited in how much they will enlarge your work and the copy area is smaller.
Artograph has a small projector for around $90, but while it enlarges up to 14 times, its copy area is only 5 x 5 inches. Artograph's Prism projector, which runs around $260 (which I own) enlarges up to 20 times and has a slightly larger 7 x 7-inch projector area.
So for example, let's say you made your drawing 9 x 12 inches. In order to use it with the Prism projector, you'd need to make a reduced copy of the drawing so that the longest dimension was no more than 7 inches. You can also try to slide the drawing through the projection area and hope you get it all to line up correctly.
Another thing to be aware of is that if you are going to enlarge the drawing significantly, you will need a large room because most of the enlargement is done by how far back the projector is from the target surface. If you are working in a small room, you can only go so large.
Another challenge is getting the projector to be the same height as your canvas. You don't want to project at an angle since that will distort your image. The projector should be a near-perfect parallel angle with the canvas. Artograph did make an adjustable stand but it can be a challenge to find and they run anywhere from $45 to over $100. So when I use mine I use a stool and stack books.
My personal experience is that when going real large, the lines can get a bit faded. So make sure the lines on your drawing are very dark and your room can be made dark enough.
How I Use My Opaque Projector
I rarely use my projector, even for large paintings. I'm not at all trying to dissuade you from getting one since they can be handy. I just find setting up all the conditions for it to work well to be a pain.
I have small children and pets, and if either the projector or my easel gets bumped during the tracing process it can be almost impossible to get everything lined back up perfectly. I'm also a bit suspicious about shrinking a detailed drawing down to 7 inches max, then blowing it up to several feet. There is probably no problem with this, that's just my own quirk.
If you want to invest in a projector, just be sure that you will make good use of it and you are aware of the things I mentioned above.
Another note about tracing photos. Some artists, even well-known artists will use projectors to trace photos. I don't do that. My personal belief is that drawing is part of the artistic process. That said, I have no issue with using technology to enlarge and trace what I have already drawn. This is my personal motto. Each artist must decide for themselves.
Enlarging Your Drawing with Digital Software
This is my primary way of enlarging my drawings for painting. I also have a background in graphic design, so it works well for me. Basically, I scan my drawing into Adobe Photoshop at around 200-300 PPI or DPI (pixels per inch or dots per inch), enlarge the image to my preferred size, then print it out.
Once printed, I will apply either charcoal or graphite on the reverse side (just over the lines), then lay the charcoal side down on my canvas and trace over the image to apply the charcoal. You can also use carbon paper instead of drawing charcoal on the backside of the enlargement. Bear in mind that lines made with carbon paper can be difficult to erase.
Another variation for oil painters is to take a large piece of tracing paper and trace the enlarged drawing, apply oil paint on the reverse side, then lay it down on the canvas and retrace the image to apply the oil paint to the surface.
The Pros and Cons of Doing Digital Enlargements
What I like about digital enlargements is you don't have the uncertainty that can come with grids and projectors. Even with grids you may not draw those little shapes correctly, and projectors require you to shrink your drawing way down, possibly losing important details in the process. This doesn't happen with digital enlargements. You get an exact replica of your sketch and can enlarge it to an exact size.
Digital enlargements are fairly quick. You just scan in your drawing, make it bigger, and then print it out. It's also nice to know you can make as many copies as needed provided the file is saved. You can also darken the lines of your drawing and crop the composition to experiment with different layouts and proportions.
There are some drawbacks to using digital enlargements. The first being price. I use Adobe Photoshop, which is probably the top photo-editing software available and one of the most expensive.
Adobe has made Photoshop much more accessible with subscriptions for around $10 a month, and the software can be updated whenever there is an upgrade. This is much nicer than the old days when you had to buy a disc of the program for around $500 only to have it go out of date within a year or two.
Scanning Your Drawings
Another consideration is you will need a scanner to digitally scan your drawing. Flatbed scanners are going to work the best for scanning at home. At the time of this writing, you can pick up an 8.5 x 11-inch flatbed scanner for around $35. If you can afford it, I would go larger than 8.5 x 11 to save yourself the hassle of having to scan your drawing in sections and assemble with photo-editing software.
Office supply stores like Staples offer scanning services. If you don't mind making the trip and paying the fee for each scan, this is another option. At the time of this writing, many Staples stores have self-service scanning that allows you to scan up to 11 x 17-inch documents for under $1 per page. Bear in mind that the quality of the scan may not be as good as scanning high-res into Photoshop, but it may get you by.
Printing Your Enlarged Drawings
For printing my enlarged drawings, I usually use my cheap desktop printer that prints a maximum of 8.5 x 11-inch sheets. Because of this small size, I print my drawing out in sections, place these sections over a light table, cut off any excess, and then tape them together. Bear in mind some generic printer drivers may not allow you to print in sections; I do my printing directly from Adobe Photoshop so I can print in sections.
If I'm doing a really large painting, I will use Staples Blueprint printing service. You can get a digital file up to 36 x 48 inches printed for under $10 (locations may vary in price). The printing paper they use is pretty thin, but it suffices for applying charcoal on the back and tracing the enlargement onto canvas. Since this service is meant for blueprints, it only works for outline work. Your drawing shouldn't have any shading or color.
The other great thing about Staples Blueprint service is you can upload your file from home, submit the order, then either have it shipped to your studio or go pick it up when it's ready. This is my favorite way to enlarge my drawings for large paintings.
Additional Tips for Turning Your Drawing Into a Painting
When using the grid, measurement, or projection methods be sure to draw your initial lines lightly. This is always a good idea regardless, but since you may need to make later adjustments, it can be handy to not have to fight dark lines that are difficult to erase.
For making corrections on your painting surface, it's always a good idea to have an eraser designated for that sole purpose, especially if you are an oil painter. You don't want to risk getting oil residue from the primer into a nice pencil drawing.
Depending on what painting medium you are using, you can seal the drawing on the painting surface with a fixative spray. This will help prevent the drawing from getting smeared during the painting process. This will work for oil but may be a problem for water-based media, especially watercolor. I personally have never done this as I use my lines only as a guide, but many other artists use this method.
Another way to preserve your drawing on the canvas is to go over your lines with ink or paint and allow it to dry. Oil painters working on universal/acrylic-primed canvas can also seal their lines with ink acrylic paint. Just be sure never to use acrylic or any water-based medium over oil. Oil over water works; water over oil is a disaster.
Since I'm an oil painter, I usually use charcoal to transfer my drawing onto canvas, or carbon transfer paper for smaller drawings. I go into more detail about other possible mediums to use in my article, What to Use for Sketching on Canvas.
I also strongly recommend you do some small color studies before you attempt to turn your drawing into a file painting. Drawing is all about line and value; color adds a whole other dimension. You will have more success if you have a plan for your colors before you start on the final.
Do as many small canvases as necessary until you are confident about what your final painting should look like color-wise. Make sure you have sufficient reference material to work from, whether that is photo reference, additional sketches (color and black and white), or preferably both. If you begin to feel burnt out, work on another project for a while.
I hope that helps. Please leave any questions or comments below and keep sketching!
Jason Tako is a nationally known fine artist who specializes in western, wildlife, plein air, and Historical Native American subject matter. He spent his learning years sketching the wetlands and wooded areas of rural Minnesota. He has been featured in Plein Air Magazine and Western Art Collector Magazine and he was the Featured Artist for the 2020 Southeastern Wildlife Expo. See his work at www.JasonTako.com and his demonstrations on his YouTube Channel.
Using solvents to thin oil paint or clean brushes can present health problems for certain artists. But one does not need to abandon oil painting or resort to water-based oil paints due to intolerance of solvents. In this article, we will explore oil painting without solvents and what artists need to know.
Solvent-free oil painting can be done by thinning the paint with non-toxic mediums such as oils, natural alkyds, and even citrus-based thinners. Oil paint made from linseed or safflower oil does not produce harmful vapors and pigment toxicity is the same in both oil paint and water-based paint.
Below we will discuss some of these options in detail and what you need to know about each. I will also have links on my Resource Page showing where some of these items are available.
IMPORTANT NOTE: I'm using general descriptions for many painting mediums. When I say something such as linseed oil is non-toxic, it's not a guarantee since it's impossible to describe every manufacturer's production and refinement methods, and product misuse can make something non-toxic become toxic. Always check the brand label to confirm any possible toxicity or limitation of the medium.
Also, when trying a new product, I recommend purchasing a small amount and testing it first. People react differently to different things, and while something may be certified non-toxic, it doesn't mean you won't have a negative reaction to it.
One more note about oil paint toxicity. Many people mistakenly believe it's the oil paint itself that's toxic, and switching to acrylics or watercolor will remove all toxins, but this is false. As stated above, oil paint is just pigment in an oil binder, just as watercolor is just pigment in gum arabic. It's not the oil binder that's toxic, its pigments like cadmium or cobalt, and these are toxic whether the binder is oil or gum arabic.
So Cadmium Red watercolor is just as toxic as Cadmium Red oil paint. But bear in mind many pigments are non-toxic, and even the toxic pigments will not be toxic to you unless your skin is exposed to them or you sand a dry painting and breathe in the particles. Also, pigments do not turn into a breathable vapor unless your spray your paint onto the canvas.
Generally Two Ways to Thin Oil Paint: Solvents and Oil
Traditionally there have been two ways for an artist to thin oil paints: oil mediums, and solvents. Oil mediums include vegetable-based oils made from linseed, poppy, safflower or walnut. Solvents include turpentine and mineral spirits AKA white spirits.
The Different Oils Used for Oil Painting
Vegetable-based artist-grade oils are generally non-toxic. They're derived from the plant they are named after. So unless you have any allergies, using one of these oils is a good substitute for solvents. Oils do not produce fumes. In fact, they will absorb oxygen during the drying process.
Some artists may wonder which oil is best to use for oil painting. Let's look at each one.
Linseed Oil
Linseed oil is the primary oil used in most oil paint. It's permanent and very stable, providing a solid foundation. It generally dries within 5 days, depending on the paint thickness, pigment, air temperature, and type of surface it's applied to. The one drawback is it can yellow over time. This is more noticeable in lighter and cooler colors. As a result, some manufacturers will use a different type of oil such as walnut, poppy, or safflower for these colors.
Walnut Oil
Walnut oil is a pale yellow-brown color. It dries a little slower than linseed and is very resistant to yellowing and cracking. Colors in walnut oil can have a more brilliant appearance. It was used by some renaissance masters and is a great choice for artists who want to keep their studio solvent-free.
Safflower Oil
Safflower oil is paler in color than linseed oil and has less of a tendency to yellow over time. Its drying time is slower than linseed oil. Unlike linseed oil, which dries by forming a top skin, safflower tends to dry evenly throughout the entire film. This causes it to have a more sticky feel during the drying process which may not be preferred by some artists.
Some express concern over safflower's long-term stability, but analysis has shown it's held up well over the centuries and is used by many top paint manufacturers.
Poppy Oil
The slowest drying time of the bunch, poppy oil is great for artists who like to work wet on wet. It can give your paint a nice buttery feel. However, it should be used in small amounts as there are questions about its long-term durability, and if you plan to layer your paints avoid using it in your initial layers.
Oil Painting with Stand Oil, Alkyds and Others
Over the centuries artists and chemists have experimented with heating oil and exposing it to the elements to alter is viscosity and drying time. This altering usually does not result in any toxicity, but as stated above always consult the manufacturer's label.
Stand Oil
Stand oil is linseed oil that has been thickened by heating. The result is a thicker medium that has less of a tendency to yellow with a slower drying time than regular linseed oil. When applied, it spreads out reducing brushstroke texture and dries with a smooth finish, similar to enamel. It's great for glazing and usually low or non-toxic and like most oils, it will not emit any harmful fumes.
Sun Thickened Oil
This is an oil that has been exposed to sunlight to change its viscosity to a thick, syrup-like consistency similar to stand oil but with faster drying time. Like stand oil, it has less of a tendency to yellow. Unlike other mediums, you can apply it to your pigment with a much higher pigment to oil ratio without any breaking. You can easily make this stuff yourself. Check out Michael Harding Oil Colors to learn more.
Alkyds
Most alkyd oil paints are made with an alkyd resin binder. They dry quickly and create a very permanent surface.
Some alkyds can be toxic, others non-toxic, depending on the manufacturing process and ingredients. Gamblin's Galkyd is less toxic than others but it does release Volatile Organic Compounds (VOC's) and petroleum distillate that may cause some people to have issues. I personally use it (with adequate ventilation), but someone who is concerned about harmful vapors may want to avoid it.
M. Graham & Co. makes walnut alkyd that is certified non-toxic. The Walnut alkyd dries very fast and leaves a glossy surface. It also doesn't have much of a smell which is great for people with sensitive noses. I love using this stuff if I have to touch up an area that needs to dry very quickly and glossy.
Natural Mediums and Thinners for Oil Painting
In recent years there has been a push to create alternatives for non-toxic oil painting. Here is what you need to know about some of these options.
Citrus-Based Turpentine
There are now several citrus-based turpentines on the market such as Zest-It and Seville Citrus Turpentine. They are technically turpentine, but these are derived from orange peels rather than pine trees or forest waste (which are the sources of traditional turpentine). They are also technically non-toxic provided they are used correctly. Always read the label.
I have never used Zest-It, which is made in Great Britain, but reviews say it has a mild citrus scent and doesn't seem to cause the same issues most people have with traditional solvents. They also say it does a nice job of thinning oil paint. There are reports of skin sensations such as tingling, but this may have been due to people leaving it on their hands long-term causing it to eliminate the natural oils on the skin.
IMPORTANT NOTE: No painting medium should be left on your skin for long periods of time. Even completely natural solutions can cause skin irritation if there is long-term exposure. Wipe your brush handles often as medium running from the bristles down the handle is one of the biggest sources of skin exposure. Another solution is to paint while wearing latex gloves.
Oil of Spike Lavender
Oil of Spike Lavender (Spike Lavender is a type of Lavender flower) has been used since the 16th century. It thins paint well but has a very strong scent and some people report being unable to use it due to the strong smell which can even stay in your oil painting. It is considered non-toxic but studies concerning long-term inhalation are lacking. I would test a small bottle first and use it with sufficient ventilation.
Thinning Oil Paint with Technique
Solvents and oils are not the only way to achieve the thinning of oil paint. You can also do this by laying down thin layers of paint straight from the tube. This may require a sturdy bristle brush and some good old fashioned elbow grease. It's also easier to do with a smooth canvas that has very little texture. The lack of texture means you don't have to work as hard to fill in all the little holes with paint.
You can also scrap excess paint off with a palette knife and then thin it more with a bristle brush.
Be Aware of the Fat Over Lean Principle
The fat over lean principle is very important to remember if you are using any type of oil or petroleum-based medium and paint. The basic concept is that you always want to make certain your top layers of paint have a higher oil content than your bottom layers.
So if you are thinning your paint with oil, the initial layers of pigment should have very little, if any additional oil applied; it should be applied with the consistency straight out of the tube. As you continue to add layers of paint, make sure they contain at least the same amount, but preferably more oil than the previous layer. Be careful not to add too much oil as this will break the pigment and not cover the preceding layer.
Ghosting-Dull Spots in Your Oil Painting
If you don't follow the fat over lean application method, you risk ghosting in your oil painting. Ghosting is when dull spots of faded color appear after the oil painting has dried. This is because the layers underneath, which incorrectly contain more oil, sucked the little bit of oil out from the top layers down to the lower layers. This can be fixed with a technique called oiling-out, which is basically brushing more oil onto the surface of the dried painting.
The other problem that can occur is cracking. Since the top layer doens't have as much oil, it becomes more brittle. When the lower layers expand or contract due to their higher oil content, the brittle top layer is not able to move along and cracks.
It's also a good idea to paint thick layers over thin layers. Thick layers by default should contain more oil than thin layers. You can glaze thin layers over thick layers, but the thin layer must contain a higher level of oil. Gamblin Oil Colors has a great tutorial on their website about oil paint structure.
Basically, if you use a layered approach to painting, keep your initial layers thin by using a medium that is not oil or petroleum-based (such as a citrus-based solvent), or just apply the paint thinly right out of the tube. Then increase the amount of oil as you proceed. Use the oiling out technique if ghosting appears.
Ventilation for Oil Painting
In theory, if you are not using any solvents or toxic chemicals, you shouldn't need to concern yourself with ventilation. However, it is always a good idea to have some kind of ventilation in your studio, and it is a must if you are using solvents that may contain even slightly harmful fumes. It is recommended that your studio air be changed 10 times per hour.
That brings me to an important note about odorless solvents. Keep in mind the term odorless is usually a misnomer. Even if they don't have an odor (many of the cheap ones have a very strong odor), they still release vapors that may be harmful and require adequate ventilation or could be outright unusable for people with health concerns.
Cleaning Your Oil Brushes Without Solvent
Linseed Oil
I personally use linseed oil to clean my brushes while painting. Bear in mind I use another technique for a final cleaning which I'll talk about below. The great thing about linseed oil is I can keep my brush cleaning jar open while painting and have no fumes or odor (except for the mild smell of the oil, which I don't even notice anymore).
This is not the cheapest method, but I usually buy a gallon of Richeson Shiva Linseed Oil for around $70 and this lasts me for several months or more (see my Resource Page on where to buy this). You can also use other oils like walnut oil to clean your brushes, though the cost will generally be higher.
IMPORTANT NOTE: If you use linseed oil, or any other type of oil as a medium or for cleaning your brushes, always dispose of any paper towels or rags that contain oil in a metal garbage can with a metal lid. Rags soaked with linseed or other oils have been known to spontaneously combust. In my 20 years of painting, this has yet to happen, but I'm not taking any chances and nor should you.
Turpenoid Natural
Weber Turpenoid Natural is certified non-toxic and non-flammable, and it's one of the best brush cleaners out there. If your oil painting brush has become stiff due to insufficient cleaning, Turpenoid Natural is one of your best bets for restoration. Just soak the bristles in it overnight and many times your brush will be ready to use the next day.
I previously used this as my daily brush cleaner but have since stopped. A garbage can full of paper towels soaked with this stuff can emit a strong odor that some people have a difficult time with. I now only use this to restore stiff brushes.
Turpenoid Natural is really meant more for cleaning brushes and not for thinning oil paint as a medium. Obviously, if you are using it to clean your brushes small amounts will make it into your painting, but this shouldn't pose any issues.
Marvelous Marianne's Savvy Soap
I love this stuff, especially for painting trips. This is more for final brush cleaning than it is for cleaning between paint strokes. It's also great for restoring brushes. It's non-toxic, bio-based, and you can even use it to clean your hands.
When I'm painting in the field and need to give my brushes a final cleaning for the day, I'll just squirt some Savvy Soap into my palette, rub the bristles in it, and wipe them with a paper towel. I repeat until they are clean. It's very convenient.
Murphy's Oil Soap
Some purists may cringe at this but I have had no issues giving my brushes a final cleaning with Murphy's Oil Soap. It's economic and works well. I just clean my glass palette, pour some on, and stir the brush bristles around in it, then wipe them clean, repeating as necessary.
Bear in mind Murphy's Oil Soap can cause irritation for some people. I only use it about once or twice a week to clean brushes I'm done using for the time being. It hasn't caused my family or me any issues, but you will probably want to test a small bottle first.
Other Options for Solvent-Free Oil Painting
Starting Your Oil Painting with Acrylic
Since it's usually the initial layers that require thinning with a medium, some artists will lay down their first layers with acrylic paint. Bear in mind this will not work on oil-primed surfaces since you cannot paint acrylic over oil, only the reverse. But if you still want to have the soft, blending capabilities of oil without the issues or ghosting or thinning with solvents, you may want to try this option
Keep in mind that if you want to use the above method, you must buy a separate set of brushes and even a separate palette and palette knives. Once you dip your brushes into oil paint, they cannot be effectively used for water-based paints like acrylic. Oil and water do not mix. Or do they...?
Water-Based Oil Paint
A somewhat newer solution that has been utilized by many is water-based oil paint. Despite what you may think, these are real oil paints and they work both with water and oil. They dry more quickly than traditional oil paint. Since they work with traditional oil paint you could thin them with water and use them for your initial layers. Then you can paint over them with traditional oils or use them exclusively.
I don't have much personal experience with water-based oil paints. I know they can become sticky if you don't use enough water to thin them. They can also freeze, which is only an issue if you plein air paint in cold temperatures. Some brands can be stiff but you will also have this same problem with cheaper traditional oil paint.
My Painting Method and Studio Practice
I don't yet have any issues with solvents, but I have immediate family members who do. My studio is not entirely solvent-free, but I'll share my process.
I use traditional oils for my entire painting process; my brush cleaning process is described above.
When starting an oil painting I will usually thin my paint with Gamsol Odorless Mineral Spirits. I have this in a small jar that I keep covered when I'm not using it since it does emit harmful vapors. I will also turn on the exhaust fan I had installed in my studio. Prior to that, I would open a window and even use a window fan.
Most all of my subsequent painting is done without thinning the paint, but using it straight out of the tube. Bear in mind that good quality paint helps. Buying cheap, stiff paint will force you to have to thin it, which usually results in soupy, unusable paint. See my Resource Page for what brands and colors I use.
At times I will use a medium to rework a dried painting or to glaze it. If I don't mind keeping the paint thin, I'll use Galkyd, which does contain mildly harmful vapors. If my family members are in the studio, I will use walnut oil or safflower oil. If I want the paint to retain some body and thickness, I'll use Gamblin's Solvent-Free Gel, a great alternative!
This is by no means an exhaustive list of everything that is available. There are always new options coming onto the market place, some better than others. Hopefully, this will convince you that you don't need to dump oil painting for health reasons and get you on the path to a viable solution.
Keep painting!
Jason Tako is a nationally known fine artist who specializes in western, wildlife, plein air, and Historical Native American subject matter. He spent his learning years sketching the wetlands and wooded areas of rural Minnesota. He has been featured in Plein Air Magazine and Western Art Collector Magazine and he was the Featured Artist for the 2020 Southeastern Wildlife Expo. See his work at www.JasonTako.com and his demonstrations on his YouTube Channel.
Clouds can add a nice touch to your landscape drawings, but making them look realistic can be fairly elusive. So how do you sketch clouds and make them look realistic? We will discuss eight things you must know to sketch realistic look clouds.
Know Cloud Families And Their Shapes
There are essentially four different types of clouds for the artist to be aware of. These are Cumulus, Cirrus, Stratus, and Nimbus. There are half-steps in between these such as Altocumulus, but you don't need to get too wrapped up in the exact scientific terms in order to draw or paint clouds. Just be aware of the basics as outlined below.
Cumulus clouds are probably the most popular, and the ones artists tend to think of when it comes to drawing or painting clouds. They have a flat base with a fluffy dome that makes one think of cotton balls. These clouds are lower in the atmosphere.
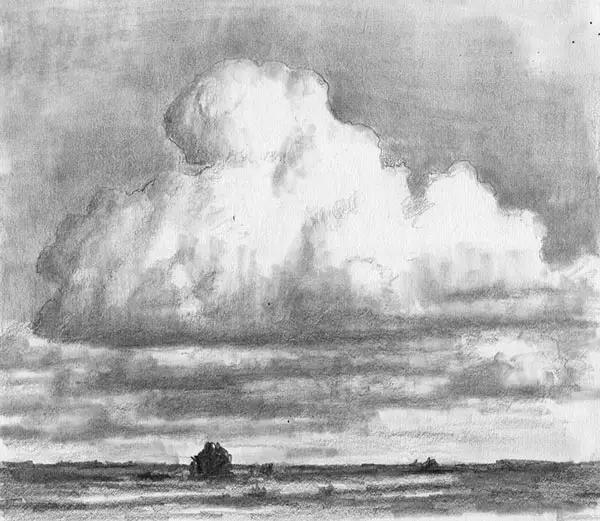
Cirrus Clouds are thin and wispy, similar to hair blowing in the wind. They have a beautiful elegance about them and can be very challenging to paint and even more challenging to draw. They tend to be high up in the atmosphere.
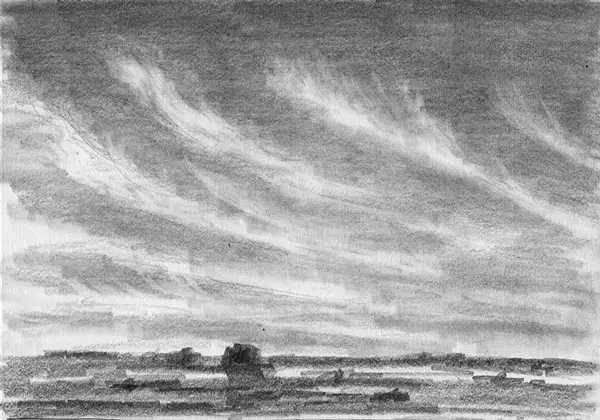
Stratus clouds are very low-level clouds, sometimes they are at ground level in the form of fog. Sometimes these clouds don't have much shape as they are made of sheets of moisture. Think of an overcast day where all you see in the sky is grey or low heavy clouds.
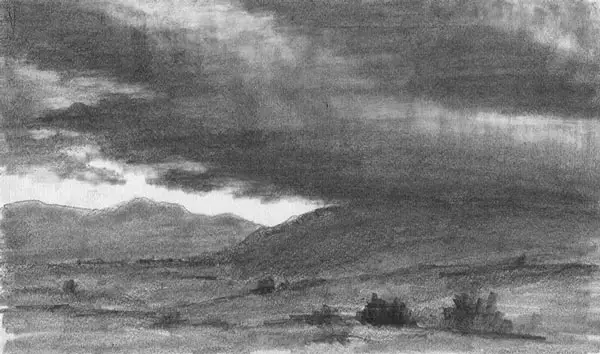
Nimbus clouds are heavy clouds that produce rain. They can be incredibly tall. Think of storm clouds that seem to almost touch the ground and rise very high up with imposing, beautiful billowing patterns. Sometimes they can almost resemble the mushroom cloud of a nuclear explosion.
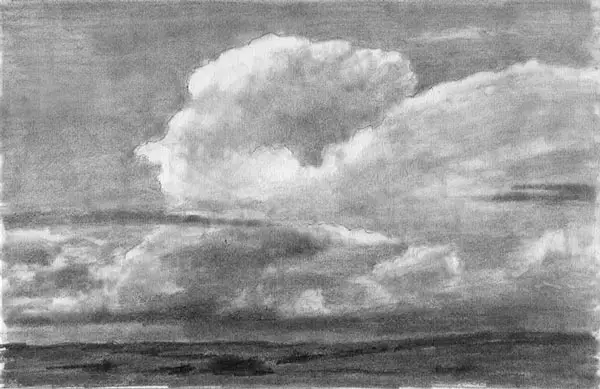
Draw Clouds And Not Symbols
While each cloud family has an essential shape, there is great variety within those shapes. The temptation is to draw symbols to represent clouds (or anything else). We did this in elementary school. I would draw a flat line with three humps on top and other kids would draw what was essentially a bumpy circle.
This is great for children and even for children's illustrations, but if you want your clouds to look realistic you must move beyond this symbolic approach and progress to an observational approach. You must abandon drawing preconceived shapes and draw what clouds actually look like by observing them in all their wonderful variety and harmony.
Focus On The Volume Of Clouds Rather Than Detail
When you draw just symbols of clouds they can end up looking flat, like they are just pasted onto the sky. Don't forget that clouds have volume. You are not looking at a puffy flat shape, rather it's a three dimensional mass of moisture that resembles more of a sphere. Of course, this applies more to cumulus clouds than to cirrus clouds.
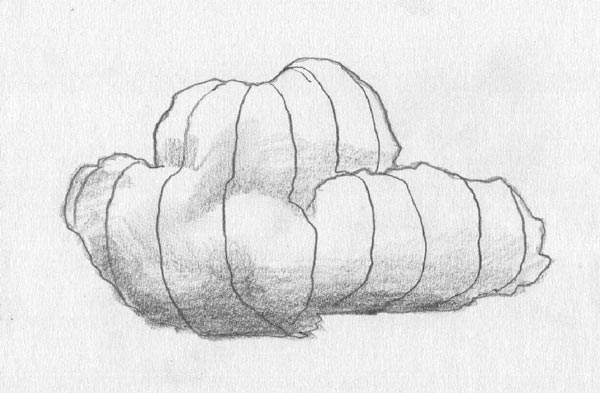
One key to making clouds appear as if they have volume is to pay attention to the values of their edges. Many beginning artists will draw or paint the edges of a cumulus cloud pure white, but this is not the case.
Remember, the edges of a cloud are a sphere that turns away from you. Therefore in almost every case the edge of the cloud should never be the lightest part, but should slightly darken to emphasize its volume. The exception is when the cloud is backlit by the sun, in which case the edges will contain a rim-lighting effect.
Another reason why the edges of clouds darken slightly is that from the viewer's perspective there is less mass in this area. Since clouds are made of translucent moisture, whatever is behind them will be more visible in the thinner areas of the cloud. This is also why very small or thin clouds will be slightly darker than large ones.
One very important thing to emphasize on drawing a cloud's volume, it is way more important to capture the volume of the entire cloud rather than the volume of it's smaller billows. Large cumulus clouds can contain many small billows. Trying to capture every single one can destroy the form of the whole cloud. Simplify the cloud by showing the form of the whole and add some smaller billows here and there for interest and to emphasize form.
Make Sure Your Clouds Have Light Values
Clouds float. They are made of water or ice. This may sound obvious but many artists will draw or paint their shadow areas with very dark values. This comes from the mistake of not considering the value structure of the entire landscape and the principles of angles and consequent values as outlined in John F. Carlson's Guide to Landscape Painting (see my review of this great book).

When you make the shadows of clouds too dark they end up looking more like rocks than clouds. In general, the shadows of clouds should never be darker than the trees of a landscape. There are exceptions to this rule, such as very dark storm clouds with foreground trees illuminated by late afternoon sunlight, but in general, cloud shadows should be fairly light in value.
Another exception to this rule is studies of clouds alone, especially backlit clouds. If you're drawing only the sky, dark values have their place, if anything to provide interest and keep the drawing from looking washed out. But once you introduce landscape elements, dark values in clouds can look out of place.

Draw Your Clouds With Soft Edges
This doesn't always appear to be the case, and there are times when firm outlines are required to define clouds, but those outlines should never dominate a cloud. They should be used sparingly with thinner, lighter lines. These outlines can even be lost at times, especially in the shadow areas. This will give your cloud the feeling of belonging in the sky rather than being pasted on.
One trick I do to make sure I maintain a light feeling in my clouds is to begin softly outlining them with the side of my pencil using the pickup grip (see my article on the six ways to hold your pencil). Applying looser lines with very little pressure helps maintain the mental awareness that clouds float and should be treated with a very light touch.
If I'm painting clouds I'll make sure to gently blend the edges ever so slightly with a clean brush to keep them from getting too hard.

Draw Clouds Overlapping Each Other
When drawing a group of clouds, make sure some of them are overlapping. This will give your sky a three-dimensional feeling. Overlapping is significant no matter what you are drawing and shows a higher level of maturity in your work.
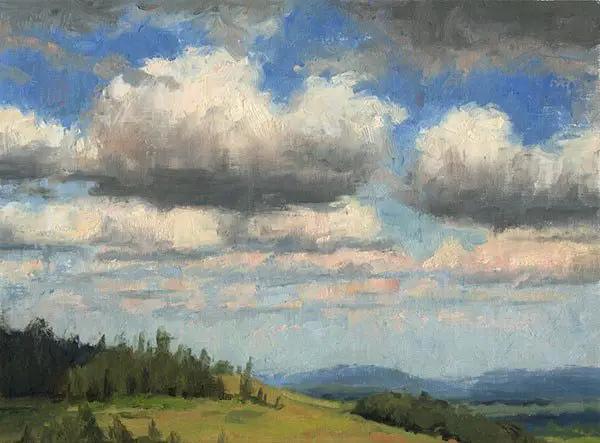
Given that clouds are made of water, they are constantly merging and splitting. Overlapping can also emphasize this aspect of clouds. It is also a nice compositional tool for breaking up the outline of a cloud that may be too dominating or is leading the eye out of the composition.
Draw Clouds According To The Rules of Perspective
This is most obvious in clouds such as cumulus clouds. Say you are standing on a large, flat plain and looking into a sky filled with cumulus clouds. Even though they all move parallel to each other, clouds will appear to recede into a vanishing point on the horizon in the same way objects on the ground do. This vanishing point will generally be a single point in the middle of your horizon line.
All else being equal, the clouds that are further away will get smaller than the clouds that are close. But bear in mind that all clouds are not equal in size, so you may have smaller clouds that are closer and a mammoth cloud further in the distance.
With cumulus clouds, the key is usually to focus on the flat bottoms of the clouds. At the risk of sounding too symbolic, you could almost think of those bottoms as round disks that have a thinner ellipse on the distant clouds and a more round ellipse on the clouds that are closer. In other words, the close the cloud is to you, he more of its underside will be visible. With distant clouds, you will see barely any of the undersides (see below).
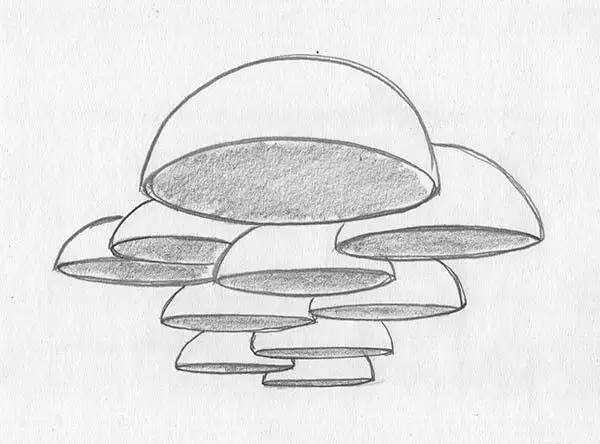
Knowing this and knowing how to depict it in your art will not only give your clouds a more realistic look, it will help give depth to your drawing or painting.
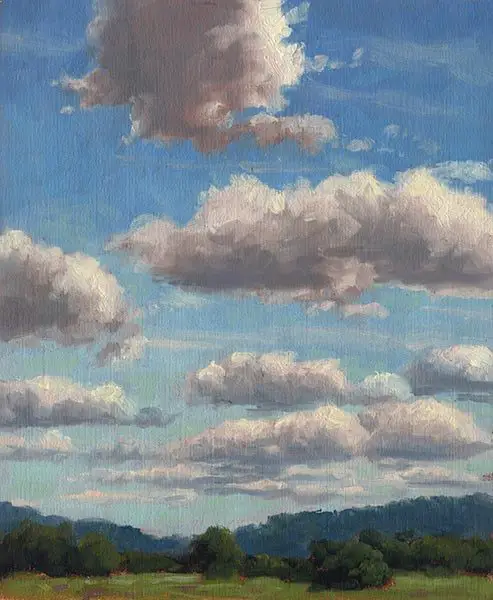
Be Aware That Clouds Are Moving And Changing
Even though they can appear right above you out of nowhere, clouds always appear to be coming from somewhere and going somewhere. The wind takes them along and also determines their shape. Sometimes the wind is gentle and the clouds appear to barely move or change, other times the wind is strong and will tear the clouds apart as it pushes them speedily along.
Suggesting movement in your drawing or painting will help prevent your sky from looking static and dull. This can be done by arranging your clouds to suggest movement. This is a very subtle thing as overdoing it can cause your drawing to look contrived.

The best thing you can do it take some time outside and study clouds by sketching them. In our instant gratification culture, this may not seem too appealing, but there are no shortcuts or magic tricks that can replace experience and hard work. Intimate knowledge of nature can only be attained by becoming intimate with nature, and this requires spending time studying nature.
Doing this will also help you become more familiar with how clouds change yet retain their characteristics. This is the best cure for symbolic drawing, a problem with so many inexperienced artists.
Sketch Clouds From Life
I recommend that you spend an afternoon outside with a cheap sketchbook or sheets of cheap paper, and sketch clouds. Begin by drawing their outlines, then move to shading. Try to feel the volume and form of the entire cloud, almost as if you were sculpting it with clay using the modeled drawing technique (previous article). Capture the lighting on the entire form. If there is time then move onto some of the little internal billows.
Pro Tip: When the sky is filled with clouds don't try to draw every cloud you see. Zero in on one or two next to each other and sketch just them. Once those clouds have moved on or completely changed shape, move onto another one.
You will find out very fast how quickly clouds can change, even on a calm day. You will probably end up with many unfinished sketches and that is totally fine. The objective is not to go home with something you can proudly post on social media, rather you want to go home with experience, knowledge, and the feeling of clouds.
Do this on a repeated basis and you will be surprised at how quickly you will be able to draw realistic looking clouds. Also, it's a nice way to spend an afternoon outside. Who among us as a child didn't sit in a grassy field and stare up at the sky, or at least dream about it?

Clouds Change Color As They Recede
If you are doing paintings of clouds, there are several very important things you must be aware of. The first is that the darks of clouds get lighter and cooler the further away the cloud is. The second is that the light (white) parts of clouds get slightly darker and warmer the further away the cloud is.
Say you are looking at a sky filled with cumulus clouds. When you look at the clouds that are very close to you, the tops of those clouds will look more white than the tops of the clouds on the horizon. The tops of the distant clouds will look more pink or orange and as a result, will be slightly darker since pink/orange is darker than white. Bear in mind that you will not want to use pure white on the close clouds, they are just whiter/cooler than the distant clouds.
It's opposite for the base/shadow parts of clouds. The base of the clouds that are closest to you will be cool, but not as cool as the bases of the clouds nearer to the horizon. Those distant bases will also be slightly lighter in value.
So when I'm painting clouds, the tops/whites of the distant clouds will have slightly more red or orange than the closer clouds, of which may be white with just a touch of Yellow Ochre and/or Cadmium Lemon. The bases of the distant clouds will have more white and blue, while the closer clouds will have slightly more blue to darken it, along with some Alizarin and a touch of Yellow Ochre or Cadmium Orange to slightly warm it up (see my palette colors here).

Cloud Drawing Demo in Charcoal
In this short demo below I'm drawing a nimbus cloud over some mountains using white compressed and black vine charcoal on toned gray paper. Charcoal is great for clouds given it's blending capabilities. The nice thing about drawing on toned paper is that you don't need to fill in a tone for the blue sky. See the video of this demonstration on my YouTube channel.
Check out the Resources Page to see what art materials I use and where they are available.


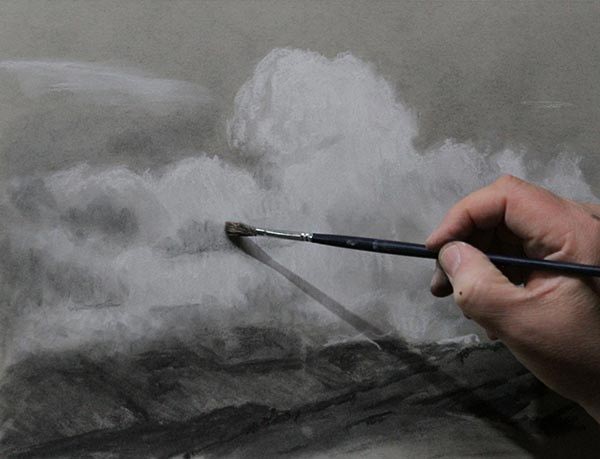
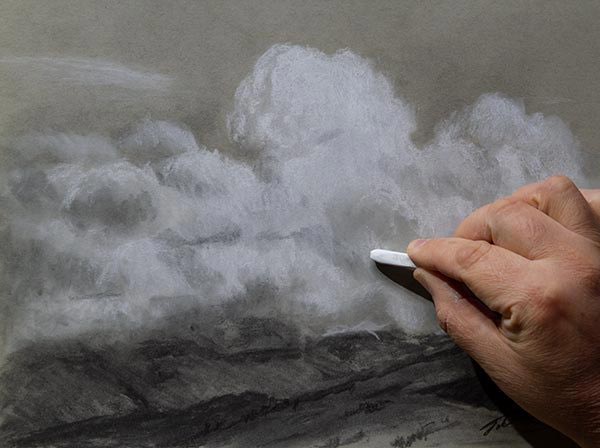
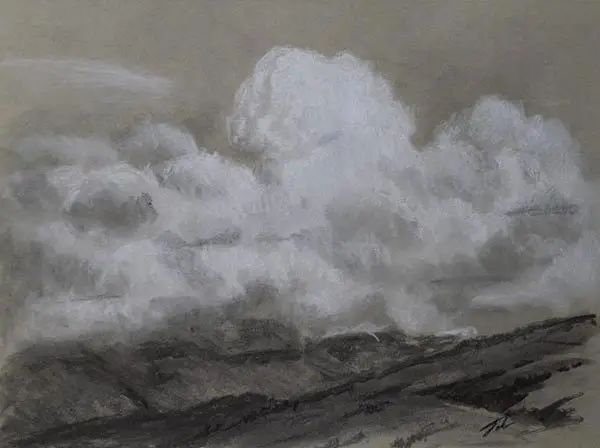
I hope it helps the next time you are sketching clouds.
Take care and keep sketching!
Jason Tako is a nationally known fine artist who specializes in western, wildlife, plein air, and Historical Native American subject matter. He spent his learning years sketching the wetlands and wooded areas of rural Minnesota. He has been featured in Plein Air Magazine and Western Art Collector Magazine and he was the Featured Artist for the 2020 Southeastern Wildlife Expo. See his work at www.JasonTako.com and his demonstrations on his YouTube Channel.
If you are just starting oil painting the numerous options can be quite intimidating, and you may wonder how much it will cost. Let's discuss at some oil painting start-up costs and what you actually need to get started oil painting.
The cost to start oil painting can vary depending on the number of colors you buy, the quality of your supplies, and who the vendor is. An average minimum cost to start can be approximately $170. This cost reflects buying only the 3 primaries and white, along with minimal painting accessories.
Let's now discuss the variables involved and what materials you actually need to start oil painting. You can see a list of most of these materials and links on where to obtain them on the Resources Page.
What Oil Colors You Need to Start Oil Painting
Many beginning artists make the mistake of thinking they need a lot of colors in order to do an oil painting. I even know one artist who went to an art store and bought every single pigment available when he started. The truth is you only need a few colors to do a good painting.
At one point, I restricted myself to just the three primaries and white and painted that way for a couple of years. I was able to get almost any color or value that I needed, including black.
The real advantage of having a greater number of pigments is mostly convenience and obtaining rare intensities that one can usually get by without. While you may not be comfortable painting with just three colors and white, it's a great way to learn how to mix color.
Below are a couple of tables where I show the minimum palette needed and my typical expanded palette. I used current pricing (May of 2020) for Utrecht brand oil colors.
Minimum Primary Palette
| Titanium White 120 ML (you will use a lot of white) | $18.44 |
| Cadmium Yellow Light 40 ML | $17.03 |
| Cadmium Red (Medium) 40 ML | $19.50 |
| Ultramarine Blue 40 ML | $7.42 |
Expanded Palette
| Cadmium Orange 40 ML | $17.03 |
| Yellow Ochre 40 ML | $7.82 |
| Burnt Sienna 40 ML | $7.42 |
| Alizarin Crimson (or Alizarin Permanent) 40 ML | $17.03 |
| Cerulean Blue Hue 40 ML | $8.36 |
| Veridian 40 ML | $17.03 |
| Permanent Green (Light or Yellow) | $8.36 |
There are cheaper brands out there, such as Windsor Newton's Winton, Chroma Archival, and Charvin. But my experience with these colors is they are either too stiff, too soft, or just bad consistency. I use Utrecht colors to this day, as do many professional artists. They don't cost much more than lower-grade paints and their quality is superior. Cheap paints usually result in a bad painting experience.
Also, there are way more colors/pigments than what I have listed. This is the main palette I have settled on after over 15 years of painting. Don't be afraid to experiment once you've gotten more comfortable. Just know this, there is no magic color that will solve all your problems. At the end of the day, it's how well you mix the colors you have, not how many colors you have.
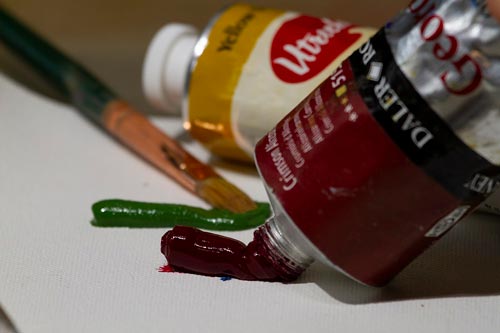
What Brushes You Need to Start Oil Painting
This is another area where going cheap it not worth it. You would be way better off buying just a few good quality brushes than buying a bunch of low-grade brushes. Cheap brushes will lose hair faster than my scalp. You will end up with hair in your paint, on your canvas and if the brush is cheap enough, it may not last even one day of average painting. Bad brushes alone may discourage you from painting.
There are a lot of brushes on the market, some good, some horrible. While you usually get what you pay for there good brushes available at a reasonable cost. A great brand is Silver Brush Grand Prix.
For oil painting, I use mostly flat bristle brushes and I can do almost an entire painting with just three different sizes. Below I have a list of brushes that can get you started (prices may vary). While you can get away with just one of each, I recommend two of each. You can use one for dark paint and another for clean, colorful paint.
| Silver Brush Grand Prix Flat Bristle #2 | $5.72 |
| Silver Brush Grand Prix Flat Bristle #4 | $6.44 |
| Silver Brush Grand Prix Flat Bristle #6 | $8.30 |
| Silver Brush Grand Prix Round Bristle #1 | $5.19 |
Once you have a few paintings under your belt, you will want to experiment as there are other types of brushes such as brights, rounds, and filberts, along with different types of hair like synthetics and sables, and different sizes.
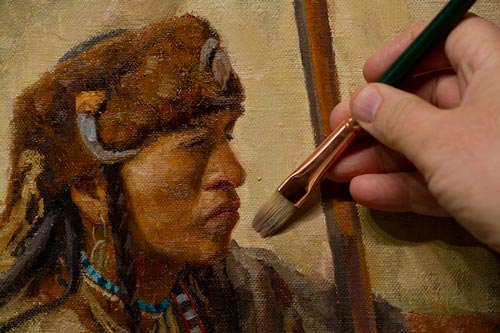
Palette Knives for Starters
Palette knives are a great way to mix paint, transfer it, or remove it from a surface. There are metal palette ones and plastic ones with different shapes and sizes. Of course, the metal ones are usually higher quality and more expensive, but for starting out you can buy a set of plastic ones for just around $10. See Resources Page.
Mediums for Cleaning and Thinning
You will need something to clean your brushes while painting, especially if you are using the same brush and going from a dark color to a light color. You will also need something if you want to thin the consistency of your paint.
Odorless mineral spirits can do both. You can get cheap mineral spirits from the hardware store for probably around $10-$12. I use this type of mineral spirits but only when painting outside. This type is not really odorless, even though it says that. In fact, it can have a very strong odor. If you want to get true odorless mineral spirits then Gamsol by Gamblin for around $15 for a 33.8 oz bottle is the way to go. See Resources Page.
If you have an issue with using solvents such as mineral spirits, you can clean your brushes with linseed oil. This is actually how I clean my brushes while painting (I use Murphy Oil Soap to clean them when I'm done painting). A word of caution: linseed oil can spontaneously combust when it's soaked in rags or paper towels. Use a metal garbage can and lid to dispose of. After 10 years I've never had this happen, but I'm not taking any chances.
Canvas for Beginning Oil Painting
There are a number of different canvases on the market. Some are universal-primed, which means they can accept oil or acrylic, and there is oil-primed which can only accept oil paint. There is also cotton duct and linen, not to mention the different grades of roughness or smoothness. Rougher textures tend to be used for landscapes, while smoother textures for portraits.
For starting out you don't need to concern yourself with all these variables, though you will want to learn them if you get serious. An economical way to start is to buy some canvas sheets that come in a pad. It's an actual canvas that you can tear out of a pad like a sheet of paper. You can tape this sheet of canvas onto a piece of plywood, hardboard, or even thick cardboard. Fredrix canvas pads are around $7 for 10 9x12 inch sheets.
I would recommend starting small, 8x10 going up to 12x16 inches until you get more comfortable. See Resources Page.
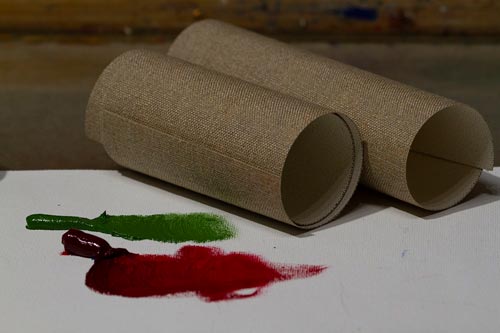
Good Starter Easel
An easel is not completely necessary. As long as you can find a place to set up your canvas and keep it fairly steady, you are good. Some people will even lay their canvas flat on a table and paint. But if you want to have an easel, you can pick up a compact table-top easel for under $20. This can get you by until you are ready to purchase a big easel. See Resources Page.
Palettes for Starting Oil Painting
There are palettes that you can hold, and there are palettes you don't hold. My preference is to have a palette I don't hold so that both hands are free. My current palette is an old office desk with a piece of glass cut to fit on top. A glass palette is nice for oil painting as it can be easily cleaned with denatured alcohol.
But for starters, you can pick up some paper palettes for less than $10. These are sheets of paper that you tear off and squeeze your paint right onto. While they may only last for a day or so, they can get you by on the cheap until you are ready to move up.
Other Items You Will Need
I didn't include these items in the total price because you probably already have these laying around the house. These include:
- Paper Towels for cleaning your brushes, palette knives and surfaces.
- A plastic or glass jar with a cover for putting your mineral spirits or linseed into to clean your brushes.
- A place to paint with good lighting. Cool lights work best. You can also paint in front of a north-facing window that doesn't ever get direct sunlight (in the Northern Hemisphere).
- A place to store your wet paintings until they dry.
- For storing leftover oil paint, see my article: A Quick and Easy Way to Store Your Oil Paint.
Artists tend to be very creative, and there are many variables and other possible solutions to the ones I mentioned above. My hope is that this list will get you started and help you eventually find your own way and methods. I would love to hear your ideas below or any questions you may have.
Keep Painting!
Jason Tako is a nationally known fine artist who specializes in western, wildlife, plein air, and Historical Native American subject matter. He spent his learning years sketching the wetlands and wooded areas of rural Minnesota. He has been featured in Plein Air Magazine and Western Art Collector Magazine and he was the Featured Artist for the 2020 Southeastern Wildlife Expo. See his work at www.JasonTako.com and his demonstrations on his YouTube Channel.
Oil paint is expensive. Letting paint dry on your palette is like throwing money away. There are different methods available for how to store used oil paints, but which ones are the best?
The best way for artists to store used oil paints and keep them from drying out is to place them on a glass plate with a cover and place it in the freezer at around zero degrees. Depending on the pigment, some colors will last for days or even weeks using this method.
Below I go into detail on my process for storing both open oil paint and paint still in the tube.
Storing Oil Paint on a Glass Plate
When I first started using this method, I used a glass plate that was placed in the freezer with the paints out in the open. The plate provided a nice flat surface that could store a decent amount of paint. This worked fine for several years, but there was always the risk of someone reaching into the freezer and sticking their hand or some food into the paint.
I eventually replaced the open plate with a glass pie plate that came with a plastic cover. Now I don't have to worry about food or hands in my paint. You can even stick paint on the angled sides of the plate as long as the paint isn't too soft. I do want to emphasize that using a glass plate or some other non-absorbant surface works best.
When I begin my day, I'll just take the pie plate out of the freezer, remove the paint from the plate with a flexible palette knife, and place it on my palette. I then pour a little denatured alcohol into the plate and wipe out the paint remnants with a paper towel.
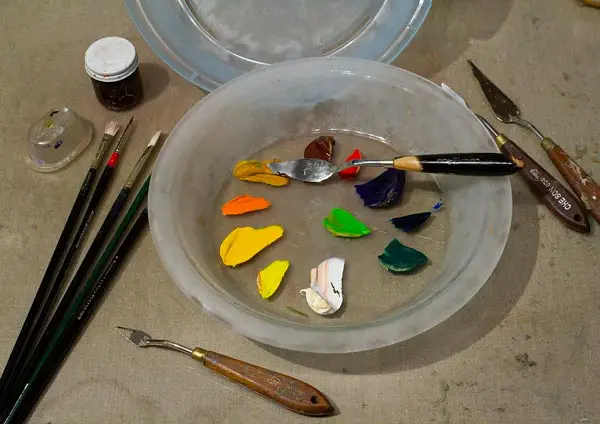
Concern About Wasting Paint
Sometimes I can't get every bit of paint out of the plate, and you do lose some paint when wiping excess paint off the palette knife between each transfer, but this is minimal. I've seen videos of artists spending a half-hour scraping piles and piles of dried paint off their palette. So the little bit you lose from transferring your paint back and forth every day is very minimal in comparison.
How Long Does Oil Paint Keep in the Freezer?
That depends on the pigment and brand. I would give an average of about a week. Some colors dry faster than others. The first colors that usually dry on me are Cadmium Red, Cadmium Orange, and Cerulean Blue Hue. Some colors like Ultramarine Blue seem to last forever when frozen. But even the faster drying colors seem to stay fresh for up to a week, especially if they are left in the freezer that entire time.
We have our freezer set around zero degrees, which seems to work well. I also have a dedicated place in our freezer to do this. If this is not possible for you, consider investing in a small freezer, which you can buy for under $150. It may seem like a lot to invest, but when you consider how much oil paint can cost, and how much paint you will waste over the years by leaving your paint out, it will easily pay for itself.
Other Methods for Storing Oil Paint
Of course freezing your paint on a glass plate is not the only method for storing used oil paints. I've seen and tried a number of other options which I'll describe below.
Plastic Wrap
Some artists will use a plastic cling wrap and just place it over their palette. While this may be better than just leaving them out in the open air, I always found this method to be a bit messy. The plastic wrap can sag into the piles of paint unless it's stretched really tight over a palette that has a walled side. Either way, it doesn't seem to keep the paint as fresh as freezing, but it is a viable alternative.
Placing Cups Over the Paint
A number of years ago I invested in these little plastic caps that had a soft rubber rim which you could place over your piles of oil paint. I can no longer find them on the internet, so they may no longer be on the market. The idea sounded good, but in practicality, they didn't seem to keep the colors fresh for very long, and I always ended up with paint on the edges of those little cups.
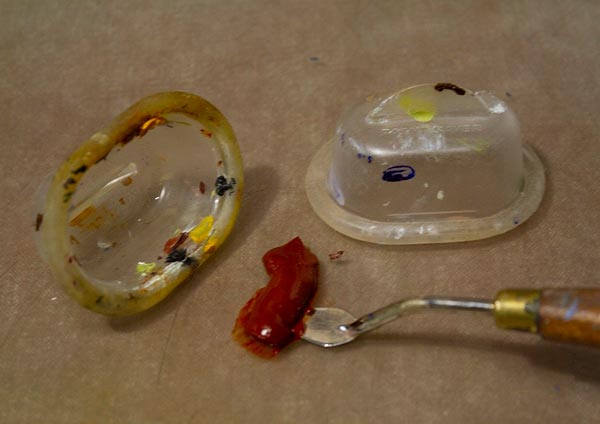
Wrapping Your Oil Paint
Another method I've seen is taking your oil paint and placing it in little sheets of aluminum foil, then folding up the foil with an "airtight seal." The problem with this method is that I doubt it's possible to get an actual airtight seal by merely folding aluminum.
I had no problem getting the paint into the foil, but a big problem getting it off after it had been wrapped up. The foil would get all kinds of bumps and dents which made it difficult to get remove the paint. But the even bigger problem is that the foil tore very easily. I concede I was using a metal palette knife, but I imagine a plastic knife may also cause tearing given the fragile nature of aluminum foil.
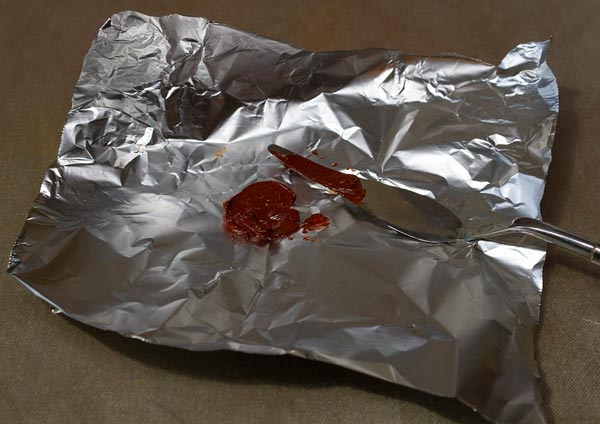
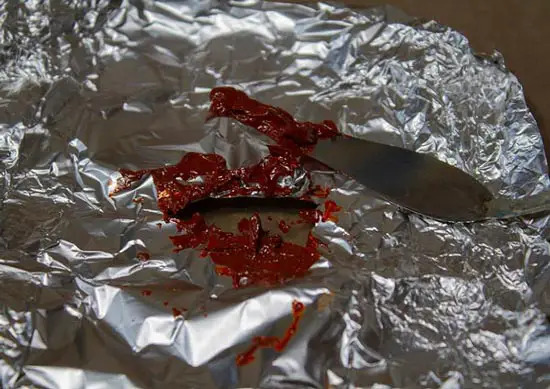
Adding Oil to Your Oil Paint
This is another one I've tried and while it does help, it has its drawbacks which lead me to abandon it. First of all, adding more oil to your paint will change its viscosity. This may not be all that bad if you like thinner and more oily paint, but it's an issue for artists who like their paint to have more body. Also, it just didn't seem to work as well as freezing.
Storing Paint in Empty Tubes
This method would be good for storing larger amounts of paint, its just something I've never had a use for. But for those who are interested, you just buy some empty aluminum tubes at someplace like Dick Blick; they come with caps but are open at the back end. Using your palette knife, you place the paint into the open end of the tube then fold and pinch the opening together with pliers.
If I had a certain color that I usually mixed and used on a regular basis, making a big batch and putting it into an empty tube would be a great solution.
See the brands and colors that are on my palette by going to the Oil Paint Resources Page.
Storing Tubes of Oil Paint
Even if you have never opened your new tube of oil paint you can still have issues with storage. The oil and pigment can separate, and the oil will usually go against gravity. This means that if you store your tubes of paint with the cap-end up you will get mostly oil and no pigment when you squeeze out the contents. When you finally do get to the pigment, it will be cakey and even dry because there is no oil left in the tube.
The best way to store tubes of oil paint opened or unopened, is to store them upside down, with the cap facing downward. I do this by attaching a binder clip to the bottom side of the tube (opposite of the cap-end), and hang the clip onto a screw that I have drilled into a large piece of plywood which hangs on the side of my palette desk.

While there are a number of ways to do it, just make sure you store your oil tubes upside down. Even when you store them on their side you can still get the same issue since the flatter bottom of the tube still causes the bottom end to be lower than the top.
While the oil and pigment still separate no matter how you store your tubes, having the oil at the back end of the tube ensures that there is still oil in the tube and will prevent the pigment from completely drying out.
I know there are other methods for storing oil paint, but freezing and upside-down storage has always worked best for me. You may even want to combine some of the methods described above with freezing. Please see free to share your ideas and what has worked for you below.
Keep Sketching!
Jason Tako is a nationally known fine artist who specializes in western, wildlife, plein air, and Historical Native American subject matter. He spent his learning years sketching the wetlands and wooded areas of rural Minnesota. He has been featured in Plein Air Magazine and Western Art Collector Magazine and he was the Featured Artist for the 2020 Southeastern Wildlife Expo. See his work at www.JasonTako.com and his demonstrations on his YouTube Channel.
Many artists and painters like to sketch their ideas onto canvas prior to painting. But what medium should you use for sketching on canvas? We will talk about some different options below.
To retain a detailed sketch throughout the painting process use an H-grade pencil and seal it with a fixative spray. Use charcoal if retaining the drawing is not necessary. Other mediums can be utilized such as markers, pastel, ink, colored pencils, transfer paper, and even paint.
This only scratches the surface of what can be used for sketching on canvas. Below we go into more detail on some of the different methods available.
Sketching on Canvas with Pencils
Pencils are a very common way to sketch on canvas prior to painting. They can be used for oils, acrylics, or most any other medium. The great thing about pencils is you can do a fairly detailed drawing right on the canvas. This works great for paintings that contain any kind of precise anatomy, perspective, or if it's a complex composition. The thin lines and detail achieved will make sure you don't miss anything important, such as a button on a shirt.
The potential drawbacks (no pun intended) is that having a lot of tight, thin outlines can cause you to be more restrictive with your paint application. This can sometimes result in a paint-by-number look since your main objective is to fill in all those little shapes with color. This can be overcome by loosely sketching your idea on the canvas rather than creating perfect outlines.
When using a pencil to sketch on canvas, it's generally best to use an H-grade pencil, preferably a 3H or 4H since these have less of a tendency to smudge. To keep the drawing from smudging, you can apply a fixative spray or acrylic matte medium with a soft brush over the canvas and let it dry before you begin to paint. Be aware of the fact that if you use a more transparent painting method, pencil lines may show through the paint.
See the types of painting and drawing materials I use on the Resources Page.
Erasing Pencil on Canvas
If you are using an H-grade pencil, a kneaded eraser will erase most of the graphite, depending on how heavy the texture of your canvas is. If you are erasing graphite or charcoal on an oil-primed canvas, I recommend you dedicate an eraser for that task alone. There are other erasers that can work, but you must be careful since using them with a heavy hand could remove some of the primer on the canvas.
Sketching on Canvas with Charcoal
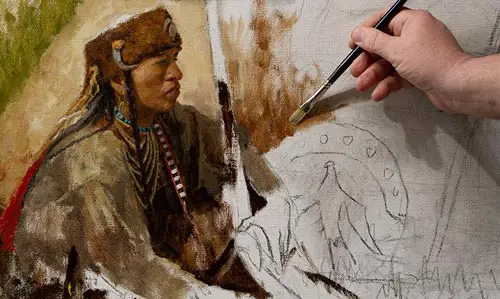
Another time-honored method us using charcoal to draw out your ideas on canvas prior to painting. If your objective is to only give rough indications of placement, proportions, and anatomy, and then let the paint do the talking, then this is the way to go.
The broad lines and temporary character of charcoal will not only help free you from a paint-by-number mentality, but it will also force you to rely more on your ability to draw with paint rather than just fill in shapes. This is a great approach for those who want to loosen up in their work.
Of course, the obvious drawback (pun intended this time) with charcoal is that it's messy. If you have a tendency to rest your hand on the canvas when you paint, you may end up with more charcoal on your hand than on the canvas. The charcoal can also blend into your paint, depending on your technique. I have not had many problems with this as I tend to paint somewhat thick, but if you use thin layers it may be an issue.
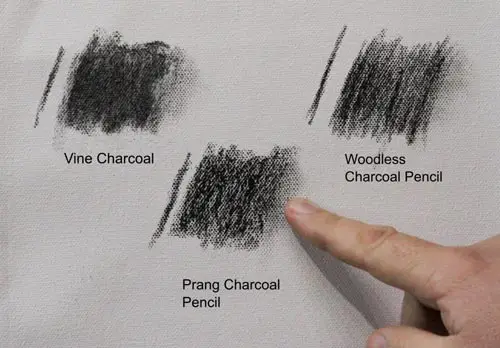
Different Types of Charcoal and Their Effect on Paint
There are different types of charcoal available on the market, but they mainly fall into two categories, vine charcoal, and compressed charcoal. Below is an example of using oil paint over vine charcoal and two different types of compressed charcoal pencil: a Prang charcoal pencil and a Mont Marte wordless charcoal pencil.
The lower right of each swatch was the thinned with mineral spirits, you can see how the effect is essentially the same on all three. I used Cadmium Lemon on the top of the swatch, Burnt Sienna on the right, and Ultramarine Blue on the bottom. I used the paint straight from the tube without thinning it.
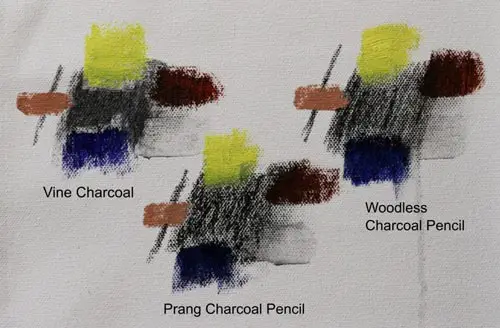
The first thing to note is how the vine charcoal, while not as dark, did a better job of covering the heavy texture of the canvas. You can see that all three did cause some pollution of the color, but as I brought the color away from the charcoal and into pure canvas, it dissipated fairly quickly. The Prang pencil seems to have more effect on the color.

Another option is using compressed white charcoal on a toned canvas. This charcoal tends to hug the canvas more, and since it's white, it doesn't seem to impact the paint as much, even when scrubbing in dark paint. You will need to tone your canvas fairly dark to be able to see the charcoal well. And it's essential to make sure the paint you used to tone your canvas is bone dry before you apply charcoal.
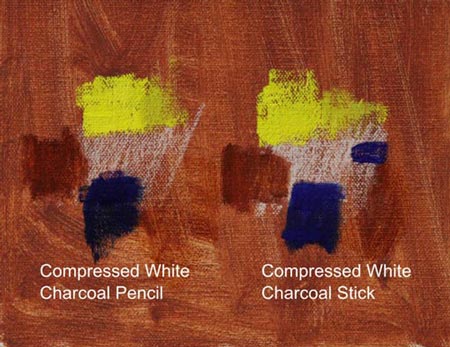
Other Alternatives for Sketching or Drawing on Canvas
Markers on Canvas
Some artists will use markers for their preliminary drawings. There are many different kinds from acrylic to Sharpies and these come in all array of colors. While I admit I've never used this method, the word is acrylic may be a better way to go since oil-based markers such as Sharpies can eventually bleed through the paint.
Pastels on Canvas
Pastels, while not optimal for doing a highly-detailed drawing, can work great if you want a loose approach similar to charcoal, yet with color. You will want to make sure that the pastel you are using is compatible with your medium. For example, you could use oil pastel with oil paint, but never with acrylic paint.

Oil pastels and oil sticks have a tendency to bleed into the subsequent layers of paint, especially if the paint is thinned (see above). This can be used to your advantage. Below I demonstrate blocking in the light and shadows in a portrait and using mineral spirits to spread the oil stick for a nice tonal foundation that can be painted over either wet on wet, or once it's dry.
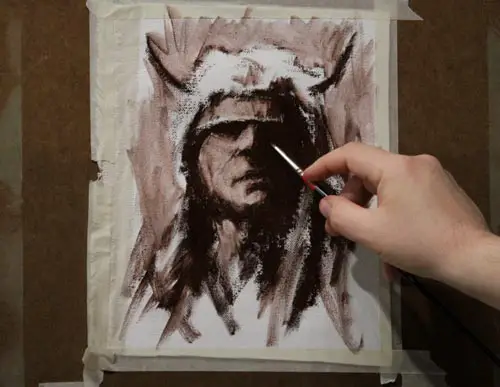
Ink on Canvas
Ink, such as India Ink is best used on a prepared canvas, with gesso or some other base. But ink has a nasty tendency to slowly bleed through the layers of paint and create a faint reminder of itself years later. To prevent this, seal it in with a couple of coats of clear matte acrylic spray prior to painting. Also, be mindful that ink is not at all forgiving when it comes to making corrections.
Colored Pencils on Canvas
Regular colored pencils have a wax base that can resist some paints. Watercolor pencils can blend nicely into the subsequent layers of paint, though you may want to limit using them with water-based paints only. Lighter colors will have less effect on your subsequent layers. Another nice thing about watercolor pencils is you can completely erase any lines by wiping them away with clean water and a paper towel.
Transfer Paper on Canvas
Whether you make your own or you purchase it, transfer paper such as graphite or carbon transfer paper is a great way to transfer a sketch or drawing onto the canvas. The lines it creates tend to hold out a little better on canvas than pencil or charcoal. And a sheet can be used multiple times.
My preferred method is to make my own type of transfer paper by applying charcoal (white or black) onto the reverse side of the paper that has my drawing. I then lay the charcoal-side of the paper onto the canvas and trace over the drawing. This method of applying charcoal tends to keep it on the canvas a little better than drawing with charcoal straight onto the canvas.
Paint on Canvas
This may seem a bit obvious, but if you are an oil painter using acrylic-primed canvas, you can do your sketch or preliminary drawing in acrylic paint. The advantage of this is acrylic's fast drying time, and the fact that it will not bleed into the oil paint once it's dry. Some artists will draw in pencil, seal the pencil lines by repainting over them with acrylic, then proceed to oil paint.

Should You Sketch Just Lines or Masses of Light and Dark?
You can do either one but bear in mind that if you are using a messier dry medium like charcoal or even pencil, having a bunch of excess graphite will cause more pollution of the paint. If you need to have those value masses, it is usually best to draw in your outlines, then mass in indications of value with thin paint before you get into the serious stuff.
Canvas Texture
Rougher canvas will be more challenging to draw on, especially if you are using a fine-tipped pencil. Erasing can also be difficult. For heavily textured canvas I would recommend a softer medium such as charcoal or a larger pencil, similar to a carpenter's pencil with a wide, blunt tip. Pastels, markers, or thinned paint can also work well with rough canvas. Avoid using sharp, fine tips like technical pencils.
Experiment with Different Techniques
Of course, there are many other techniques and options for sketching on your canvas that cannot be covered in this article. Hopefully, this will be enough to get you started and experimenting with your own techniques. Just remember the one unbreakable rule, oil over water, never the reverse. In other words, don't paint acrylics over oil pastels.
Please leave your comments or questions below and keep sketching!
Jason Tako is a nationally known fine artist who specializes in western, wildlife, plein air, and Historical Native American subject matter. He spent his learning years sketching the wetlands and wooded areas of rural Minnesota. He has been featured in Plein Air Magazine and Western Art Collector Magazine and he was the Featured Artist for the 2020 Southeastern Wildlife Expo. See his work at www.JasonTako.com and his demonstrations on his YouTube Channel.
There are a number of steps that go into planning a complex oil painting. Below I describe the process I went through to arrive at my latest painting, Splitting the Herd, oil on linen, 36x48 inches.
Preliminary Work
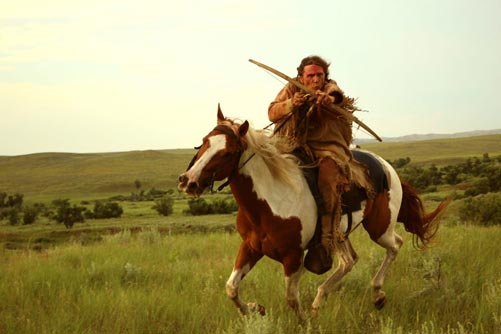
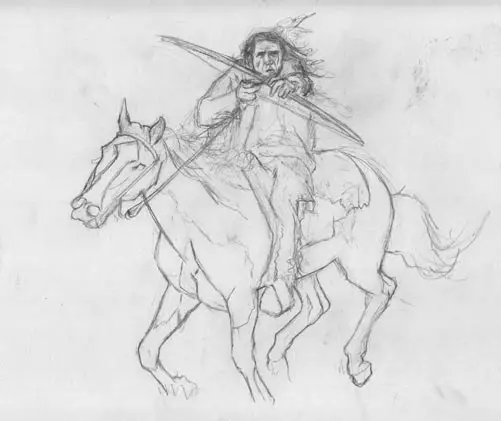
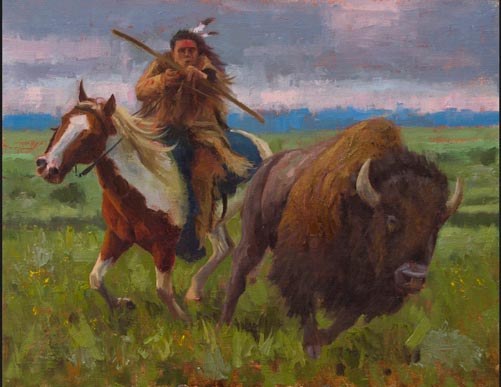
When planning a complex oil painting, or any type of painting, it's always good to see if your idea will work by doing a small study. These studies do not have to be detailed or precise; their purpose is to help you visualize and plan the large shapes in the composition, the primary color scheme, and the value relationships. Detail is not a consideration at this point. See my rough preliminary study below.
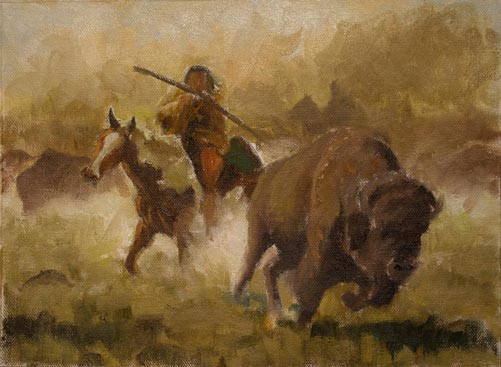
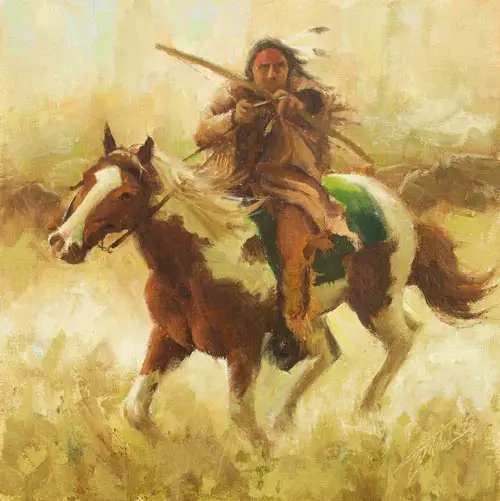
Starting the Large Painting
It's now time to start the large painting. A large sheet of Claessens #15 oil-primed linen is stretched onto heavy duty stretcher bars.
A very easy and cost-effective way to enlarge a drawing for a painting is to scan your sketch into Adobe Photoshop, enlarge it to the size of the final painting, upload it onto Staples Print and Marketing Services and have it printed as a blueprint, (and no, the outlines will not be blue unless you draw them that color). Depending on your location, you can get a 36x48 inch outline printed for less than $10 if you choose the store pick-up option.
Attach the print onto your canvas by taping down just one side, then slide some carbon transfer paper underneath or apply charcoal on the backside of the print, the side that will be in contact with the canvas. You don't need to cover the entire back with charcoal, just where the lines are. Now with the print on the canvas, trace the outline of the print onto the canvas.
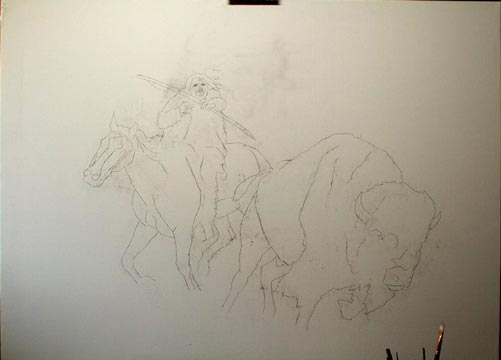
The block-in is started with a very limited palette. This helps me to focus on correct shapes, values, and composition. Once this foundation is laid, I have something solid to build upon.
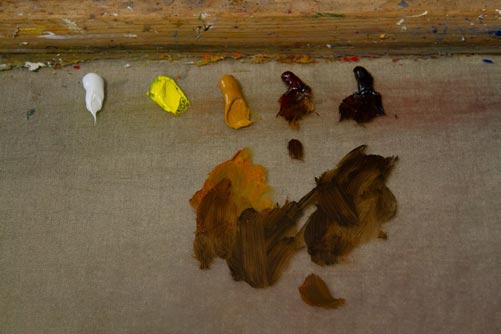
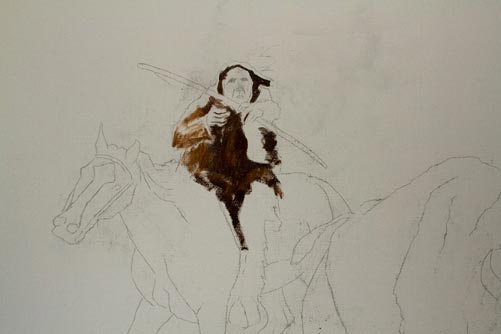
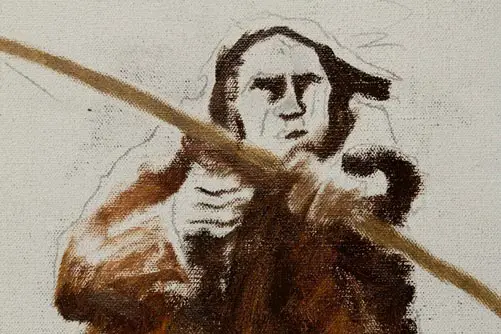
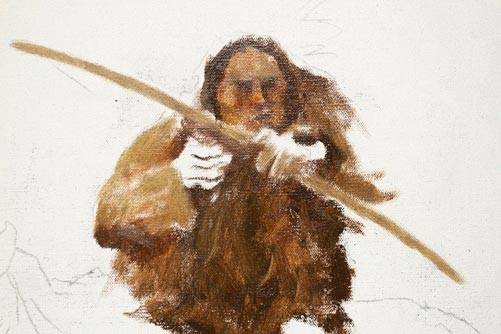
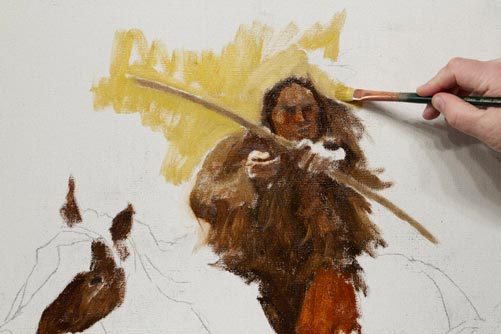
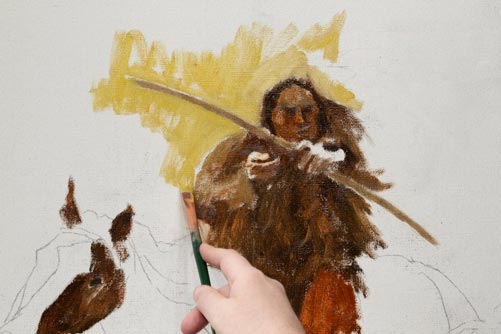

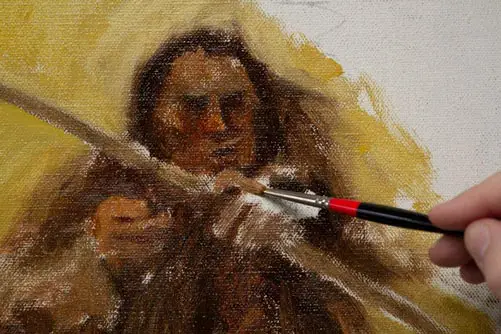
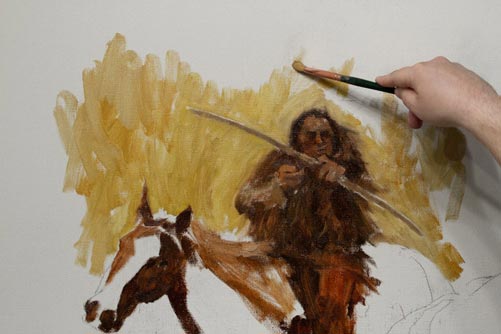
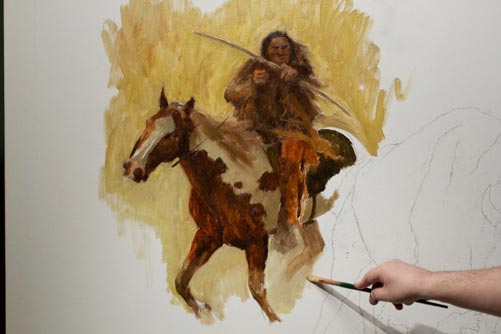
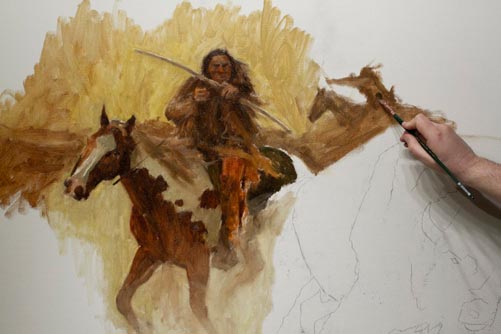
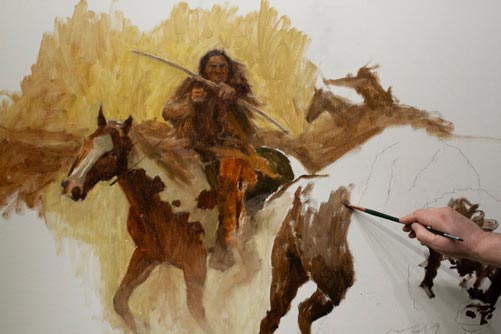
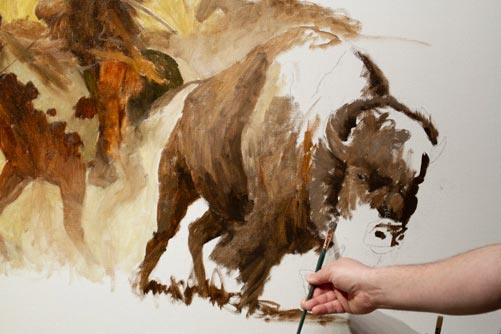
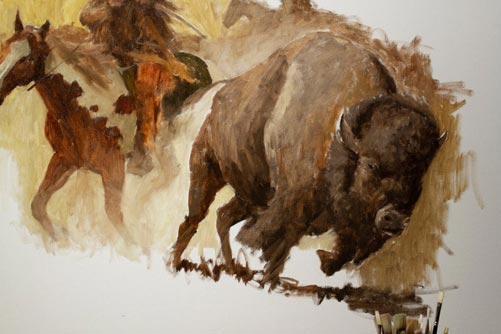
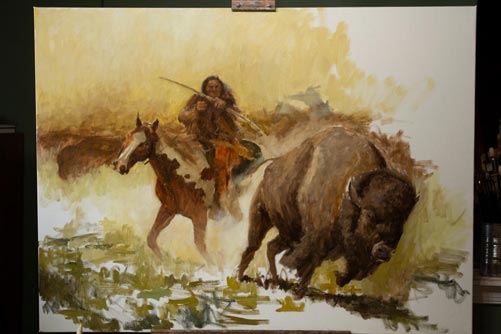
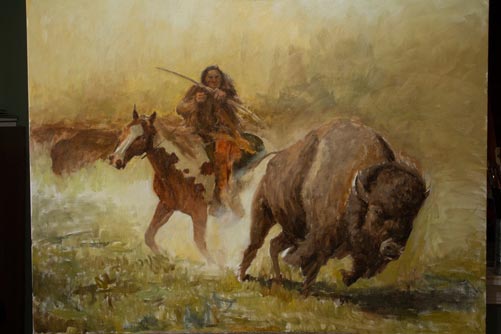
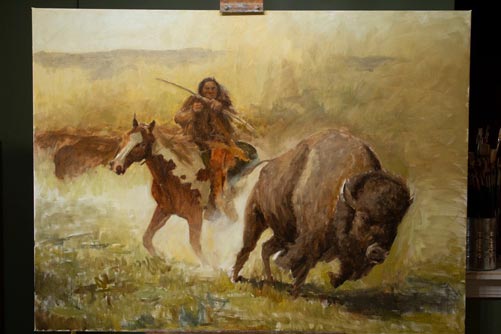
Planning a Complex Oil Painting-The Final Stages
We are now beyond the initial stages of planning a complex oil painting. I left the painting alone for a day and when I returned two days later, the block-in which almost dry. This allowed me to put more paint on top for adjustments, details, and texture. The only medium that was used a odorless mineral spirits. Now I will use my full palette of Titanium White, Cadmium Lemon, Cadmium Yellow Light, Yellow Ochre, Transparent Oxide Red, Cadmium Red, Alizarin Permanent, Ultramarine Blue, Cobalt Blue, Thalo Turquoise, Viridian, and Permanent Green. Note that I'm no longer using Van Dyke Brown.
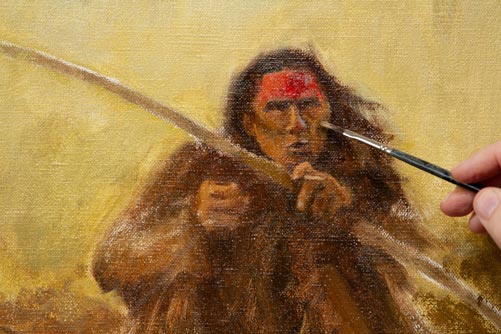
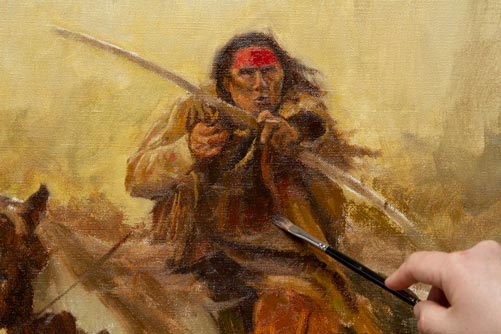


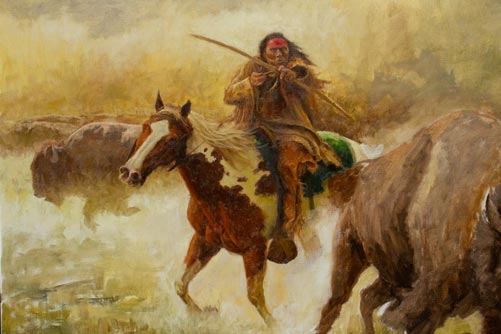
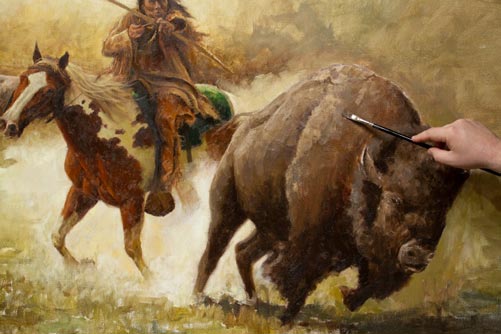
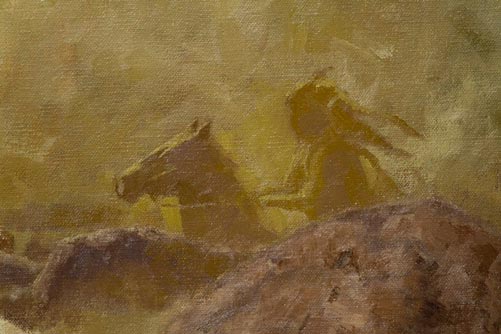
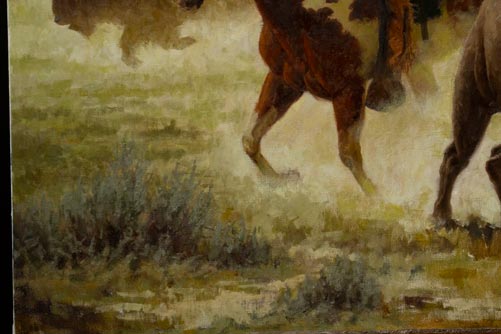
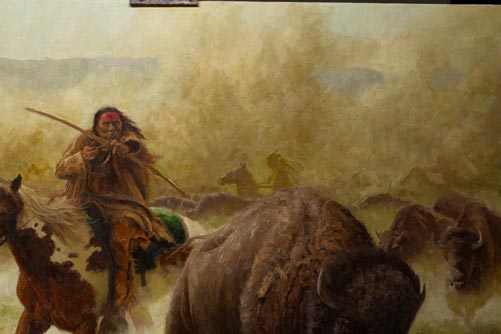
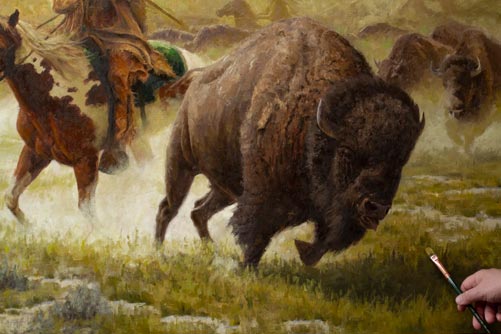
I hope you found this post on planning a complex oil painting helpful. Click here to see a small oil painting demo. Please leave your comments or questions below and don't forget to subscribe. Also, visit my website at www.JasonTako.com and see video demonstrations on my YouTube channel.
Disclosure: Some of the links in this post are affiliate links in which I will earn a commission, but there is no increased cost to the buyer. I link companies and their products because I use them and believe in them, regardless of whether I get a commission or not.
Jason Tako is a nationally known fine artist who specializes in western, wildlife, plein air, and Historical Native American subject matter. He spent his learning years sketching the wetlands and wooded areas of rural Minnesota. He has been featured in Plein Air Magazine and Western Art Collector Magazine and he was the Featured Artist for the 2020 Southeastern Wildlife Expo. See his work at www.JasonTako.com and his demonstrations on his YouTube Channel.