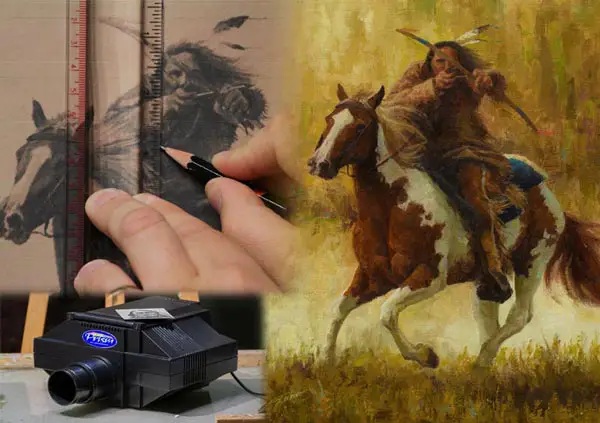
Enlarge Your Drawing Into a Painting With or Without a Grid
So you have a nice drawing that you would now like to paint, and you want the painting to be bigger than the drawing. How do you turn your small drawing into a larger painting and enlarge the drawing onto the canvas?
There are several ways to transfer a smaller drawing onto a larger painting surface. The Grid Method breaks the drawing down into squares, and each square is copied onto the larger surface. You can also use the Measurement Method, an opaque projector, or enlarge the drawing digitally.
Below we look at each process in detail so you will have the best success with enlarging your drawing and turning it into a painting.
Enlarging Your Drawing with the Grid Method
This is the most time-honored approach, and probably the most painstaking. Yet it works well for those who don't have an opaque projector or the means to do digital enlargements.
The basic principle is that you subdivide both the drawing and the painting into small squares. Then you can replicate the shapes in each square on your canvas. Once they are all replicated, you have a larger version of your drawing complete with correct proportions. It's a great method, especially for complex compositions where accuracy is a must, though it does have drawbacks you must be aware of.
How to Create a Grid
To do this right you must make sure that your larger painting surface will be the same proportion as your drawing. So in other words, if your drawing is 6 x 8 inches, your larger painting can be 9 x 12, 12 x 16 or 18 x 24 inches, since those proportions are the same.
In order to make sure your proportions are correct, you can buy a Proportional Scale at an art supply store for around $7 (see Blick Art Materials for current price), or you can just visit a free online proportional calculator such as this one at http://www.madametalbot.com/13/scale.htm. There are also apps that you can download onto your phone.

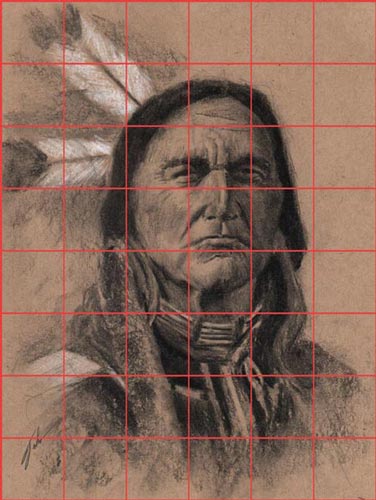
First, you will want to start by making 1-inch squares over your drawing. If you don't want to draw lines over your original drawing or sketch, you can create a replica by tracing over it with tracing paper and drawing the grid lines on the tracing paper. You can also print a photocopy and draw the grid lines on the copy.
Whatever you do, just make sure your lines are straight. Use a ruler to make 1-inch marks on all four sides of your drawing, then use a ruler to connect these dots by making perfectly straight lines.
IMPORTANT NOTE: If your drawing has shading and tone and it not just an outline, you may want to create an outlined version of it with tracing paper since you may have a difficult time seeing gridlines on a fully shaded photocopy. Another option is to lighten the photocopy with photo-editing software like Adobe Photoshop.
Now you need to figure out what size to make the squares on your larger painting surface. There is a simple formula to figure this out: Divide the dimensions of the painting by the dimensions of the drawing.
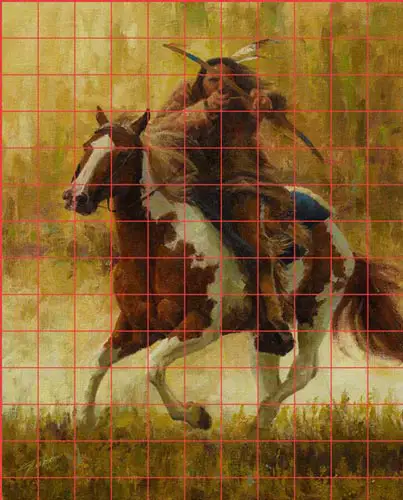
For example, let's say your drawing is 6 x 8 inches, and you want to enlarge your drawing onto an 18 x 24-inch canvas (or a 13.75 x 11-inch drawing into a 20 x 16-inch painting as illustrated below). Divide the height of the painting by the height of the drawing, then divide the width of the drawing by the width of the painting. So 18 divided by 6 equals 3, and 24 divided by 8 also equals 3. In reality, as long the proportions are the same between the drawing and the painting, you only need to divide either the height or the width, not both.
So in the above-written example, the squares on your painting will need to be 3 inches while the squares on your drawing are 1 inch.
Applying the Grid Onto Your Canvas
The process of getting the grid onto your canvas is essentially the same as getting it onto your drawing. Still using an 18 x 24-inch canvas as an example, with a pencil, create dots 3 inches apart on all four sides of the canvas. Then using a yardstick, draw straight lines to connect the dots and create squares.
If your painting is larger than the yardstick, you may need to create dots 3 inches apart (or whatever spacing is required) somewhere in the middle of the painting. Line up your ruler or yardstick by using the dots on the side of the painting with the dots in the middle, draw your lines, then repeat on the other side of the canvas to complete the lines.
Once you have the grid on your canvas, you can start replicating the drawing. Below is another example, this time taking a nonstandard-sized drawing (13.75 x 11-inches) and converting it into a 20 x 16-inch painting. The grid for the painting ends up being 1.45-inch squares. Notice how I had to cut off the row of squares at the bottom due to the unusual layout of the drawing.
Other Helpful Tips for Using a Grid
Subdividing Squares for Details and Precision
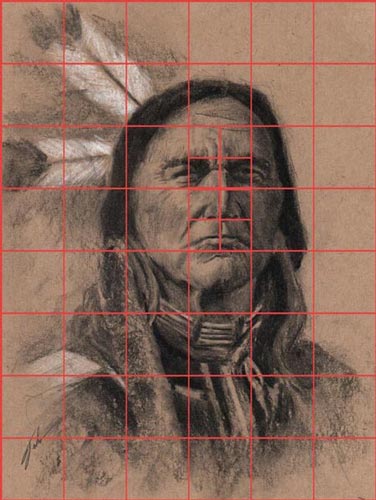
If your subject matter contains parts that are very detailed or require absolute precision, you can subdivide the squares in those areas to get more precise shapes. I do this when it comes to certain things like faces or hands. Using the 18 x 24-inch canvas as an example, in complex areas subdivide the squares on your drawing to be 1/2 inch, and the squares on the painting to be 1 and a 1/2 inch in size.
Numbering The Squares
If your composition is complex and/or you have a lot of squares to deal with, numbering the squares can help you keep track of which square you are actually working on. Nothing can be more frustrating than spending a couple of hours transferring your composition only to learn that you were off by one square and you need to erase everything and start over, leaving your canvas with messy, residual graphite.
Creating a Grid on Tracing Paper for Repeated Use
If you plan to use the grid method in the future, you can save yourself some time by creating a grid of 1-inch squares on a sheet of tracing paper or a sheet of acetate which you can then lay over the top of your drawing. Just make sure that the grid doesn't get moved once you have it lined up. Paper clips or mounting the grid and the drawing together on a clipboard can help.
The Pros and Cons Of Using the Grid Method
The pros of using a grid are that it's probably the most cost-effective method available. All you need is a rule or a yardstick and a pencil. It also gives you the confidence of replicating your drawing with correct proportions. You can make all your corrections, erasing, adjustments etc. on a smaller piece of paper, and accurately replicate that drawing.
The cons of using a grid are that once the drawing is transferred, you still have all those squares on your painting surface. You can erase those squares, but depending on your medium that could prove difficult. Plus you may end up accidentally erasing some of the actual drawing. This is why the grid method is best used for opaque mediums such as oil.
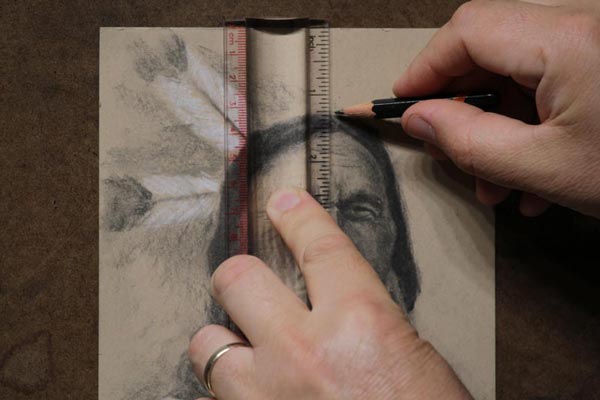
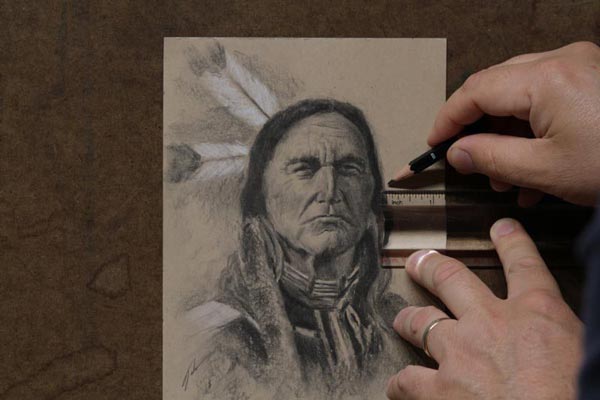
Transfer Your Drawing by Using the Measurement Method
This method is similar to using a grid yet without all the lines. Instead of drawing a bunch of squares, you measure the primary shapes on your drawing, increase their size proportionally, draw measurement dots on your canvas, and freehand draw the larger shapes on your canvas. Let's look at an example below.
Let's say you want to paint a human figure. We will once again use the example of taking a 6 x 8-inch drawing and transferring that to an 18 x 24-inch canvas in vertical format.
First, you will need to determine the starting point. Let's say the top of the head is 1.25 inches down from the top edge of the drawing. Use the above formula of dividing the size of the painting by the size of the drawing, 24 / 8 = 3. So all of your shapes will need to be increased three times. Moving to the canvas, the top of the head will be 3.75 inches down from the top edge of the canvas. Make a dot or small line on the canvas to mark this spot.
Repeat this same formula for determining the distance of the left side of the head from the left side of the canvas, then repeat for the right side, making small dots or lines to mark these spots. You should now have the correct placement of the head on the canvas.
Now you can work on measuring the distance from the top of the head to the bottom of the chin. Let's say this distance is 3.25 inches on your drawing. Once again multiply that by 3 which will tell you that the distance from the top of the head to the chin is 9.75 inches. Now you have the correct size of the head measured out.
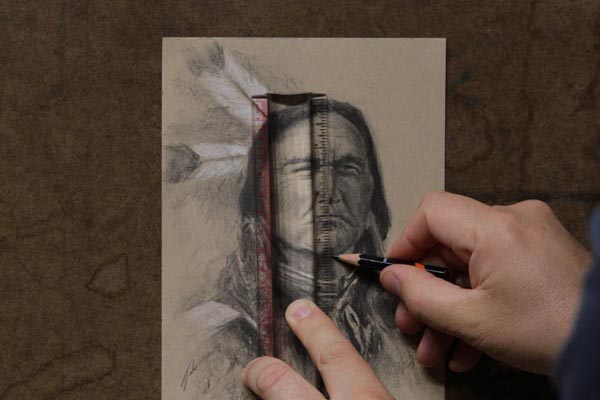
You can do this for the distance between the eyes, the length of the body, and so on. You can even use it to figure out proper angles. Say you have a slanted leg in your drawing and you want to figure out the proper degree of the slant. Measure the distance of the top of the slant from the edge of the canvas then repeat with the bottom of the slant. Mark each spot and draw a line to connect the dots.
At some point you may want to pause your measurement process and start drawing some rough outlines so you don't forget what each dot or dash represents.
The Pros and Cons Of Using the Measurement Method
The Measurement Method is just as cost-effective as the grid method, all you need is a ruler and a pencil. It has one big advantage over the grid method in that you are not creating a bunch of excess lines that will need to be erased or painted over. This makes it more attractive for transparent mediums such as watercolor.
The disadvantage is that since you are only marking measurement points and not replicating shapes in small squares, your drawing skills will need to be on par for the task. The silver lining is that if you are confident in your drawing skills, you have more freedom of expression and feel less like a machine copying little squares.
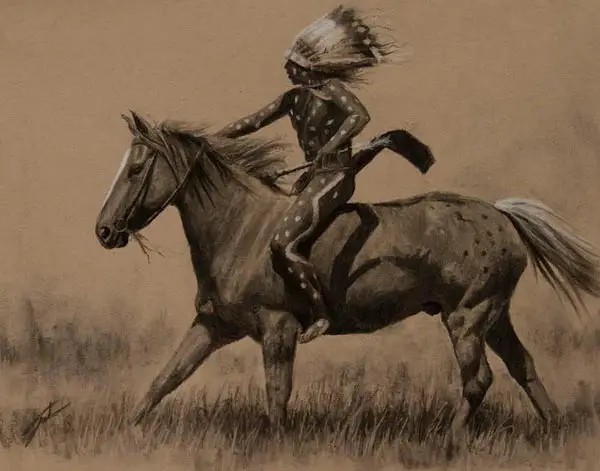
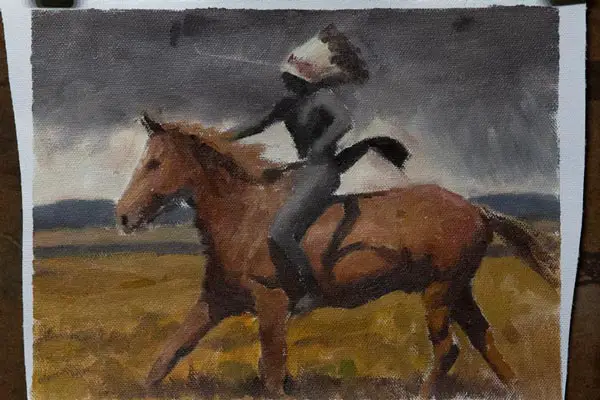
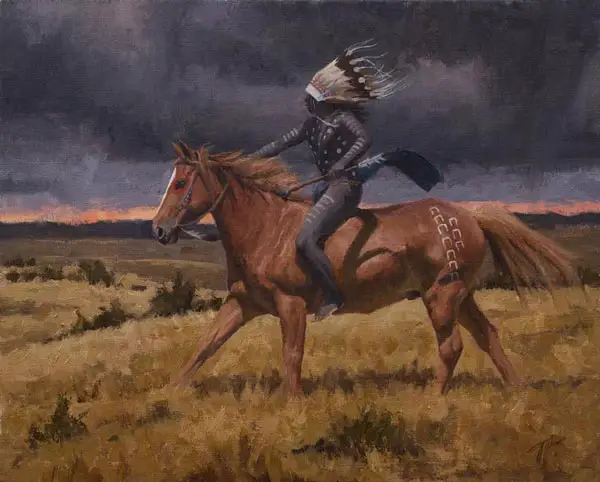
I like using this method for simple composition that requires accuracy, like single a horse with a rider, or even portrait-type work. It can work great for landscapes also.
I will also use this method when creating my original drawing from a photograph. I don't use any math, I just compare the shapes with one another using a drawing compass to measure. I may also make the drawing the same size as the photograph and use the drawing compass to measure the subject matter in the photo and make measurement marks on my drawing. I get correct proportions without the scruples of tracing.
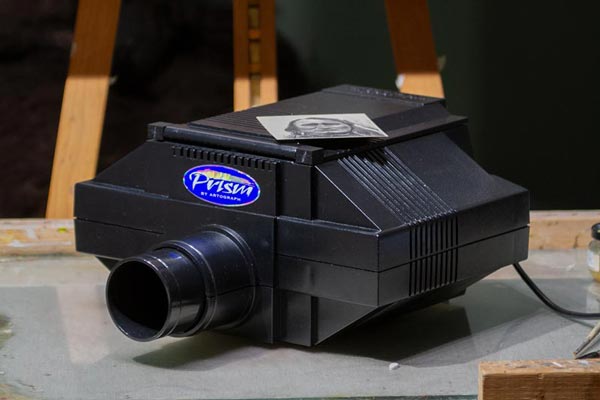
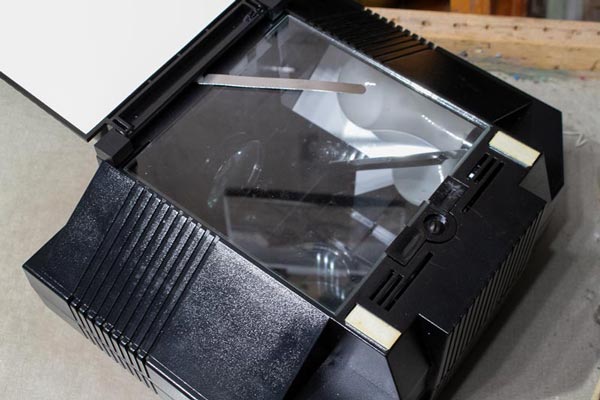
Enlarging Drawings with Opaque Projectors
Probably the quickest and cleanest enlargement and transfer method available to artists. An opaque projector will project an image of your drawing onto a larger surface allowing you to trace the illuminated image onto your canvas.
The Pros and Cons of Using an Opaque Projector
The great thing about it is you don't need to do any math, create grid lines that later need to be erased, or do numerous measurements. You just place your drawing on the projector, turn off the lights, project it onto your canvas and trace it. Once done you have an accurate enlargement of your drawing and nothing else. Some projectors like the Artograph Prism will also reduce drawings as well as enlarge.
Some things you should be aware of with projectors. First of all, this is one of the more expensive method for enlarging your drawings. There are some cheaper options out there but they are more limited in how much they will enlarge your work and the copy area is smaller.
Artograph has a small projector for around $90, but while it enlarges up to 14 times, its copy area is only 5 x 5 inches. Artograph's Prism projector, which runs around $260 (which I own) enlarges up to 20 times and has a slightly larger 7 x 7-inch projector area.
So for example, let's say you made your drawing 9 x 12 inches. In order to use it with the Prism projector, you'd need to make a reduced copy of the drawing so that the longest dimension was no more than 7 inches. You can also try to slide the drawing through the projection area and hope you get it all to line up correctly.
Another thing to be aware of is that if you are going to enlarge the drawing significantly, you will need a large room because most of the enlargement is done by how far back the projector is from the target surface. If you are working in a small room, you can only go so large.
Another challenge is getting the projector to be the same height as your canvas. You don't want to project at an angle since that will distort your image. The projector should be a near-perfect parallel angle with the canvas. Artograph did make an adjustable stand but it can be a challenge to find and they run anywhere from $45 to over $100. So when I use mine I use a stool and stack books.
My personal experience is that when going real large, the lines can get a bit faded. So make sure the lines on your drawing are very dark and your room can be made dark enough.
How I Use My Opaque Projector
I rarely use my projector, even for large paintings. I'm not at all trying to dissuade you from getting one since they can be handy. I just find setting up all the conditions for it to work well to be a pain.
I have small children and pets, and if either the projector or my easel gets bumped during the tracing process it can be almost impossible to get everything lined back up perfectly. I'm also a bit suspicious about shrinking a detailed drawing down to 7 inches max, then blowing it up to several feet. There is probably no problem with this, that's just my own quirk.
If you want to invest in a projector, just be sure that you will make good use of it and you are aware of the things I mentioned above.
Another note about tracing photos. Some artists, even well-known artists will use projectors to trace photos. I don't do that. My personal belief is that drawing is part of the artistic process. That said, I have no issue with using technology to enlarge and trace what I have already drawn. This is my personal motto. Each artist must decide for themselves.
Enlarging Your Drawing with Digital Software
This is my primary way of enlarging my drawings for painting. I also have a background in graphic design, so it works well for me. Basically, I scan my drawing into Adobe Photoshop at around 200-300 PPI or DPI (pixels per inch or dots per inch), enlarge the image to my preferred size, then print it out.
Once printed, I will apply either charcoal or graphite on the reverse side (just over the lines), then lay the charcoal side down on my canvas and trace over the image to apply the charcoal. You can also use carbon paper instead of drawing charcoal on the backside of the enlargement. Bear in mind that lines made with carbon paper can be difficult to erase.
Another variation for oil painters is to take a large piece of tracing paper and trace the enlarged drawing, apply oil paint on the reverse side, then lay it down on the canvas and retrace the image to apply the oil paint to the surface.
The Pros and Cons of Doing Digital Enlargements
What I like about digital enlargements is you don't have the uncertainty that can come with grids and projectors. Even with grids you may not draw those little shapes correctly, and projectors require you to shrink your drawing way down, possibly losing important details in the process. This doesn't happen with digital enlargements. You get an exact replica of your sketch and can enlarge it to an exact size.
Digital enlargements are fairly quick. You just scan in your drawing, make it bigger, and then print it out. It's also nice to know you can make as many copies as needed provided the file is saved. You can also darken the lines of your drawing and crop the composition to experiment with different layouts and proportions.
There are some drawbacks to using digital enlargements. The first being price. I use Adobe Photoshop, which is probably the top photo-editing software available and one of the most expensive.
Adobe has made Photoshop much more accessible with subscriptions for around $10 a month, and the software can be updated whenever there is an upgrade. This is much nicer than the old days when you had to buy a disc of the program for around $500 only to have it go out of date within a year or two.
Scanning Your Drawings
Another consideration is you will need a scanner to digitally scan your drawing. Flatbed scanners are going to work the best for scanning at home. At the time of this writing, you can pick up an 8.5 x 11-inch flatbed scanner for around $35. If you can afford it, I would go larger than 8.5 x 11 to save yourself the hassle of having to scan your drawing in sections and assemble with photo-editing software.
Office supply stores like Staples offer scanning services. If you don't mind making the trip and paying the fee for each scan, this is another option. At the time of this writing, many Staples stores have self-service scanning that allows you to scan up to 11 x 17-inch documents for under $1 per page. Bear in mind that the quality of the scan may not be as good as scanning high-res into Photoshop, but it may get you by.
Printing Your Enlarged Drawings
For printing my enlarged drawings, I usually use my cheap desktop printer that prints a maximum of 8.5 x 11-inch sheets. Because of this small size, I print my drawing out in sections, place these sections over a light table, cut off any excess, and then tape them together. Bear in mind some generic printer drivers may not allow you to print in sections; I do my printing directly from Adobe Photoshop so I can print in sections.
If I'm doing a really large painting, I will use Staples Blueprint printing service. You can get a digital file up to 36 x 48 inches printed for under $10 (locations may vary in price). The printing paper they use is pretty thin, but it suffices for applying charcoal on the back and tracing the enlargement onto canvas. Since this service is meant for blueprints, it only works for outline work. Your drawing shouldn't have any shading or color.
The other great thing about Staples Blueprint service is you can upload your file from home, submit the order, then either have it shipped to your studio or go pick it up when it's ready. This is my favorite way to enlarge my drawings for large paintings.
Additional Tips for Turning Your Drawing Into a Painting
When using the grid, measurement, or projection methods be sure to draw your initial lines lightly. This is always a good idea regardless, but since you may need to make later adjustments, it can be handy to not have to fight dark lines that are difficult to erase.
For making corrections on your painting surface, it's always a good idea to have an eraser designated for that sole purpose, especially if you are an oil painter. You don't want to risk getting oil residue from the primer into a nice pencil drawing.
Depending on what painting medium you are using, you can seal the drawing on the painting surface with a fixative spray. This will help prevent the drawing from getting smeared during the painting process. This will work for oil but may be a problem for water-based media, especially watercolor. I personally have never done this as I use my lines only as a guide, but many other artists use this method.
Another way to preserve your drawing on the canvas is to go over your lines with ink or paint and allow it to dry. Oil painters working on universal/acrylic-primed canvas can also seal their lines with ink acrylic paint. Just be sure never to use acrylic or any water-based medium over oil. Oil over water works; water over oil is a disaster.
Since I'm an oil painter, I usually use charcoal to transfer my drawing onto canvas, or carbon transfer paper for smaller drawings. I go into more detail about other possible mediums to use in my article, What to Use for Sketching on Canvas.
I also strongly recommend you do some small color studies before you attempt to turn your drawing into a file painting. Drawing is all about line and value; color adds a whole other dimension. You will have more success if you have a plan for your colors before you start on the final.
Do as many small canvases as necessary until you are confident about what your final painting should look like color-wise. Make sure you have sufficient reference material to work from, whether that is photo reference, additional sketches (color and black and white), or preferably both. If you begin to feel burnt out, work on another project for a while.
I hope that helps. Please leave any questions or comments below and keep sketching!
Jason Tako is a nationally known fine artist who specializes in western, wildlife, plein air, and Historical Native American subject matter. He spent his learning years sketching the wetlands and wooded areas of rural Minnesota. He has been featured in Plein Air Magazine and Western Art Collector Magazine and he was the Featured Artist for the 2020 Southeastern Wildlife Expo. See his work at www.JasonTako.com and his demonstrations on his YouTube Channel.
Warning: Undefined array key "preview" in /home3/mysketc2/public_html/wp-content/plugins/oxygen/component-framework/components/classes/comment-form.class.php on line 75
Warning: Undefined array key "preview" in /home3/mysketc2/public_html/wp-content/plugins/oxygen/component-framework/components/classes/comment-form.class.php on line 79