Giving Your Oil Painting That Glossy Look
There are many different reasons artists choose to paint with oil paint. While numerous blending capabilities, longer working time, rich, and deep colors are some of the reasons, a glossy finish is one of the most popular. But just because you are painting with oils doesn't mean you will have glossy results. So how do you achieve a glossy finish in your oil painting?
The three biggest factors that contribute to a glossy look in oil painting is having a higher oil content in your paint, adding a medium such as Galkyd or Liquin, or finishing your painting with a glossy varnish. One of these factors alone is usually sufficient to achieve a glossy finish.
There are a number of other factors that can increase or decrease the gloss of your oil painting. Let's look at each factor below in detail.
Achieving a Glossy Finish with Higher Oil Content
Not all oil brands or even colors of oil paint are created equal. Some by default have more linseed or safflower oil than others. Colors such as Ivory Black will usually have more oil than a color such as Yellow Ochre. Many times this is immediately noticeable when you squeeze the paint from the tube. This can also depend on the brand and how the paint is manufactured. Some manufacturers will use more oil with their pigments, and cheaper brands will add other fillers which can impact the finished appearance.

The challenge this presents is that your painting may dry with an uneven surface. Some areas will look very glossy, while others will dry matte. That is where oiling out and varnishes come into play.
Given all the variables it's not always easy to tell which colors have more oil content, and it's nearly impossible to provide a comprehensive list. The best way to tell is to paint a swatch of any color you buy on some canvas and see if it dries glossy or matte. Eventually, you will end up with a list of colors and brands that suit your preference.
Achieving Gloss with Paint Application
Even if the oil paint you are using has a higher level of oil content, that alone will not necessarily mean your paint will dry with a glossy look. How you apply the paint is another variable that can affect the final look of your painting. If you apply your paint in thin layers, scrubbed on with a bristle brush or even thinned with a solvent, it's very likely to dry with a matte finish. Thicker applications of paint are more likely to dry glossy since you are not spreading the oil around over a larger area.
Stick to Fat Over Lean to Achieve Gloss
Speaking of paint application, if you are applying multiple layers of paint, be sure to follow the fat over lean principle. This basically says that any subsequent layer of paint should have at least or more oil content than the previous layer. So if your first layer of paint has a significant amount of oil in it, you will need to make sure the next layer has at least the same amount of oil to prevent sinking in.
Sinking in is an ugly, desaturated, matte appearance that develops in your painting after it has dried. It happens when the more oily layer of paint underneath sucks out the lesser oil content of the layer above. It's usually best practice to make sure your initial layer of oil paint has very little oil in it. Do this by thinning it with a solvent or scrubbing it onto your canvas thinly with a bristle brush. Then gradually increase the oil content on subsequent layers. You can also achieve this by making sure the layers on top are thicker than the layers beneath.
Use Mediums to Achieve Gloss
There are many mediums on the market that when added to your paint will cause it to dry with a glossy look. Two of the most popular are Galkyd made by Gamblin, and Liquin made by Windsor & Newton. Gamblin also makes a non-toxic safflower painting medium. Adding a little bit of one of these mediums will increase the gloss of your painting. Just remember that these mediums are usually oil-based and therefore fall under the fat over lean rule mentioned above.
Paint On a Less Absorbant Surface
If you paint on an absorbent surface your paintings are less likely to dry glossy. Absorbent surfaces will suck the oil out of the paint resulting in a matte finish.
More absorbent surfaces generally include those primed with gesso, alkyd, and unprimed canvas, wood, or paper. Less absorbent surfaces are those that are oil-primed or lead-primed. Gamblin Ground provides a good, non-absorbent painting surface that you can apply to prepared canvas or wood.
Single-primed surfaces are more absorbent than double or triple-primed. So when considering the variable of your painting surface, your best chances at achieving a glossy surface would be quadruple oil or lead-primed linen or several layers or Gamblin Ground.
Bringing Back the Gloss by Oiling Out
Chances are that no matter what steps you take to achieve gloss, at least some parts of your painting will dry less glossy than others. Some parts may actually sink-in (see above), causing a blotchy surface of both gloss and dead, matte areas. If and when this happens never fear, all you need to do is oil-out your painting.
Oiling out is the simple process of applying clean oil onto the surface of your painting once that painting is dry to the touch (see below for more on making sure your painting is dry enough). The classic method is to thin the oil with artist-grade mineral spirits or turpentine at a ratio of about 1:1. While you can use linseed oil, it has a tendency to yellow over time. Try safflower or walnut oil which is more resistant to yellowing. Or better yet, use Gamblin's Galkyd in place of traditional oils. Galkyd will dry much faster (usually in less than a day), and won't yellow.
Oiling out gives your painting a permanent, protective surface and restores an even appearance to the painting. The nice thing about oiling out is that it allows you to rework the painting if you so choose. In fact, many artists will do thin applications of oiling out between working sessions if the surface has dried with an uneven finish.
If you're certain that your painting is complete and you want more gloss without varnishing, simply increase the amount of oil or Galkyd ratio to mineral spirits. Some artists may do a 90/10 Galkyd to solvent ratio. I've seen some artists apply Windsor & Newton's Liquin straight out of the bottle onto a dry painting surface to even the finish.
One thing I've noticed about oiling out is that over time an oiled-out surface can loose a bit of its luster and appear less glossy than when it was first applied. Which brings us to our next solution.
Varnish Your Oil Painting
Varnishing your oil painting when it's dry is the surest way to achieve a permanent glossy finish. A good coat of varnish will eliminate most any dull spot and give the surface an even finish. There are many different varnishes on the market by numerous manufacturers, and some even offer matte, satin, as well as gloss finishes.
If you are not certain whether your painting is finished or not, you will want to use retouch varnish rather a finishing varnish. Retouch varnish allows the painting to breathe or oxidize (the process of drying), and gives you the opportunity to add additional layers of paint, all while giving it a temporary gloss. Retouch varnish is an alternative solution to oiling out when sinking in occurs. I personally prefer oiling out over retouch varnish because you don't have layers of varnish between layers of oil paint, but retouch varnish is a time-tested method, as is using certain varnishes as a medium for oil painting.
If, and only if you are certain your painting is finished, you can then apply a final varnish such as Damar varnish. This will provide an even, glossy surface. While Damar varnish has been used for a long time, it will start to yellow after about 20 years. You also need to give your painting about a 6-month drying time before you can apply Damar varnish, depending on how thick you paint.
Another alternative is Gamblin's Gamvar varnish. I like to use this varnish because it provides a glossy protective layer (they also have matte and satin varnish), but it's formulated not to yellow, it can be applied after just a couple of weeks of drying if you paint thin (a couple of months if you paint really thick), and it can be removed with mineral spirits in the event that you need to make some touch-ups to your work.
Whatever varnish you use, be certain that your painting is completely dry. Follow the manufacturer's recommendations on when and how to apply the varnish. If you're using retouch varnish or you're oiling out, your painting only needs to be dry to the touch. But watch out for pockets of thick paint that may still be wet underneath. Linseed oil dries by forming a skin over the top and later drying underneath. If that skin is thin and it's covering a pocket of wet paint, your brush could break the skin open causing a big mess. This has happened to me more times than I'd like to admit. Gently press on any thick paint strokes with your fingernail to test how thick the skin is before you apply retouch varnish or you oil out.
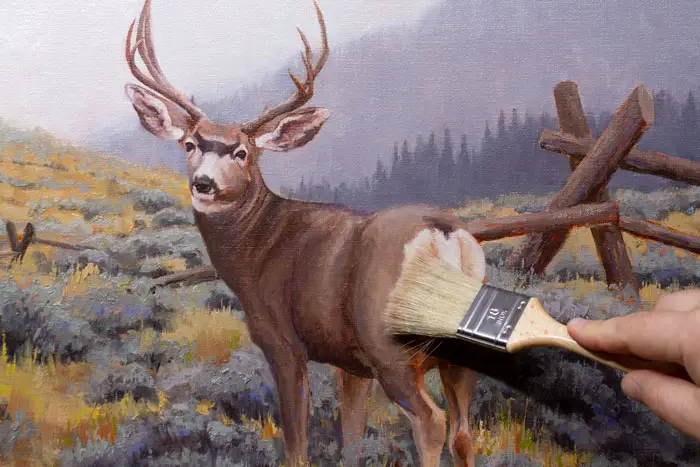
Most varnishes are applied with a brush. I like to use a softer bristle brush and apply the varnish or oil-out solution with gentle, rapid circular motion, similar to a gentle scrubbing (which is why you need to make sure those thick pockets of paint won't break open). This approach is good because it gets the varnish into all those little crevices without using a ton of varnish. Varnish and oiling out are better applied in thin layers rather than one thick layer. Also, be sure to use a different brush for varnish versus oiling out.
Jason Tako is a nationally known fine artist who specializes in western, wildlife, plein air, and Historical Native American subject matter. He spent his learning years sketching the wetlands and wooded areas of rural Minnesota. He has been featured in Plein Air Magazine and Western Art Collector Magazine and he was the Featured Artist for the 2020 Southeastern Wildlife Expo. See his work at www.JasonTako.com and his demonstrations on his YouTube Channel.
Warning: Undefined array key "preview" in /home3/mysketc2/public_html/wp-content/plugins/oxygen/component-framework/components/classes/comment-form.class.php on line 75
Warning: Undefined array key "preview" in /home3/mysketc2/public_html/wp-content/plugins/oxygen/component-framework/components/classes/comment-form.class.php on line 79