
How to Quickly Sketch People In 10 Easy Steps
The human figure is one of the most beautiful and complex forms in nature, which makes it a challenge to draw. So how does an artist quickly and easily create sketches of people? In this article, I'll show you how to sketch people with this quick and easy step-by-step process.
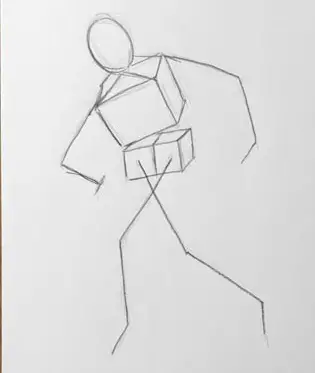
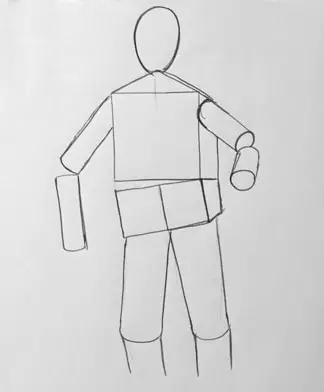
Start By Drawing A Square to Indicate the Torso
The first step in quickly sketching the human figure is to simply draw a square. You will want to be mindful of the square's size since this not only represents the torso, the largest mass of the figure, but it's also what everything else will be measured against.
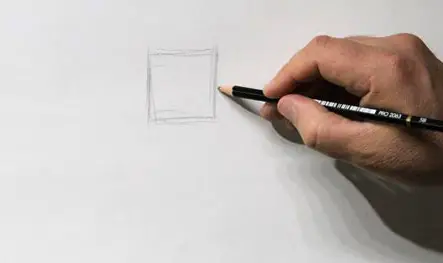
You don't need to obsess about the size, just try to get it close to how you think it should be. This may take a little practice but after a few tries you will get it down. At this beginning stage, you will want to draw everything very lightly in case you need to make adjustments.
Also, try to think about the angle and pose of the figure you are sketching. Are they bending over, slouching, running? This will affect the angle of the square you are drawing. To keep this demonstration simple I'm drawing a figure from the front standing fairly straight up.
The length of the torso will be our primary unit of measurement to compare the rest of the figure's body parts. We will call this measurement a torso length.
Draw Two Smaller Squares To Indicate the Hips
Next draw two squares, connected horizontally, to indicate the hips. Both of these squares should be about a quarter the size of the torso square, which means that the length of one side of the smaller square will be one half of the torso length.
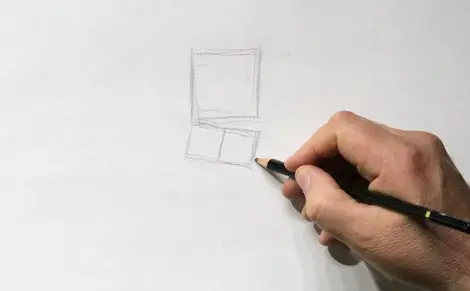
Is many cases you will want to make the hip squares slightly angled from the torso square. Most people tend to slightly shift their weight to one leg when standing, which puts their pelvis at a slight angle. This will look more relaxed and natural.
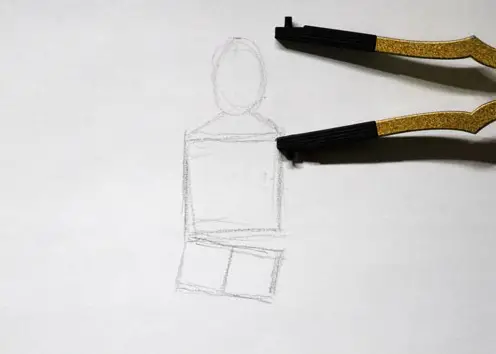
Draw A Triangle To Represent The Shoulders
On the top of the torso square, draw a fairly flat obtuse triangle to indicate the shoulders and neck area. Depending on the angle of the shoulders and clavicle, you may need to draw a triangle that is more scalene.
Draw An Oval to Represent the Head
On top of the triangle draw an oval to indicate the head. Note that the distance from the top of the torso square to the top of the oval should roughly be one torso length.
Draw Two Line Segments to Indicate the Arms
Next, draw two line segments on each side to represent the arms. The first segment will be from the shoulder to the elbow and the second segment from the elbow to the hand.
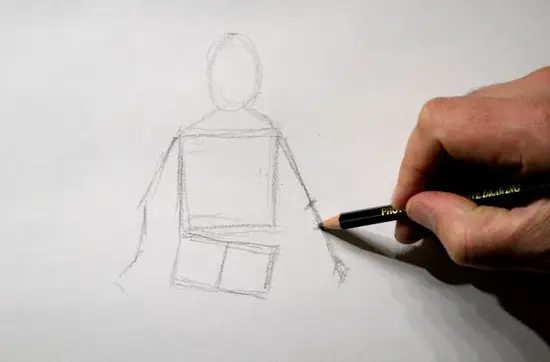
Each segment is approximately one torso length if the arm is extended straight up, down or to the side. If the arm is somewhat forward toward the viewer (or backward) as it is in my example, then the length will appear to be shorter. In this case, eyeball it as best as you can and make an approximate judgment.
Draw Two Lines Beneath the Hip Squares for Legs
Starting in the middle of each hip square, draw lines that are about 1-1/2 torso length. This is the thigh that goes from the hip area to the knee. Now draw another line the same length from the knee to the feet. The feet are generally included in this segment.
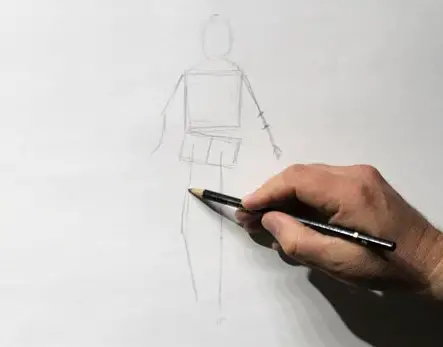
As with the arms, these measurements are for legs that are perfectly straight up and down. If the legs are bent, then these lines will be shorter depending on how deep the bend is.
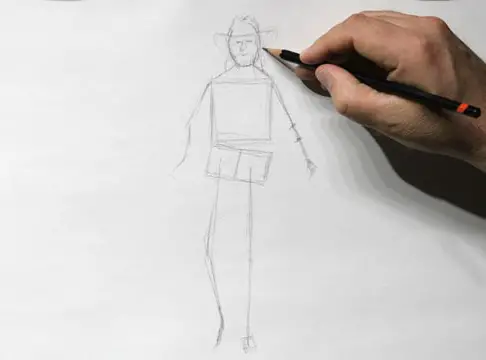
Add Details to the Head
You should not have a glorified stick figure. The different with stick figure as compared to ones you may have drawn in Kindergarten is that this one has proper proportions from which to work with. One of the biggest mistakes with drawing the human figure is incorrect proportions.
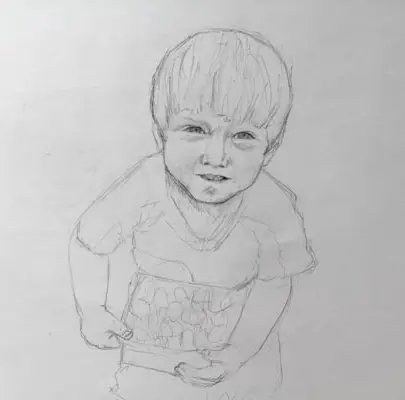
Start with the head and add a little more shape to the oval. Human faces have an overall oval shape to them but are not a perfect oval. Men will especially have straighter features. Roughly indicate these features. Add some quick lines for eyes, which are generally in the center of the oval. Sketch a triangle shape for the nose and another line for the mouth. Now add some hair. In mine, I indicate long hair and a cowboy hat.
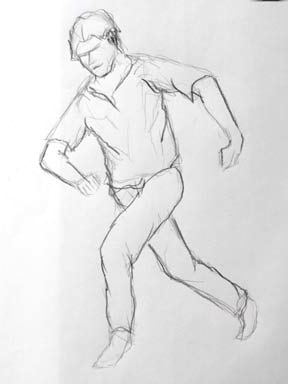
Add Form To the Arms, Legs and Torso
Using the lines as a guide for length and angles, I add form to the arms, legs, and torso. Since the arms are slightly bent in my figure, I use the curved shape of the ends of the shirt sleeves to indicate the cylinder volume of the arms. If the arms were straight down you would not see this curve.
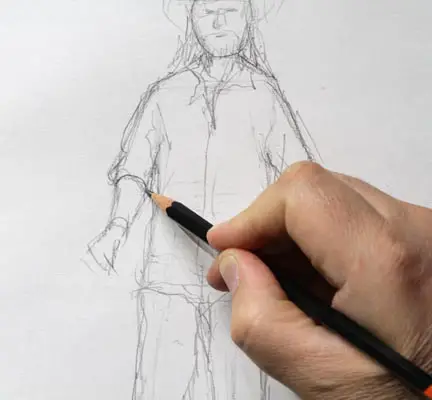
Use simple shapes to indicate the hands. Don't worry about fingers, just get the general shape of the entire hand. Think of the hand as a rectangle that can bend in two or three places.
I have my figure's shirt untucked which covers the top of the legs. The lines for the legs are drawn around the stick-figure legs. Keep in mind that these are essentially cylinders when you are drawing them. Simple shapes are used to indicate shoes.

Once the arms, legs and torso have some volume I erase the stick-figure lines and boxes.
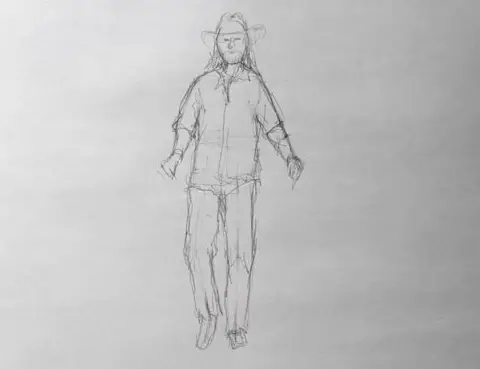
Roughly Sketch Folds and Clothing Details
You are almost done now. Roughly sketch some lines to imply folds in the clothing. Keep the overall shapes of the figure in mind when doing this. On my figure, I add a collar, buttons, and folds near the joints to emphasize the form.
Add Some Shading
The last step is to add some shading to imply color and more importantly form. This is where you can really stylize your figure. Use the side of your pencil so you can create larger strokes of shading. You can also use the point of your pencil for more detailed areas.
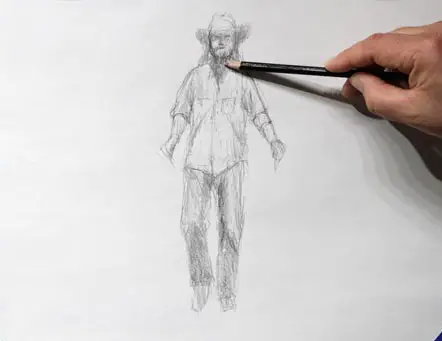
At this point, you can refine the sketch as much as you like. You can use a blender to smooth some of the shading, or leave it sketchy as I did. If the sketch is just preliminary work for a later piece, don't spend too much time on it. Only complete it to the point where you have your idea clearly mapped out.
Other Considerations When Sketching Figures
The steps above are for a figure that is standing straight up and being viewed from the front. If you are going to draw a figure from an angle or a 3/4 view, you need to expand upon this idea and take the three-dimensional aspect into consideration. So the torso square will become a box.
A little trick that will help you to figure out where the center of a skewed box is so you can establish the point of the triangle is to draw lines from each corner of the box. The center of the X will be the center of the box. Then draw a vertical line through the center to determine where the triangle should be.
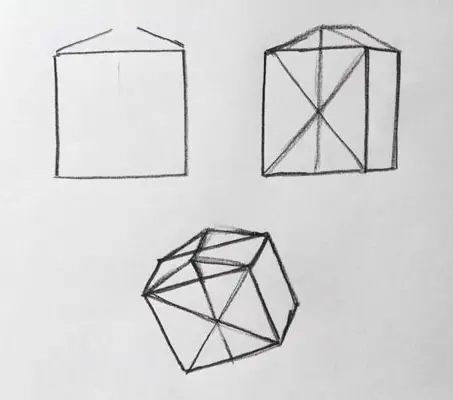
Keep in mind the dimensions of the legs and arms, which are basically cylinders. This will help you visualize their form when sketching.
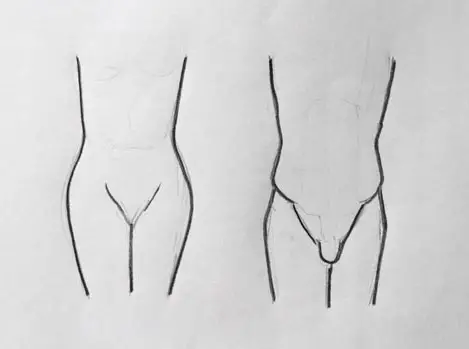
Men, Women, and Children
Men and women have different skeletal structures which is most evident in the pelvis. From the front, the male pelvis bone is slightly taller and more narrow than the female pelvis bone. This results in the female body shape being slightly wider in this area than the male shape. Keep this in mind when drawing male or female figures.
Children are basically compact versions of adults with larger heads in proportion to their bodies, which are more stocky. Their facial featured are more compact and closer together since the skull tends to be larger.
Focus On the Overall Shapes
They key to sketching people quickly is to look at the overall shape their body is creating. A long rectangle will is the overall shape of a figure standing straight up, whereas a figure seen from the side kneeling down to pick something up may be best represented by a triangle.
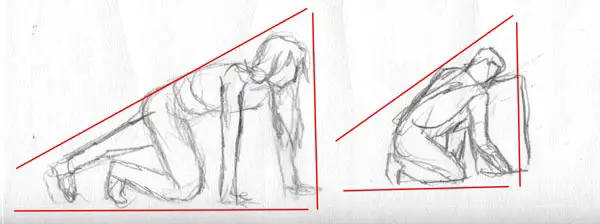
It's important that you learn to see these overall shapes which can act as a type of envelope in which to place the figure. From this point, you are just breaking that shape down into smaller shapes.
What you want to avoid is starting with the details. Do not start with facial features or attempt to capture a likeness. Doing this will lock you into a mentality of drawing details rather than drawing the whole of the figure. Details, and especially likeness are things you should worry about later, if at all.
Keep It Sketchy and Light
Besides seeing the whole, you may want to keep your figures sketchy looking, at least in the beginning, and use a light touch with the pencil. Think of drawing as a series of constant little corrections that are made throughout the process. Each line you draw is not something permanent, it's like a little stick that you can move and adjust as needed.
I also like to think of it like sculpting, you start with a lump of clay and constantly add or take away until you get what you intended.
Keeping your lines sketchy keeps you from getting locked in on what may be a bad line or shape. Whereas if you draw a dark, solid line you may be more hesitant to make adjustments to that line if it's needed. It may also be difficult to erase.
Keeping things light and sketchy is more important at the beginning, especially when you are drawing the boxes and lines since you may want to erase these later. As you progress and develop more confidence you may find your style is not a sketchy look, always be open to what you like and what works best for you.

Why Should You Sketch Figures Quickly?
There are many reasons to sketch people quickly. First of all, sketching people from life is a highly recommended practice, even if you don't plan to have humans as part of your future subject matter. People are complex shapes that move a lot and can assume many different poses. Sketching people from life will empower your skills of observation very quickly.
As implied above, the goal is not to have anatomically precise results, though you can arrive at that with additional refinement and time. The goal of fast sketching is to help you visualize a moment or an idea by capturing only the essentials.
I use quick sketching to rough out compositional ideas for finished drawings and paintings. The questions I ask myself while doing this is what will a figure standing up look like in this spot? Or what about having a figure kneeling in this area? What would it look like if I overlap these two figures? I don't want, nor do I need to spend all day drawing perfect anatomy and details to solve most compositional problems.
Once I have the overall compositional idea worked out, I can then fuss with precise anatomy and details. But these things don't mean a hill of beans if the overall composition is poor.
Practice Sketching People
Bear in mind that formulas will only get you so far. If you would like to get really good at sketching people, then you must sketch people as often as possible. Keep a sketchbook with you at all times and make a commitment to put something in it every day.
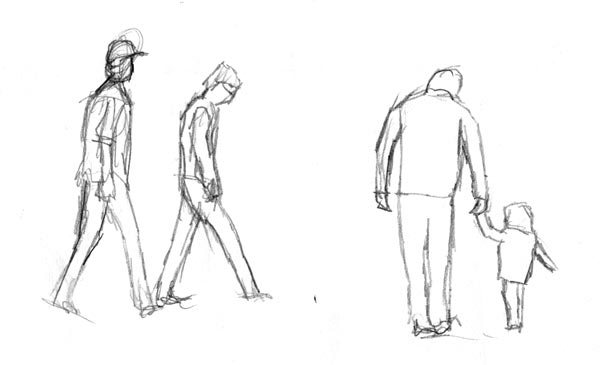
Some ideas for sketching people are sketching co-workers during lunch break, sketching people at restaurants, parks, shopping malls, sketch family members, sleeping children, etc. To practice sketching the figure quickly you don't need to be close to them, which is nice because you don't want people to notice you staring at them.
You can also sketch from photographs, but the danger is that since photos never move, you may be tempted to do a detailed drawing rather than sketch the essentials. If you use photos time yourself. Start out doing three-minute sketches, then work your way down to one minute and even 10-second sketches. Another option is to sketch figures in videos. While in both cases you are seeing a 2-D image, it will give you good practice.
Please leave your questions or comments below and keep sketching!
Jason Tako is a nationally known fine artist who specializes in western, wildlife, plein air, and Historical Native American subject matter. He spent his learning years sketching the wetlands and wooded areas of rural Minnesota. He has been featured in Plein Air Magazine and Western Art Collector Magazine and he was the Featured Artist for the 2020 Southeastern Wildlife Expo. See his work at www.JasonTako.com and his demonstrations on his YouTube Channel.
Warning: Undefined array key "preview" in /home3/mysketc2/public_html/wp-content/plugins/oxygen/component-framework/components/classes/comment-form.class.php on line 75
Warning: Undefined array key "preview" in /home3/mysketc2/public_html/wp-content/plugins/oxygen/component-framework/components/classes/comment-form.class.php on line 79