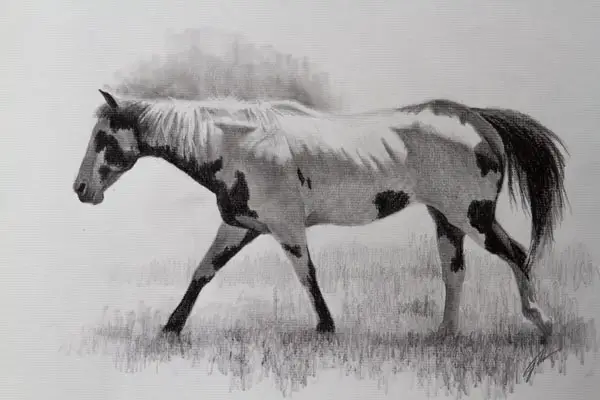
The Best Way to Draw a Realistic Horse in 8 Steps
There are many online tutorials that show you how to draw a horse using circles and boxes. The problem with this approach is that it doesn’t usually result in a realistic-looking horse. So how do you draw a realistic horse? I’ll break it down for you into 8 overall steps and examine each step in detail.
Obtain Good Reference Photos
Despite what many people think, all experienced artists know that you must have good reference material to draw something realistically. While Mozart was a musical anomaly who could play a tune from memory after hearing it only once, the notion that all artists can draw anything accurately and realistically completely from memory is completely false.
Sure, some artists after years of working with very limited subject matter may be able to draw that subject fairly well strictly from memory, yet even they will usually use reference material when creating final work.
Make sure that your photos are of good quality. Working with fuzzy photos where the horse is way in the distance is almost like not having a photo at all. If you are drawing just for practice you can legally use someone else’s photo that you find online without obtaining permission, just make sure you never sell or publish that artwork in any way, even on social media.

For this demonstration I used Strathmore 11 x 17-inch charcoal paper 300 Series. While the slightly rougher texture is meant for charcoal, it works good for pencil and seems to accept subsequent layers of graphite without burnishing.
Click here to watch a video demonstration of this drawing on my YouTube channel.
I used a 2H pencil for all of the preliminary and outline work, applying little pressure. I didn’t start with a softer pencil until I began the shading process. At that point, I switched to B and 5B pencils.
Other tools utilized were a kneaded eraser, several blending stumps, and an electric eraser. The electric eraser is great for precise erasing and for lines that are difficult to erase. See the Resource Page for more info about this great tool!
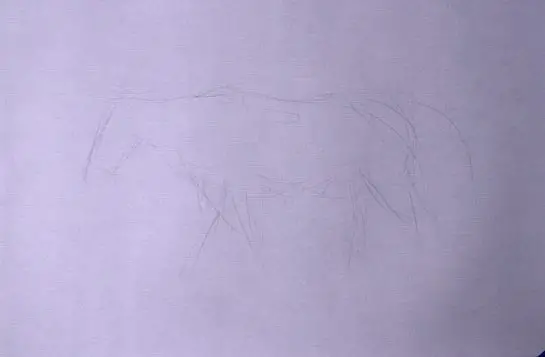
Sketch a Rough Outline to Indicate Placement
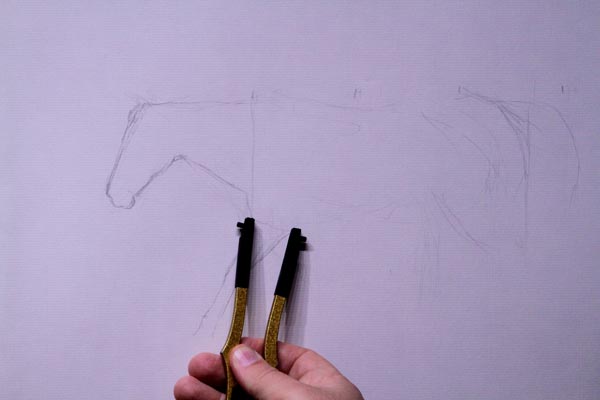
Start your drawing by very lightly sketching a rough outline of the horse to indicate its placement on the paper. This does not have to be perfect or even really look like a horse, it should just be a general idea so you have an approximate start and endpoint and to make certain it will all fit onto the paper. Do this very lightly with an H-grade pencil so you can easily erase these lines later if desired.
Measure the Primary Anatomical Features
The most important aspect to getting a good drawing is proportions. Showing beautiful muscle tone or minute detail doesn’t mean anything if it’s in the wrong place. The biggest flaw with many online how to draw a horse tutorials, even those most highly ranked by Google is that the anatomy is incorrect and this is almost always due to incorrect proportions.
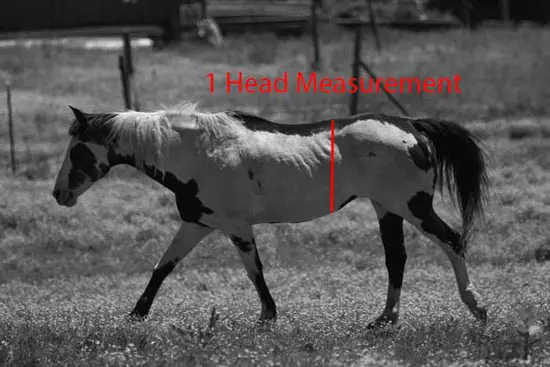
You can solve this problem by taking the time to measure and compare the primary anatomical features of the horse you are drawing. Do this by measuring one part of the horse's anatomy, and then use that measurement to compare everything else. In this demonstration, I'll establish the size of the horse's head, and then use the length of the head to measure everything else.
Measure and Indicate the Horse’s Head
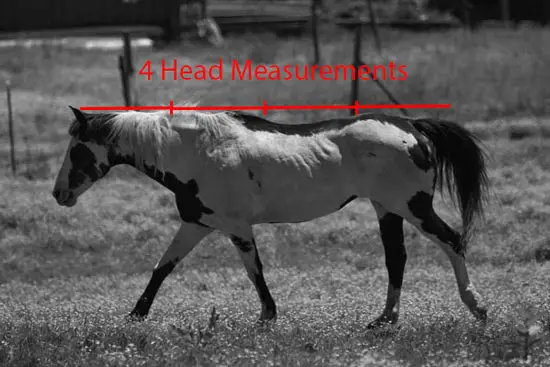
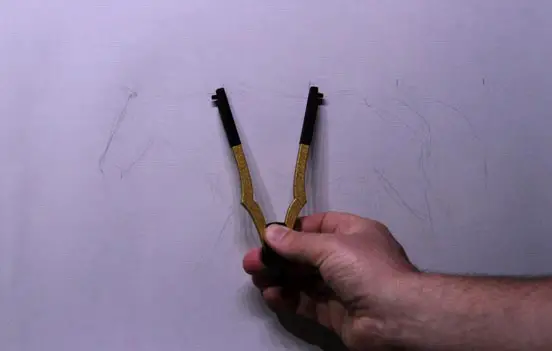
Start by measuring the length of the horse's head from the poll to the bottom of the muzzle in the reference photo using either a drawing compass, ruler, or a pencil. See how many times this measurement goes into the length of the horse from the poll to the back of its rump, just below the dock. Do not include the tail since it’s not part of the essential anatomical structure of the horse’s body.
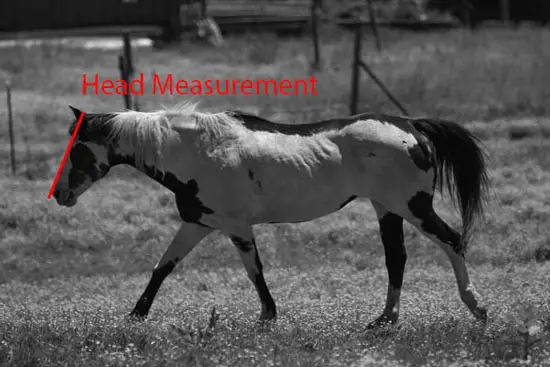
Depending on the type of horse and its pose, the head-length will go into the length of the neck and body just slightly over three times. While this does not give you an exact measurement, it gets you close enough to be able to eyeball the rest.
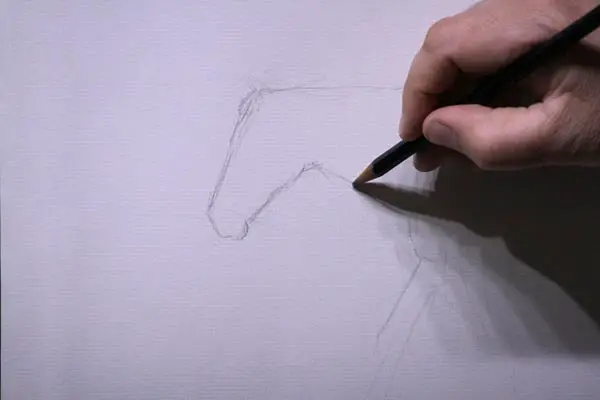
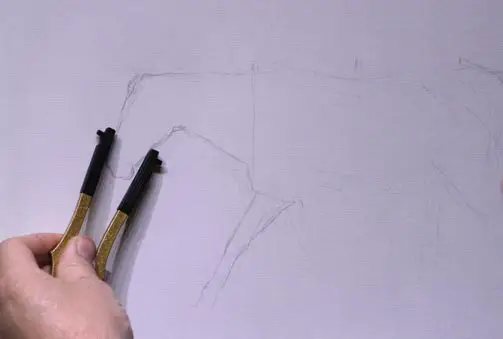
Now on your drawing paper, very lightly draw a slanted line to indicate the top of the horse’s forehead, from the poll to the bottom of the muzzle. Try to get is as close as possible to the slant of the horses's head in your reference photo. It doesn't have to be perfect but it should be close.
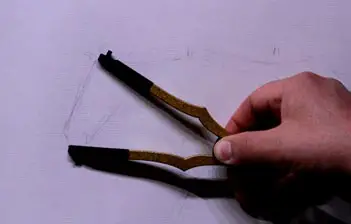
Now measure the length of this line with a drawing compass, ruler, or pencil. Using this measurement, repeat the length of this line until you get to the dock area of the horse. Basically you are just repeating on your drawing paper what you did with the photo. This will tell you how long the overall body will be in comparison with the length of the line you drew for the horse’s head.
In my reference photo, the length of the horse's body, minus the tail, is about 3 and 2/3 the length of the head.
Bear in mind that this above ratio can vary greatly depending on how the horse is holding its head, the angle of the horse in the photo, and the breed of the horse.
Check The Overall Length of the Torso
Now let’s make sure that the entire horse will fit into the rough outline you created. Do this by measuring the length of the horse’s head in your drawing and making marks for this measurement until you have the proper number of measurement intervals that you counted in the reference photo.
If the horse’s body will be too small, make the measurement line of the horse’s head a little longer and repeat the body measurement. If the horse's body will be too big, make the line for the head smaller and repeat. In my example, I had to make the horse’s head a little smaller and remeasure the body length so it would fit. This is key to making sure your drawing isn't too small, or that it will run off the page.
Now that you are confident that the horse will be the right size on the paper, you can refine the head somewhat.
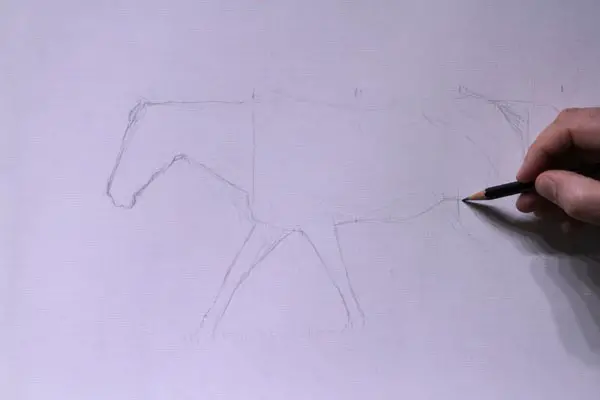
Measure the Draw the Legs and Belly
With the head indicated draw the bottom of the neck. Drawing a line straight down from the first measurement point after the poll, I see the neck ends at the check right before this line. This location can vary depending on the angle of the head and neck, and the breed of the horse.
Now measure the front legs. In my reference photo, using the measurement of the head, I see that in the reference photo that the distance from the chest to the Sesamoid bone is equal to the length of the head.
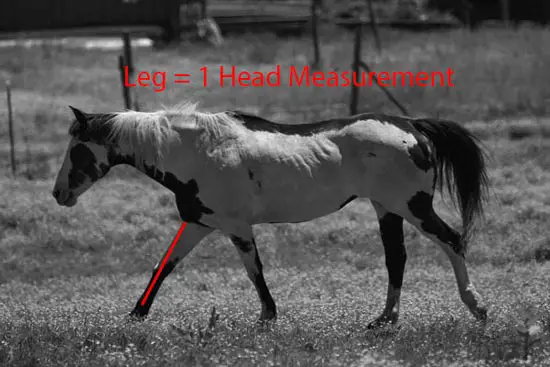
Paying careful attention to the angle of my lines, I rough in the leg. When you are drawing the leg, pay special attention to the width and how it tapers as it moves down. Compare the width of the start of the leg with the width of the head. Usually, they match up close to the center of the horse's head.
Next, draw the other front leg which in my photo is slanted toward the back of the horse. While you can measure for this leg, I chose to just eyeball it using the first leg. Double-check the width of the top of the leg with the width of the horse’s muzzle area.
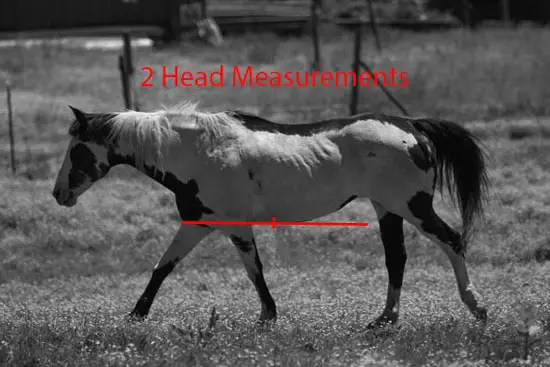
Now, lightly indicate the horse's belly just to get its general placement. Make sure that you have the correct distance between the horse’s front and back legs, which will help reinforce the length of the entire torso. Use the head measurement to determine this. In my drawing, I found that the distance between the front of the horse’s right leg and the beginning of the back leg was almost two head lengths.
You will generally have more success drawing the bottom of the horse's torso and legs prior to the top since measuring the distance between the legs can help you reinforce the correct length of the entire torso.
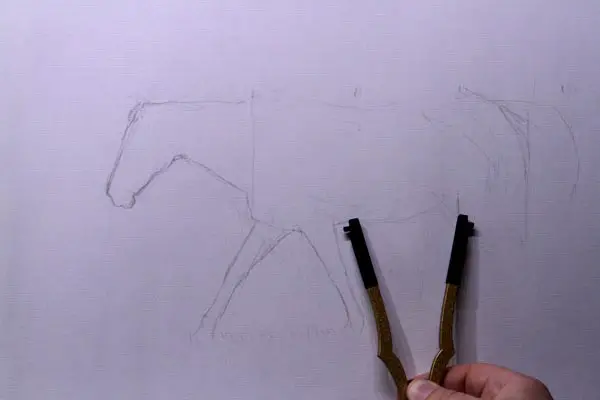
Roughly indicate the start of the back leg. When you do, you should find that it lines up with the measurement you earlier indicated. Don’t draw the entire leg until you are certain that the placement and length of the horse's entire torso is correct.
Confident that the placement of the left leg is correct, you can move onto the right leg (or vice versa depending on your reference photo). I lightly but carefully indicate this leg, still using a 3H pencil. When doing this, be sure to look as much at the negative abstract shape as you do the legs themselves. This will help you judge your spaces and shapes more accurately.
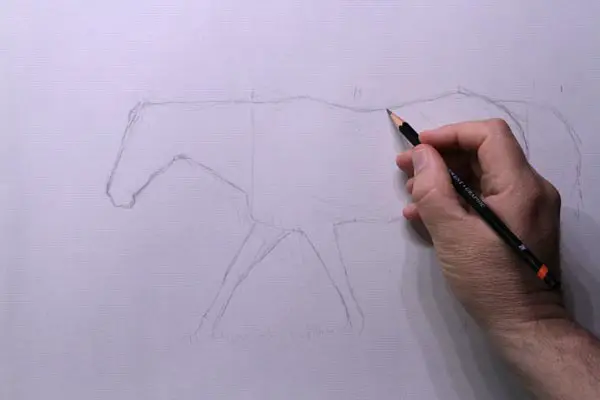
At this point, most of the horse’s outline is drawn which makes it easier to draw the back correctly. Measure the thickness of the torso from the back to the belly and compare it with the head. On my reference photo, the torso at one point is about the same as the length of the head.
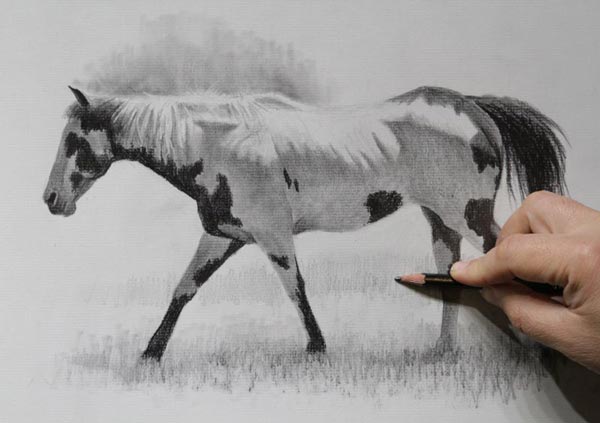
Add Details and Muscular Features
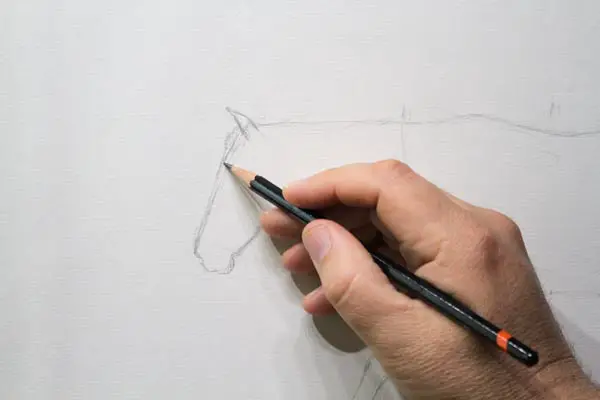
Starting with the head, make slight refinements to the outline, refine the ears, indicate the eyes, and mane. Refinements are made to the outlines of the body and legs. Basically what you are doing is making constant adjustments to your lines until they are as correct as possible. Similar to how a sculptor will rework the clay, adding and taking away until the sculpture is correct.
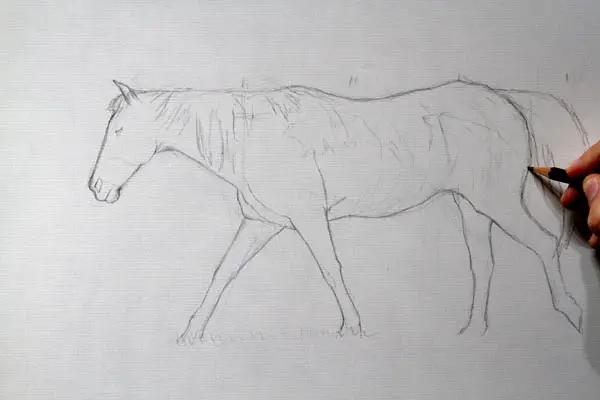
Add some of the muscular features to indicate form. I will even lightly draw some contour lines to indicate three-dimensional form.
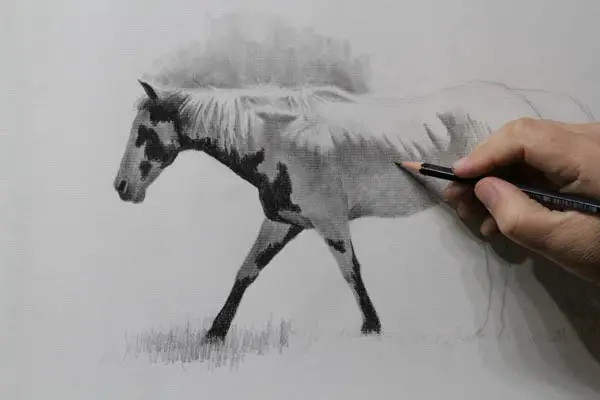
Finish Up by Adding Light and Shading
Next, add shading and indications of color. Pay attention mostly to the light and shadow shapes since that will be the primary way to indicate form. Getting this right will give your drawing a high sense of realism, way more than any amount of detail. Focus on the shapes of light and dark and how soft or hard the edges are on where these shapes come together.
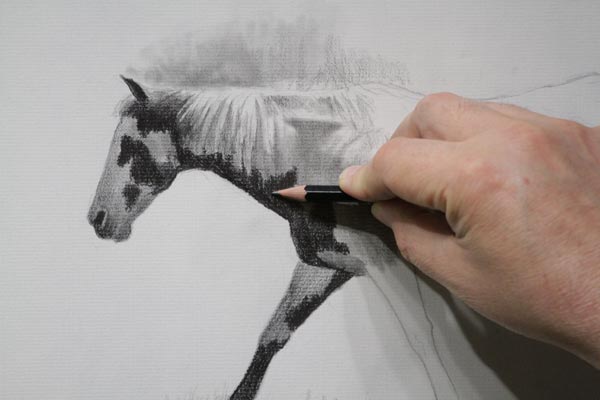
Make any adjustments required to the form, shape and anatomy. Do not make any dark lines or apply significant pressure unless you are completely certain that what you are drawing is correct.
That said, don’t be afraid to make sensible changes that divert from the photo reference. For example, let’s say in your photo the horse’s mouth is partway open and it looks strange. For the sake of artistic quality, you should find another photo from a similar angle where the horse’s mouth is closed and draw the mouth that way.
Other things to consider changing are markings and coloration. In my reference photo, I removed the long black section on the top of the mare’s back and added a black spot on her belly. I also reduced the black spot on her back right leg since I thought having a long dark mass there would not have worked as well.
There is always room for adjustments, don’t feel like you have to be a slave to the photograph.
Additional Notes on Obtaining Reference Photos
To obtain my reference photos I will usually travel into the country and photograph horses on farms and ranches. While this is perfectly legal as long as you remain on the road or other public property, it's a good idea to let the owner of the horses know what you are doing, especially if you are visible from their residence. I've found that most people are fine and even flattered when you tell them what you are doing.
If you are using an SLR camera, it's a good idea to have a zoom lens and a regular lens handy. Some horses are curious and friendly and will get as close as they can, this is where a 50mm lens or less comes in handy. Other times they will walk out into the pasture, which makes the zoom lends necessary.
If you are photographing a horse mostly from the front or back, it's always best to do this somewhat from a distance with the zoom lens. This will prevent distorted foreshortening where the horse's head looks gigantic and the back end looks really small. Photographing with a zoom lens from a distance eliminates this issue.
Take as many photos as possible, but limit them to interesting poses. When horses are in a pasture, they spend much of their time eating with their heads bent down into the grass. You may want some poses like this but you may have to be patient while you wait for the horse to lift its head.
When the horse finally gets into a desired pose, take as many photos as possible. Many times the horse may still continue to chew grass or you may catch a strange-looking leg pose while the horse is walking. You may find that out of 10 photos, only one is good. So the more you take, the more possibilities you will end up with. You can also combine photos of similar poses for even better results.
The best advice I can give is to keep drawing horses over and over again. My first horses were horrible. It was only through repetition and persistence that I was able to draw horses at a level I'm happy with.
Jason Tako is a nationally known fine artist who specializes in western, wildlife, plein air, and Historical Native American subject matter. He spent his learning years sketching the wetlands and wooded areas of rural Minnesota. He has been featured in Plein Air Magazine and Western Art Collector Magazine and he was the Featured Artist for the 2020 Southeastern Wildlife Expo. See his work at www.JasonTako.com and his demonstrations on his YouTube Channel.
Warning: Undefined array key "preview" in /home3/mysketc2/public_html/wp-content/plugins/oxygen/component-framework/components/classes/comment-form.class.php on line 75
Warning: Undefined array key "preview" in /home3/mysketc2/public_html/wp-content/plugins/oxygen/component-framework/components/classes/comment-form.class.php on line 79