Why Oil Paintings Get Dull Spots-And How to Fix It
Artists call it different names, sinking-in, dead spots, ghosting, blotchiness, and it can be one of the biggest frustrations for oil painters. When your beautiful painting dries, certain spots appear dull and devoid of color. So how can you prevent dull patches from happening in your oil painting?
You can prevent oil paint from sinking-in by using a thick over thin or fat over lean painting technique, and by painting on properly prepared substrates to prevent absorption. If sinking in still occurs, the problem can be corrected by oiling-out the painting surface.
Let's take a look at how sinking-in occurs and what to do about it.
What is Sinking In?
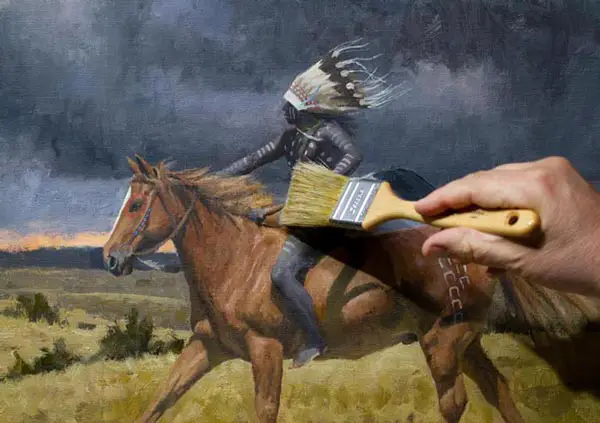
Sinking-in, or ghosting is when the oil in the upper layers of an oil painting gets absorbed into the layer beneath during the drying process. Once the painting is dry, this leaves spots in the upper layer looking very dull, matte, and even devoid of color. This is usually more evident in darker colors.
In most cases, the entire painting surface is not affected, though this can be the case depending on how it happened. Most of the time you will have normal and even glossy spots combined with completely dead spots, resulting in a very uneven appearance.
If you are new to oil painting, this phenomenon may catch you off guard. The good news is this is quite common, even among seasoned professionals, and it's an easy fix.

The Causes of Sinking-In
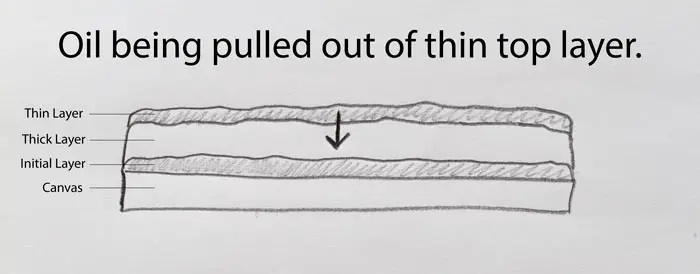
As stated above, what happens during sinking-in is the oil in the top layer is absorbed into the layers underneath, but how does this happen?
The most common cause of sinking-in is the improper application of oil paint, painting thin layers over thick layers, or painting lean paint over fat paint. If you do either of these, you are almost certain to have ghosting in your work. In either of these cases, the higher oil content in the underneath layers absorbs what little oil is in the top layer.
Another cause can be painting on a highly absorbent surface that has not been properly sized and or primed. For example, if you paint on a bare wood surface, the unprotected wood will absorb the oil like a sponge, leaving little in the pigment. This can be prevented by properly sizing and priming the surface, or glue primed canvas onto the surface.
Let's look at each cause in more detail and how to prevent it.
Keeping It Thick On Top
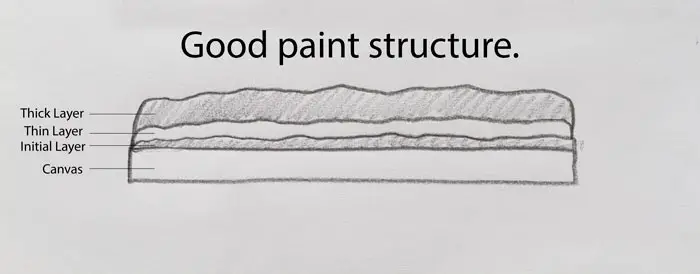
One of the easiest ways to prevent sinking-in is to make sure that your initial paint layers are thin and subsequent layers are thicker. This not only prevents ghosting, but it also results in a more stable painting.
Let's say you like to thin your paint with solvents (mineral spirits or turpentine) to achieve lower viscosity (thinner paint with more flow). This is fine but just make sure that you only do this with the initial layers, using less and less solvent with each subsequent layer.
Once you get to the point of tube consistency (using paint as it comes straight out of the tube), you should cease to use solvent in any subsequent layers.
Bear in mind that you don't need to obsess over how much mineral spirits you are adding or your ratios. No artist uses measuring spoons for this process. Just casually lessen the solvent with each additional layer and keep it out of your top layers.
Keeping It Fat on Top
The second thing you will want to do is make sure that you are painting fat over lean. Fat over lean is sightly different than thick over thin as the term refers not to how thick the paint is, but how much oil it contains. Fat paint has more oil, while lean paint has less oil.
If you are new to oil painting you may think that all oil paint contains the same amount of oil, but this is not the case. Certain pigments have a higher oil content than others and this can also vary depending on the brand of paint. Basically, the shinier the paint, the higher the oil content. Many times you can notice this by looking at the paint itself when you squeeze it out of the tube.
If you stick to the thick over thin principle, you will usually, by default, achieve the fat over lean principle. However, since all pigments do not have the same oil content, there are times when even painting thick over thin may result in some sinking-in.
Some artists will get around this by using an oil-based medium such as linseed oil, Liquin or Galkyd in all of their layers. But this is not necessary as sinking-in can be easily corrected. Also, this may not solve the problem as it's difficult to assess whether you used more or less medium in your previous layers.
While this is not something you want to obsess about while painting, try to avoid using a very oily color, such as Ivory Black, on your initial layers, unless you thin it with a solvent to lessen the oil content. And whatever you do, don't ever thin your initial layer of paint with oil or an oil-based medium such as Liquin or Galkyd. This would necessitate adding tremendous amounts of oil in your subsequent layers.
How to Paint Thin Over Thick
There are times when an artist would need to paint a thin layers of oil paint over a thicker layer. Techniques like glazing require thin paint to be used as a means to shift a color or value. This technique has been utilized for centuries and if done correctly, it will not result in sinking-in.
To properly glaze over thick paint, use oil or an oil-based medium to thin the paint before application. This will ensure that this subsequent layer is fatter than the layer it's being applied to and will prevent sinking-in. You may need to experiment with how much to thin your paint. I recommend testing this on a piece of scrap canvas to make sure the result isn't too shiny or dull.
Make sure you don't thin your painting with a solvent to glaze, unless you are glazing over very thin subsequent layers, and even then you may get sinking-in. Basically the rule is that you can paint thin over thick, but rarely lean over fat. I say rarely because there are caveats even to this rule that we will discuss below.
Substrate Priming and How It Affects Your Painting
One more cause of sinking in that we will look at is painting on very absorbent surfaces. Surfaces like bare wood and untreated paper are highly absorbent. Traditional gesso is also highly absorbent and using it will result in a very matte appearance. Painting on high-absorbent surfaces increases your chances of sinking in.
Acrylic gesso, while less absorbent than traditional gesso, is still fairly absorbent. Oil-primed surfaces are mostly non-absorbent and will result in a glossier finish. With oil-primed surfaces, the more layers of primer there are, the less absorbent the surface will be. So three layers of oil primer will be less absorbent than a single-primed canvas or wood surface.
Oiling Out-The Cure All For Sinking In
So you've done everything right (or perhaps not) and you still have dull spots on your painting. Never fear, that's where oiling-out can come to the rescue.
As stated above, those dull spots don't have enough oil in them. So all you have to do is put more oil in them and they will come back to life again. So let's talk about how to do this.
The first thing you need to do is make sure your oil painting is dry to the touch. It does not have to be completely cured, nor does it require the minimum 3 to 6 months of drying time that some varnishes require. Oiling-out does not seal the surface as some varnishes do, you are merely adding more of what is already there. You also don't need the entire painting to be dry, just the dull part.
Next, you will want to get a hold of some pure, odorless mineral spirits. Do not use the mineral spirits from the hardware store as this stuff usually has additives that you will not want in your painting. Make sure it's an artist-grade mineral spirit like Gamsol or Turpenoid.
The third thing you will need is some type of artist-grade oil or a drying oil-based medium. You can use linseed oil, but remember that linseed oil can yellow over time so you may want to avoid using it over cool, light areas such as white, light blue, or pink. For these areas, you may want to use safflower oil. Keep in mind that if you use a natural oil it will probably take several days or more to dry.
Rather than using natural oil, most artists will use a quick-drying oil medium such as Galkyd by Gamblin or Liquin by Windsor & Newton. These do not yellow and they dry much faster than regular oils. Please note that I have never used Liquin and I'm not sure you can thin it with solvents. I suggest Glakyd by Gamblin as I know this can be diluted with mineral spirits. See the Resources Page for more info.
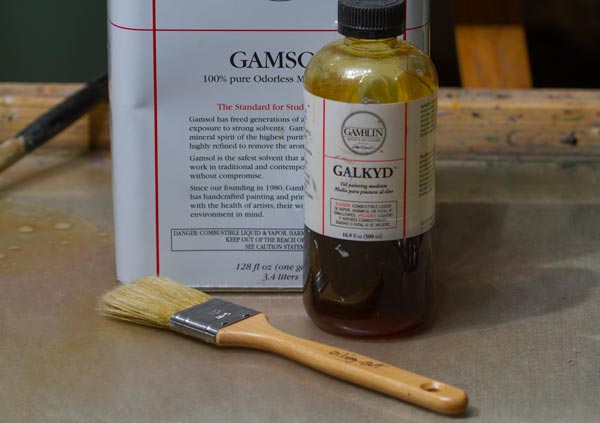
Next you will need is a clean, soft bristle brush to apply the mixture. A 1 or 2 inch brush from the hardware store usually suffices, as long as the bristles are not real stiff. You don't want to damage and open any thicker paint strokes that may still have wet paint underneath.
The last thing you will need is some clean, lint-free cloth like cheesecloth.
Here is a list with the materials reiterated:
- Artist quality mineral spirits
- Artist quality oil or quick-drying oil medium
- Soft bristle brush
- Lint-free cloth such as cheesecloth
- Jar big enough to fit the paint brush
The Oiling-Out Process
In a jar, blend one part mineral spirits and one part oil medium (or oil) to a 50/50 ratio. You can adjust this ratio if you want less gloss or more gloss. I've known some artists to use just oil medium with no solvent. I don't usually recommend this because if you want to paint over it, you will need to add that much more oil to the subsequent layers.
Apply a very small amount of this mixture to your bristle brush, then lightly apply the mixture with a quick, circular motion over the areas that need oiling, or over the entire painting. Leave the painting stand for about a minute, then wipe off any excess with a piece of cheese cloth.

Be sure not to apply too much, just enough to re-saturate the area. If you are unsure, apply a small amount, wait for it to dry, then repeat if necessary until the area no longer looks dull or blotchy.
Once this area has dried, you can paint over it. Just make sure that any subsequent layers have oil or oil medium added to them to prevent the exact problem you just corrected. If you do encounter more sinking in on the same painting, don't stress, just repeat the oiling out process again.
Sinking-In While Painting Wet on Wet
I've been talking a lot about painting in layers, but what if you don't paint in a grisaille-type manner with complete layers? Basically all this still applies whenever you place any paint over previously applied paint, even if it's in just one spot on your canvas.
It can also apply, though not as much, when painting wet on wet. You may think that since you are laying down wet paint over wet paint, it will all just blend together, but this is only true if you blend the new layer with the initial layers. If you are gently laying down a subsequent layer, while it will stick to the previous layer, it will remain its own layer and could result in sinking-in.
There are times when you can break the rules. One of the most common is dry brushing a small amount of thin, tube-consistency paint onto thicker paint with a very light hand, leaving little openings to the previous paint layer. An example of this may be thin winter tree branches. In this case, you are applying so little paint that any sinking-in will not be noticeable, and since it's a thin stroke of already broken paint, cracking should not be an issue.
Using Varnish to Solve Sinking-In
Since sinking-in results in a dull, flat appearance, you may think that varnishing alone will solve the problem. This is not true. Varnishing will mask the problem by adding a glossy surface over the area that is sinking-in, but it doesn't solve the fact that the sunken-in area still lacks sufficient oil content.
Depending on the type of varnish and how much you apply, you may still have an uneven surface appearance. And even more, concerning is that this area is still brittle. Varnish will not re-saturate the paint, it just sits on top. That brittle area will probably end up cracking someday. Get the surface appearance as even as possible through oiling out before you varnish.
Oiling-Out As a Varnish
That brings up another point. You can use the oiling-out method as a type of varnish for your paintings. There are two great reasons for doing this. The first is that you don't have to wait several months for your painting to dry as you do with many traditional varnishes. You can achieve a glossy surface right away. This is great if you have to display the painting sooner than it can be varnished.
Another good reason is that oiling-out provides a permanent, protective layer of oil over the painting. You can still rework the painting, or varnish it. I like this method better than using retouch varnish since if I have to rework the painting, I'm not adding a layer of varnish between the layers of paint.
To use the oiling-out method for a varnish replacement or a pre-varnish treatment, just follow the instructions as listed above. If you are confident that the painting will require no further working, you can skip wiping off the excess oil-out mixture with cheesecloth (unless it's pooling up somewhere, which would result in an uneven appearance). You can also use a higher oil/solvent ratio for a glossier finish.
Even with the higher oil/solvent ratio you can still retouch the painting, just make sure you have a lot of oil in the paint when retouching.
My Oil Painting Process
I thought I would briefly share with you my typical painting process. While it used to happen a lot, I now rarely have occurrences of sinking-in.
I paint on Classeans Oil-Primed Linen and for the most part, and I use Utretch and Gamblin oil paint (see the Resources Page for more info and where to get these materials). Sometimes I will tone the canvas with Gamblin's Fast Matte oil paint, other times I'll just paint right on untoned canvas.
My first layer of paint is almost always thinned with Gamsol Odorless Mineral Spirits. In most cases, I don't make it too soupy. Once the canvas is covered, I'll either reduce the amount of Gamsol that I add to the paint or start adding thin layers without any solvent. Once I add layers without solvent, I cease adding solvent to any subsequent layers.
I will continue to add thin layers of paint, straight from the tube with no solvents or medium. I add thin layers until I'm confident that my colors, values, and shapes are correct. At this point, I may add some thick paint for texture or surface interest.
With this method, I rarely encounter any sinking-in. The exception is when I have to apply dark paint over dried paint. Knowing this I will usually add a little bit of some type of oil-based medium such as Galkyd. If sinking-in does still occur, then it's time to oil-out.
I hope that helps. Please leave any questions or comments below and keep painting!
Jason Tako is a nationally known fine artist who specializes in western, wildlife, plein air, and Historical Native American subject matter. He spent his learning years sketching the wetlands and wooded areas of rural Minnesota. He has been featured in Plein Air Magazine and Western Art Collector Magazine and he was the Featured Artist for the 2020 Southeastern Wildlife Expo. See his work at www.JasonTako.com and his demonstrations on his YouTube Channel.
Warning: Undefined array key "preview" in /home3/mysketc2/public_html/wp-content/plugins/oxygen/component-framework/components/classes/comment-form.class.php on line 75
Warning: Undefined array key "preview" in /home3/mysketc2/public_html/wp-content/plugins/oxygen/component-framework/components/classes/comment-form.class.php on line 79