6 Ways to Hold Your Drawing Pencil-Pros and Cons of Each
How should you hold your pencil while drawing or sketching? There are essentially 6 ways to hold your drawing pencil and there are pros and cons of each method. What grip you use depends on the results you would like to achieve in your drawing.
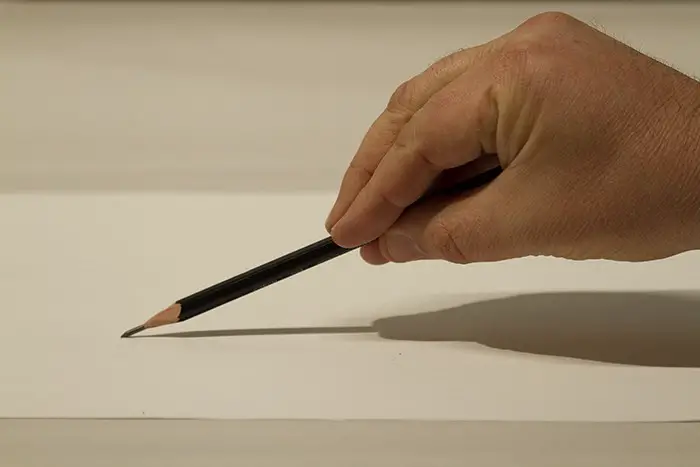
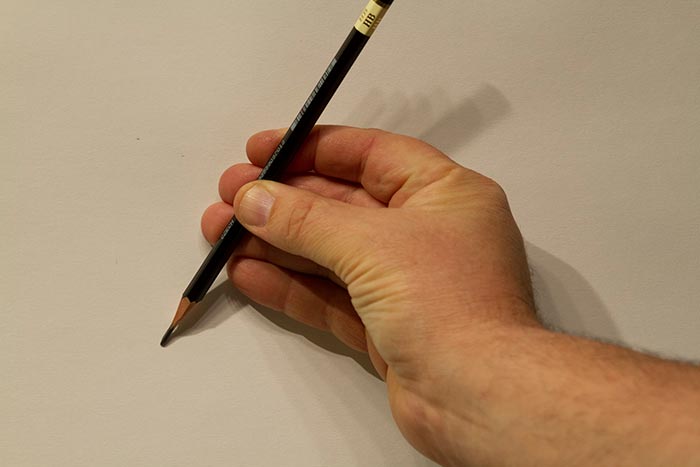
The Writing or Tripod Way To Hold Your Pencil
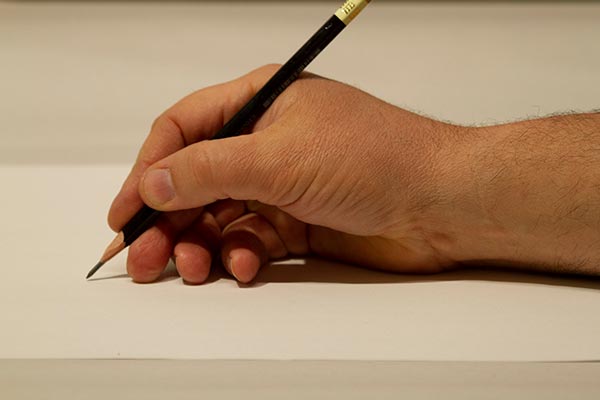
This is the way we typically hold a pen or pencil for writing. Naturally, when we first start drawing we usually resort to this grip. While some artists almost seem to discourage holding the pencil this way, it does have its place. After 20 years of drawing, I still use this grip quite a bit.
Benefits of Drawing with the Tripod Grip
When using this grip, you are generally moving the pencil with either your fingers or your wrist. Because the muscles being utilized are very close to the tip of the pencil, you achieve a finer level of control, which makes it perfect for fine details and precision.
Precision is also achieved by the fact that you rest the side of your palm and perhaps your entire forearm on the table. This restricts movement and gives the artist more control and security, things that are desired by the beginning artist.
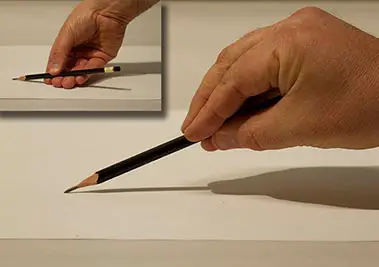
However, with this grip you are not restricted to just finger and wrist movement, you can also use your arm and even shoulder to move the pencil. This will give you a nice combination of fluid movement and control (see below), though you would probably not do this for detailed areas. This method requires you to very gently rest your hand and forearm on the table with very little if any pressure.
Disadvantages of Drawing with the Tripod Grip
Like many things, the advantages can also be disadvantages depending on the context. The high level of control and limited movement can also become a crutch resulting in stiff drawings that can lack emotion. If your style is tight photorealism this may not be an issue, but if you are still finding your artistic voice this can be very limiting.
The temptation for artists is to remain trapped in this method and only see the details rather than the whole. Our minds are interconnected with our bodily movements more than we would like to imagine. Drawing tight little lines all day could create a mental block that will prevent you from seeing the bigger picture, resulting in highly-detailed drawings that contain incorrect proportions and bad composition.
The tendency to press your hand and forearm on the writing surface can result in smudged drawings, especially when using soft pencils. One solution is to use an artist leaning bridge. Another is work strictly left to right (or vice versa if left-handed). I've tried resting my arm on another sheet of paper but if you have a heavy hand smudges will still occur.
Uses for the Tripod Grip
If you are a beginner, you will want to break away from the tripod grip as much as possible to keep it from becoming a crutch. Try using it only for detail work where absolute precision is critical.
If you need to create long, fluid yet precisely drawn lines (such as with anatomy), you can still this grip but just be sure to rest your hand on the paper very gently and use your arm and shoulder to move the pencil rather than your wrist and fingers. This will prevent you from making choppy little marks to represent a line that should be long and graceful. This all requires practice, see my article on sketching exercises for practice tips.
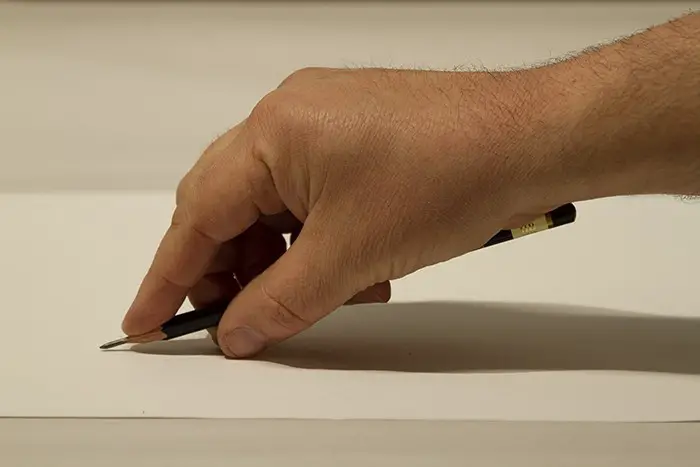
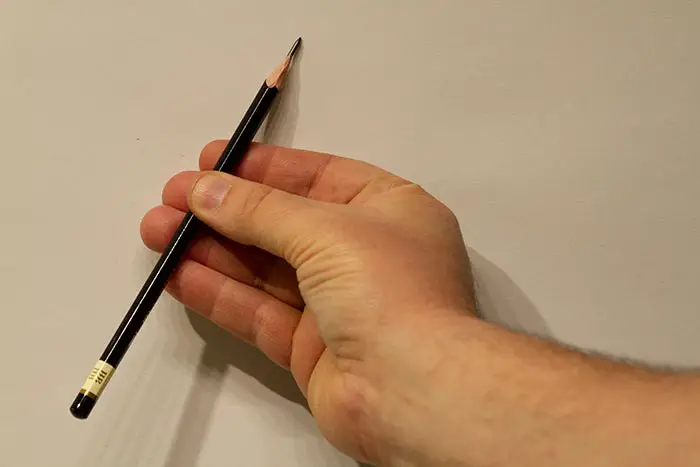
The Pickup Grip Method to Hold Your Pencil
This grip is similar to picking up something up with your fingertips. I use this grip a lot when sketching, especially in the early stages of a drawing when I want to keep my lines loose and sketchy.

Benefits of Drawing with the Pickup Grip
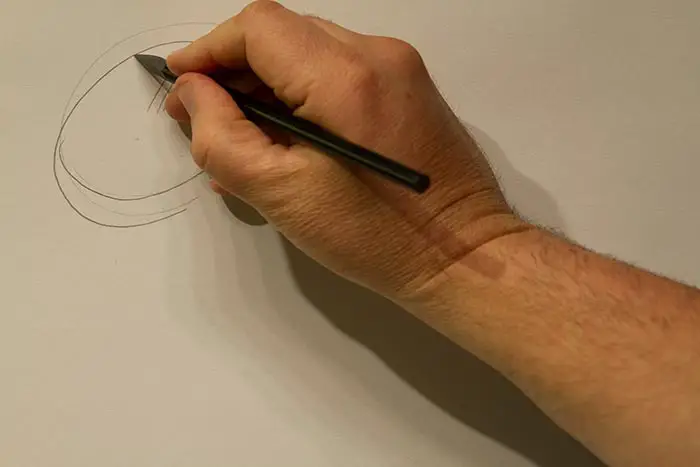
It's difficult to not be loose with this method. The pickup grip forces you to use your entire arm and even your shoulder since it's almost impossible to use just your fingers. This produces long, fluid, sweeping strokes that cannot be achieved with the tripod grip. If you want to loosen up with your drawing, this is a great place to start.
Another reason why this grip forces you to be looser is that in order to get the pencil at an angle where it can make a mark, you have to lift your entire palm and arm off the paper. Gone is the security of resting the side of your palm and making safe little strokes with your fingers. The most you can get away with is resting your thumb and fingertips on the paper, and even then all your movement must come from your arm and shoulder.
This grip is also great for tonal drawing, shading, and covering the paper quickly. Because the pencil is held close to parallel with the paper, it's easier to use the side of the pencil tip and produce broad strokes. Your also less likely to smudge your drawing. I also like this grip for vine charcoal.
The pickup grip allows for the greatest variety of strokes with the greatest ease. You can create broad strokes by keeping the pencil more parallel with the paper or get thinner strokes by slightly tilting the pencil in a more upright fashion so the tip makes contact with the paper (see below).
Disadvantages of Drawing with the Pickup Grip
As to be expected the drawback is limited precision for detailed work. For the beginner, not having the control that the tripod grip offers can be intimidating. Detail work can be accomplished with this grip, but not with the precision of the writing/tripod grip.
Another potential disadvantage is it's bit easier to break your pencil lead with this grip, especially if you sharpen your pencil so as to expose a lot of graphite and you work with a heavy hand.
Uses for the Pickup Grip
Use this grip when starting a drawing to quickly and lightly indicate the rough outlines of your subject. If you are doing gesture sketches this grip is perfect. Hold the pencil lightly and let it barely touch the paper. Start out by keeping your thumb and fingers suspended with only the pencil making contact. Use your entire arm to move the pencil. When more control is needed, gently rest your fingertips on the paper.
This method works great for compressed charcoal sticks. Since these sticks are a lot stronger than vine charcoal or thin graphite, you can apply them with more force and quickly cover the paper.
The Brush Grip Method of Holding Your Pencil
This is another grip that forces you to loosen up and also keeps your hand away from the paper. Easel painters use this grip by employing a long paintbrush which allows them to keep some distance from their painting. This has two advantages, it allows the artist to see more of their canvas at once, and it keeps their strokes loose.
Benefits of Drawing with the Brush Grip
As stated above, this grip can help you stay back from your drawing and see the whole, rather than getting locked into one small section. It also keeps you loose since there is even less control than with the pickup grip.
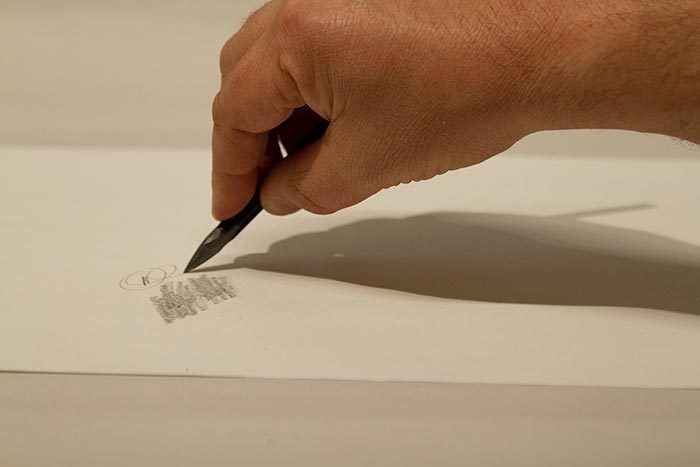
This grip is also good for making light, delicate marks since only the tip of the pencil can be utilized. This will prevent you from making heavy marks that are difficult to erase.
A third advantage is that since your hand has no contact with the paper, you will not smudge your drawing.
Disadvantages of Drawing with the Brush Grip
This grip provides even less control than the pickup grip and arguably the least amount of control among all the grips. Since you do not rest your hand on anything, it can be difficult to make precise curves, long or short with this grip.
I also find it difficult to draw slowly with this method. It seems to lend itself more to quick strokes than accurate anatomical lines. When I try to draw long, slow lines I end up getting rough squiggly lines. This result can be wonderful for painting with a broad brush as it can give interesting edges, but it's usually not desired in drawing, unless you want it to look like your drawing was done on a bumpy car ride.
A third disadvantage is that this technique only utilizes the very tip of the pencil. In order to use the side of the pencil you have to change your grip. No big deal, but something to be aware of.
Uses for Drawing with the Brush Grip
Best done with an H-grade pencil, use this one for starting a sketch to block in light, thin lines that are easy to erase. If you need to draw quick, thin lines such as grass, then this grip will work great! Also, use it to get over your dependence on the tripod grip.
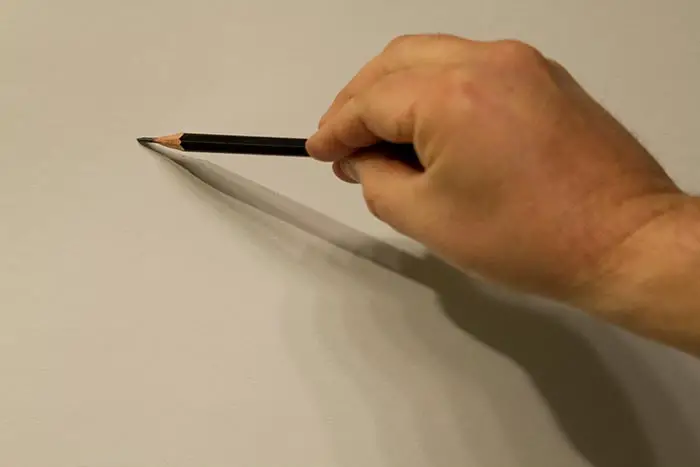
You will probably have more luck if you draw in more of an upright position (see above) rather than on a flat table. Getting used to this method can help prepare you for easel painting.
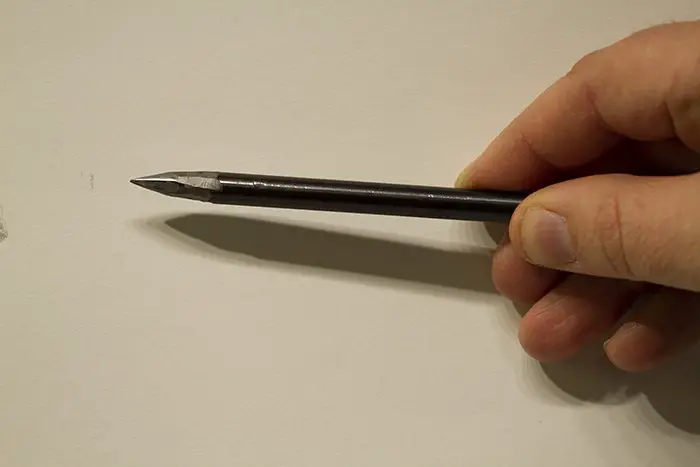
The Overhand Grip Method
This is a combination of the pickup grip and the brush grip. Like the brush grip, your pencil points more straight out from your hand, but unlike the brush grip, you can also use the side of the graphite.
Benefits of Drawing with the Overhand Grip
The most forceful grip, this is great for quickly filling in large areas of the paper with broad, tonal strokes using the side of your pencil or drawing stick. You can support the pencil tip with your forefinger and apply more pressure to make sure you are putting down as much graphite or charcoal as quickly as possible while keeping the graphite intact. You can also make broad, loose strokes using the side of your pencil.
Disadvantages of Drawing with the Overhand Grip
Once again detail is not as easy to achieve, and while you use your arm and shoulder to create movement, it doesn't have the graceful feel that you get with using the pickup grip.
Uses for Drawing with the Overhand Grip
Make sure that you sharpen your pencil in a way that exposes a large amount of graphite. Since you will be using the side of the tip, you want to have a fairly long tip. Apply the graphite or charcoal with vigorous, rapid strokes and cover the area quickly.
While this grip tends to be used for more forceful drawing, you can also experiment with drawing longer, fluid lines with some control by resting your thumb and fingertips on the paper while drawing.
I like to use a woodless graphite pencil or woodless charcoal for this grip (see above and below). Woodless pencils have thick cylinders of graphite that is surrounded by a thin layer of plastic. When sharpened, you have much more exposed graphite to use and the graphite is less prone to breaking. See the Resources Page for more information on these great pencils and where to get them.
The Underhand Grip-Downward Facing Method
Utilized more by easel painters than by draftsman, this grip is used extensively by advanced painters for applying their paint by dragging their brush across the canvas with the lightest touch possible. It is also used by Spencerian calligraphers for flourishing.
Benefits of Drawing with the Underhand-Downward Facing Grip
For the pencil artist, this grip lends itself well to circular movements resulting in thin, graceful lines. The use of your arm and shoulder gives you large, graceful movements, while gently resting the side of your palm on the paper gives you some stability and control.
Disadvantages of Drawing with the Underhand-Downward Facing Grip
Because the pencil is held at a higher angle, it is almost impossible to get anything besides thin lines, and detailed work can be very challenging.
Uses for Drawing with the Underhand-Downward Facing Grip
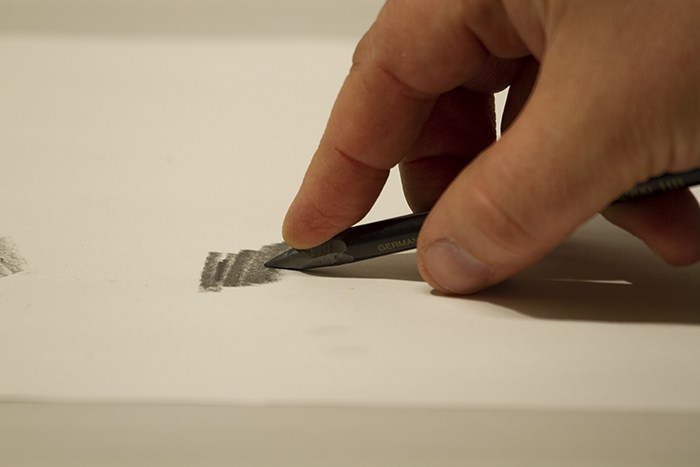
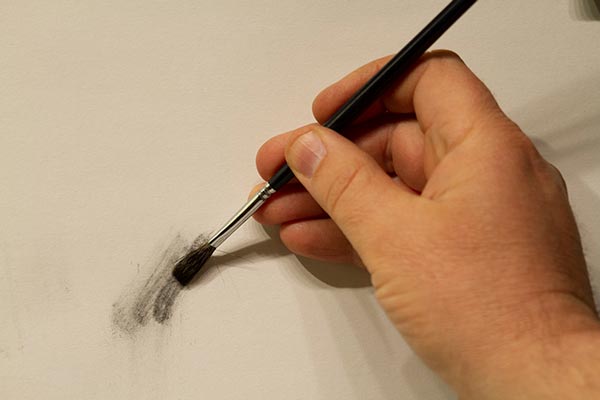
Another great way to loosen up. for gesture drawing or beginning a sketch. Hold the pencil lightly and use your entire arm to create fluid movements and strokes. I personally don't use this one very much for drawing (perhaps I should), but I use it a ton for oil painting. If anything it can prepare you for using a brush. See below how I use this grip to apply charcoal powder with a brush.
The Underhand Grip-Upward Facing Method
I have to admit, I've rarely used this grip for drawing, but some people use it on a regular basis, therefore it should be mentioned. This is basically taking the pickup grip and flipping your hand upside down.
Benefits of Drawing with the Underhand-Upward Facing Grip
Fluid, graceful lines can be achieved with full arm movement. When working upright, this grip will allow you to see more of your work while drawing since your hand is downward with your pencil facing up. You can also rest all four of your fingers on the paper for more control.
Disadvantages of Drawing with the Underhand-Upward Facing Grip
Very awkward to use if you are sitting down and drawing on a flat surface. It seems better suited for working either upright or on a highly slanted surface. Also, having all four fingers resting on the paper can cause smudging issues if using a softer pencil. Of course, you could always raise your fingers off the paper, which would be a great exercise in arm control and movement.
Your Objectives Will Determine What Grip to Use
As implied above, which grip to use really depends on your objectives and your style. If you prefer to do tight, realistic drawings, you will probably find yourself using the writing/tripod grip most often. If you want looser results, then one of the other grips will work best. Also, lighter lines will be more easily achieved by the pickup, underhand, and brush grips, while the tripod and overhand grips will help you produce heavier lines.
My preferred method is to lightly block-in larger shapes using the pickup grip or the underhand-downward facing grip, then proceed to the tripod grip for detailed and carefully rendered lines (moving the pencil with my arm rather than my fingers for longer lines). I will also use the overhand grip for covering large areas quickly with the side of my pencil.
I try to never start a drawing with the tripod grip. If I do, I tend to get too locked down into the details and draw with more pressure, which makes my starting lines too dark and difficult to erase. Starting with one of the other grips helps me keep my first lines light and loose. This makes them easy to adjust by drawing over them with slightly darker lines, or by erasing them.
Practice Using All the Drawing Different Grips
Your first attempts at some of these grips may seem very awkward. Please don't let that stop you from making them part of your drawing arsenal. Moving beyond just using the tripod grip will help improve your drawing. It will allow you to see the bigger shapes and proportions, and draw them more accurately.
A little secret to share with you, it's not all that detail that makes for a good drawing, it's getting the shapes and relationships between those shapes correct. That is what will get you a likeness; detail is just icing in the cake.
Practice all the different grips and settle on at least two others besides the tripod grip. See my article on sketching exercises for ways to get comfortable with these different grips.
Best wishes and keep sketching!
Jason Tako is a nationally known fine artist who specializes in western, wildlife, plein air, and Historical Native American subject matter. He spent his learning years sketching the wetlands and wooded areas of rural Minnesota. He has been featured in Plein Air Magazine and Western Art Collector Magazine and he was the Featured Artist for the 2020 Southeastern Wildlife Expo. See his work at www.JasonTako.com and his demonstrations on his YouTube Channel.
Warning: Undefined array key "preview" in /home3/mysketc2/public_html/wp-content/plugins/oxygen/component-framework/components/classes/comment-form.class.php on line 75
Warning: Undefined array key "preview" in /home3/mysketc2/public_html/wp-content/plugins/oxygen/component-framework/components/classes/comment-form.class.php on line 79