If you are starting out, or even if you have been an artist for a while, it can be challenging to know what skills an artist should have in order to create beautiful and great looking artwork. Know what to work on can be a tremendous help. In this article, we will discuss the 16 essential skills needed to create great artwork and where you should start.
Artists Should Learn Drawing First
Drawing has a broader term than just making a mark with a pencil. It means making the right shape, making that shape the correct size in proportion to the other shapes in the picture, and sticking that shape in the right place.
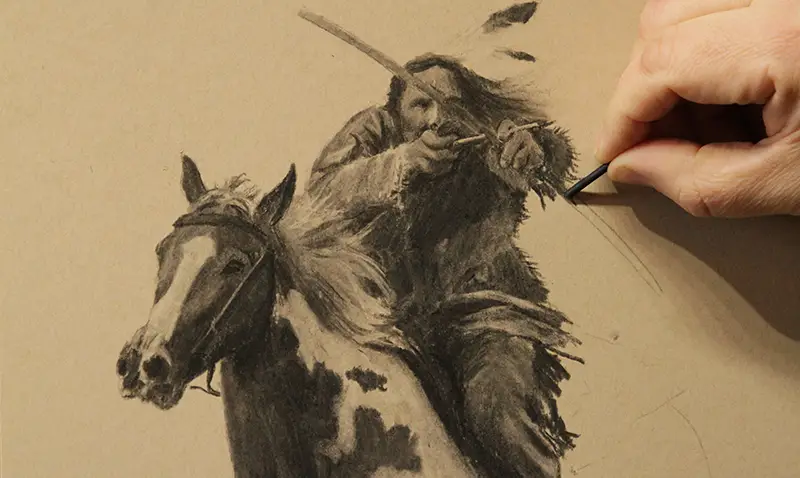
Let's say you have drawn a set of eyes and next you are going to draw the nose. You first need to draw the nose the correct shape so that it looks like a nose and looks like the nose of the particular person you are drawing or painting.
The nose also has to be the correct size when compared with the eyes that you have already drawn. If you were only drawing a nose you could make it whatever size you want as long as it fits on the paper. But since you are combining it with a set of eyes on a face, you now have to make sure it's the correct size in proportion to the eyes. This is accomplished by comparing or measuring the size of the nose with the eyes.
Then you have to stick the nose in the right spot on the face, which of course would be with the top of the nose between the eyes.
This may all seem pretty obvious when you are reading it, but it can be easy to forget this process when actually drawing. Drawing is really all about making shapes and measurements of proportions. And in the context of realistic art it must be done whether you are using a pencil or a brush.
When Drawing Isn't As Essential (But Still Essential)
Drawing, good or bad happens whenever you make a mark on paper or canvas (or anything), regardless of whether you are drawing a person's face or a simple landscape. But some subject matter requires a higher level of draftsmanship than others.
Drawing country landscapes (while they require some sense of proper linear perspective and a tremendous amount of aerial perspective) is not nearly as demanding as drawing a portrait. If you move a tree branch down an inch it probably won't be an issue; if you move the nose of a beautiful woman down an inch (or make it too big or small) it's a very big deal. So depending on what your subject matter is will determine how refined your drawing skills should be.
Drawing is Where It All Begins
For the representational artist (one who tries to paint some semblance of visual reality), drawing is the most fundamental skill you can acquire. It doesn't matter how beautiful the color, how proper the value, or how sophisticated the edge if it's stuck in the wrong place or its the wrong size.
As stated above, your subject matter and style may not demand absolute precision. Monet's paintings were all about color and had very little draftsmanship; John Singer Sargent's work was the complete opposite. But you must acquire the level or drawing that your subject matter demands.
Where To Start Learning to Draw
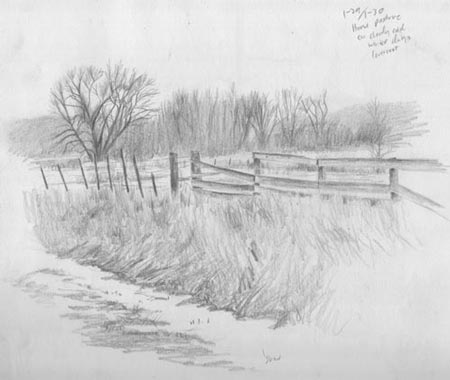
The best way to learn how to draw is to draw. Draw all the time when starting out, and draw anything you can get your hands on; anything that will challenge you. I have an article about choosing the right subject matter to improve your drawing skill.
I highly recommend The Charles Bargue and Jean-Leon Gerome: Drawing Course, especially if your subject may include the human figure. It's actually a book that is a collection of drawing plates that were used extensively in the 19th century to teach students very refined drawing skills. There is also The Natural Way to Draw by Kimon Nicolaides, the book that got me started, and for drawing with paint, Richard Schmid has a great chapter in his book Alla Prima II. All three can be seen in my article Books that Changed My Artistic Life.
Learn Values Before Color
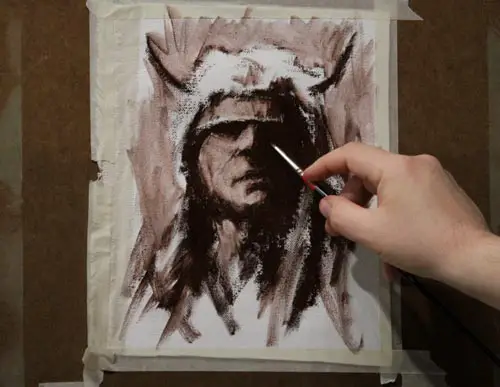
Values are the lightness and darkness or either a gray or a color. It is the second most important thing to master since it is the dominating principle behind contrast. Contrast is the reason why we can see anything at all.
This is illustrated by the classic joke about showing a blank canvas and claiming its a painting of a polar bear in a snowstorm. While obvious hyperbole, it does illustrate that you could not see a completely white object if it were surrounded by a completely white background. And this is because it would completely lack contrast.
But values go much further than just defining objects and shapes of light and dark. A proper understanding and use of values will give your work a three-dimensional look. When representational artwork looks flat, it's almost always because of incorrect use of values. The darks are not dark enough, or they are too dark. And the lights are not light enough or they are too light. Values can be very elusive to the beginner.
Color Has Value
Values are extremely important when using color. It can be argued that they are more important than the color itself. Each color has its own value, which is how light or dark the color is. Blue can be dark in value, but it can also be light by adding white. When artists are having issues with color it can usually be attributed to improper value.
Working With Values
The painter should remember that the full range of values are usually not required to make a good painting. The most intense light and dark (and chroma) should be avoided until the end and used only sparingly as an accent. This will give the painting more harmony. The most beautiful paintings usually have a very limited range of values.
One trick that I use when plein air painting (painting on location) or even when using photo reference in the studio is to look at my subject and my painting through a piece of red transparent pexiglass. This turns all of the colors into values and allows you to see which parts of your painting may be too light or dark as compared with the subject matter.
One of the most thorough treatments of values that is easy to understand is given by Richard Schmid in his book Alla Prima II. See my past article to learn more and where you can find his book.
Understand How to Use Color
Color is one of the fundamental reasons many people take up painting. It's beauty can be almost seductive and for Impressionist painters it's probably the sole reason they paint. Color is also the thing many artists struggle with the most. As stated above, when there is a color problem it can usually be attributed to incorrect values.
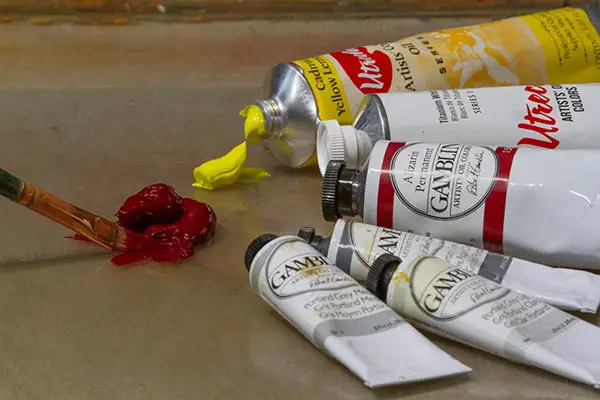
Besides value, which is the most important aspect of color, there is hue and chroma. Hue is just what color family the color belongs to, such as blue, yellow, etc. Chroma is how intense the color is, such as a dull red compared to what is called candy-apple red. All three, value, hue and chroma, must be taken into consideration if color harmony it to be achieved.
How to Think of Color
When I first started painting, I tended to think of and try to categorize every color I needed to mix with names. For instance, I would call a deep, muted red Burgundy, and a bright, intense red Cherry Red. This kind of thinking is very limiting since we can never develop, much less remember, names for all the millions of color variations in nature. It also tends to make us think we can buy a tube of paint to cover every color we will need.
Rather than use names such as Burgundy, we should think in terms of value, hue and chroma. So Burgundy becomes a cool/blueish red (hue), that is dark (value), and somewhat muted (chroma).
Thinking this way about color allows for a better understanding of what must be adjusted in order to paint your subject faithfully. Rather than hitting a dead end when Burgundy doesn't work, you can ask yourself which aspect of the color needs to be adjusted.
Color Formulas
There are a number of color theories and formulas out there that promise great results. These have their place, but when it comes to representing reality they are severely limited. Nature doesn't conform to a triadic color scheme. At times you may find it in nature, but if you try to make nature always conform to a preconceived formula you will not only end up with different colors than what's there, but you may miss seeing what is there completely.
I think formulas and theories are great for enhancing your paintings and adding a dash of interest, and some artists will completely change nature's colors to conform to a preconceived idea or theory. There is nothing wrong with this as long as that is the intention. Just be aware that no color formula will be able to solve every color problem if your desire is to paint nature as it is.
Learning Color
There are a lot of great books on color, and the subject is way too deep to tackle in this short article. I have to say that the book that helped me the most was once again Alla Prima II by Richard Schmid. He dives very deep into the subject yet keeps it clear and even fun. See my past article to learn more and where you can find his book.
Understand Light Temperature and Type
Light Temperature
The temperature of light ties directly in with color and is one of the primary influences of color. Light has temperature, meaning that is can be very warm (yellow/orange), or it can be very cool (blue). On the Kelvin scale light can go all the way from 1,000, which is candlelight, to 10,000 which is blue skylight. It's interesting to note that on the Kelvin scale, the warmer the light, the lower the number.

To get your color harmony correct, and to accurately paint the colors in your subject matter, you must know approximately what is the temperature of the light that is illuminating your subject matter. You do not need to know the exact temperature, so don't run out and by a light meter. You just need to know if the light is warm, cool, or near the middle somewhere.
Warm light will generally mean that the side of your subject that is illuminated will be warmer than the shadow side. Cool light will generally mean that the illuminated side will be cooler than the shadow side. I say generally because there are a number of anomalies that can occur.
So if you are painting a white ball in sunlight outside on a cloudless day, the illuminated side of the ball will have some warmth in it (yellow/orange) because the sun's light is warm, the shadow side of the ball will be cooler, meaning that it will have some coolness (blue) in it.
This doesn't mean that the lit side will be orange and the shadow side will be blue, it just means that the lit side will have very little if any blue and the shadow side will have very little orange and way more blue in it. So with warm light, you generally have warm light areas and cool shadows. And if the light is cool, your light areas will be cool and your shadows warm.
There is much more about this subject, and as said there are many caveats, but this is the general rule.
Light Type
There are generally two types of light the artist needs to be aware of, direct light and diffused light. Direct light would be the type of light you get from the sun on a cloudless day or the light of a bright spotlight. This type of light creates cast shadows, the type of shadows that mimic the shape of the object creating it and have very defined edges
Diffused light is the kind of light you get on an overcast day or from blue sky light, which is the light that the blue sky creates within the shadow of an object (Think of being on the shadow-side of a large building or mountain. That area, while not in the sun, is illuminated by the very cool blue light that the blue sky gives.) In diffused light you will not have cast shadows. Rather the shadows will be very soft and barely noticeable.
So to put is all together, for outdoor subjects, warm light is usually associated with hard, cast shadows, and cool light with soft, diffused shadows.
Variety of Edges is Essential for Great Artwork
Edges are not even a consideration for many beginning artists, but they can bring magic to your work. Variety of edges can give your work realism and interest and can help emphasize form. Variety of edges also mimick how the eye actually sees. In our field of vision, only the things we look at directly appear to be sharp. As you move out to your near-peripheral and far-peripheral field of vision, edges get blurry.

The three different types of edges are hard, soft, and lost, with many degrees between each. Each one has its place and function and can complement the type of form as well as values, colors, and movement. It's always a good idea to reserve your hardest edges for the focal point in your artwork and keep the edges on the edge of your composition somewhat soft so they don't divert attention away from the focal point.
Understand How to Make Good Composition
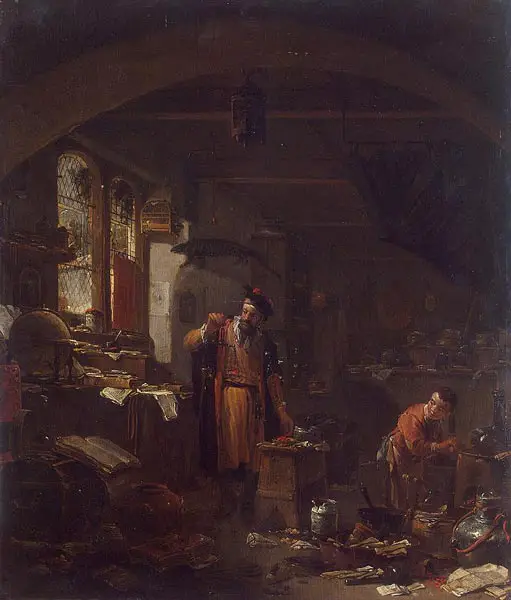
Composition is one of those concepts that artists struggle with all their life. Once an artist has mastered drawing, value, color, and so on, they will still agonize over composition. Composition is usually the reason master artists will abandon an idea or a painting. But please don't take this as discouragement, it's actually one of the things that keeps an artist interested in art and challenged after many years of being an artist.
While drawing is making something the right shape, size, and sticking it in the right place, composition is not nearly as objective. Good drawing skills will tell you if you drew a woman's nose in the wrong place on her face, but good composition will tell you if the woman is in the right place on the canvas. Drawing is almost always objective, while composition is usually subjective, which is where the challenge comes in.
Composition is all about creating a pleasing arrangement of shapes, colors and values in your artwork-nothing more. And while there are formulas and rules that can be helpful, especially when starting out, know that every single one of those rules has been broken by some artist who made a pleasing composition during their rule-breaking.
That said, if you are new to drawing or painting, it's always a good idea to accept a degree of humility and learn the rules and principles before you break them. There are many good books out there, but you can start by just doing sketches of paintings you like and try to figure out why you like them.
Master the Technique of Your Chosen Medium
You can't hit a home run if you don't know how to properly swing a baseball bat. And you can't paint a masterpiece if you don't know how to use your paints and brushes correctly. Good technique means knowing how to handle your materials and knowing exactly what those materials will do when used a certain way.
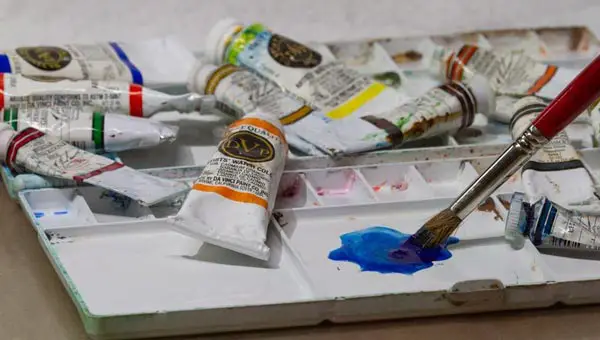
While most everyone knows that blue and yellow will make green, many people don't realize that Viridian Green mixed with Alizarin Crimson and some white will make a beautiful cool lavender color. This is a case of intimately knowing your pigments.
If you are an oil painter you need to know about the principles of fat over lean paint application. If you are a watercolorist you need to know how wet your paper should be to achieve the effect you desire. You also need to know the different types of brushes and what they will do.
You don't need to obsess over every technique available and know every single tool or paint mixture. Part of the joy of art is learning new things as you progress and trying new techniques. Also, much of this knowledge can only be gained through trial and error and experimentation. Just realize that you cannot expect advanced results until you have some handle on your technique.
Draw and Paint From Life as Often as Possible
If there was only one bit of advice I could give to my students, it would be to draw or paint from life as much as possible. Photographs, as helpful as they can be, are not life. A camera takes all the bigness, motion, and variety of life and squishes it down to a small, frozen, sterile rectangle.
Cameras, even the most advanced, do not record colors or values the same way the human eye does. For all the advancements that cameras have made over the years, the human eye can still perceive much more hue and value variety than a camera can capture. Also, when looking at a photograph, you are looking at a 2-dimensional representation of our 3-dimensional world that was created by a mindless machine that doesn't have your emotions or ability to express.
Probably worst of all, the photograph can enslave you into a mentality that your artwork will only be good if it imitates the photo as much as possible. Nothing will do more to suck your creativity away than submitting to this mentality.
Please don't get the idea that I'm totally against photos. This is far from the truth as I use photos for almost all of my studio work. What I advise against is relying exclusively on photos for the totality of your artistic being. An artist who wants to draw or paint reality should have consistent artistic contact with reality, not just a machine's interpretation of reality.
Get a sketchbook and draw from life, or get a pochade box setup or a French easel and paint from reality. I promise you that you will paint some disasters, just like I did and still do. But to work from life is to observe and internalize life from an artistic perspective, and that is the goal, not having a pretty painting to post on social media. Doing this on a regular basis will put you on the fast-track to being a master artist, even if you end up painting from photos in the studio.
Understand Linear Perspective

The first half of the depth equation, understanding of linear perspective, also known as classical perspective, is necessary for establishing a sense of depth and realism in your work. It is basically creating the illusion that objects that are further away actually recede to a vanishing point, and that your composition has depth. If you get this down, along with aerial perspective (see below), it will make the viewer feel like they can walk right into your artwork.
While perspective can become quite complex with vanishing points, lines, and grids, it doesn't need to be. In fact, trying to do this can sometimes make your work look less realistic since there are many times when a vanishing line will not be within the boundaries of your paper or canvas, and having them within those boundaries would create an unnatural and exaggerated perspective.
If you essentially match the angles of things you are seeing in life, then linear perspective usually takes care of itself. Yet this is much easier said than done, especially with things like interiors and complex architecture. One book I found very helpful that didn't over-complicate the matter was The Art of Perspective by Phil Metzger. Also, drawing from life will help you to get a feel for perspective in reality.
Master the Use of Aerial Perspective
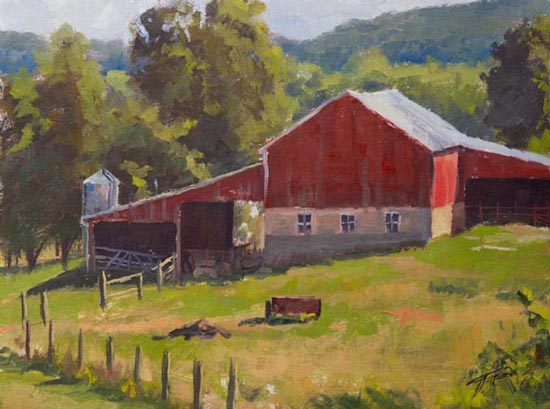
The second half of the depth equation, especially for landscape artists, is aerial perspective. This is showing depth and distance in your work through the proper use of values and colors.
While there are many aspects and caveats to this principle, the basic concept is that shadows and dark objects get lighter in value and cooler in color temperature the further they recede. In regard to color, a good rule to go by is that as things recede, yellow is the first color to diminish, followed by red, which then leaves blue. This is because of the effect the atmosphere has on color.
So let's say you are painting some trees that are very close to you as well as some trees off in the distance. The contrast between the light and shadow areas of the trees will be greater in the foreground trees since the shadows are darker. In the distant trees, there will be less contrast between the light and shadow side of the trees because the shadows will be lighter in value.
Continuing with the tree example, the foreground trees will have more yellow in the light areas and more warmth in the shadow areas than the distant trees. Those distant trees will have less yellow in the light areas and more blue in the shadow areas. This just scratches the surface of aerial perspective. If you want to learn more, I highly recommend John F. Carlson's Guide to Landscape Painting.
Ability to Gather Sufficient Reference Material

This one may surprise you as it's not a skill they would normally teach in art school, but in my years of painting, I've learned the hard way that not having sufficient reference material, or the ability to obtain it can make a drastic difference in your work.
I've seen many art students try to do masterpieces from really bad photos where you could barely see the subject matter. When it comes to painting realistic work (unless you are incredibly familiar with your subject), if you can't see it, you can't paint it.
Reference material can be anything from sketches, paintings done on location and/or photographs. It's important to get the best and largest amount of reference material possible in order to make quality works of art.
If you work from sketches or plein air paintings, that means doing some good sketches and maybe even several of the same or similar subject matter under the same lighting conditions. If you work from photos, that means taking way more photos than you think you will need, especially if your subject is something like an animal that moves and will exhibit many different poses and gestures. It also means knowing how to take good photos and knowing what to do with those photos in your studio.
My preferred way of working is with a combination of sketches, field studies and photos. Many of my paintings end up being a combination of sometimes 20-30 different photos along with field studies. I've found that sometimes the slight angle of a person's head or arm can make all the difference in a good composition.
Take way more photos than you think you will need. It's way better to have them and not need them than to wish you had them and compromise on your artistic idea. Also, learn how to work your camera well and learn the basic principles of photography. There is a wealth of information on the internet on this subject. Google how to use your camera model and It's pretty much guaranteed that there will be some free instructional videos on YouTube.
Learn to Edit Your References and Paintings
Now that you have good reference material, you need to know what to do with that material. There is an art to knowing how to edit your sketches or photographs in order to create a pleasing composition and realistic-looking work.
Nature almost always gives the artist more than he or she needs. Your job is to know what needs to go, what needs to stay, and what needs to be changed. Sure that tree may have actually looked that way as the photograph clearly shows, but that doesn't mean you can't and shouldn't make it look better.
Perhaps you want to draw a running horse and you love the angle of the head in a particular photo but the legs look weird. In that case, you should change the legs to make them look better. This is where taking way more photos than you think you will need becomes so important.
When combining references from different locations, its ultra-important that you make sure the lighting in those references is reasonably similar and from approximately the same angle, or that you paint them that way if you are skilled enough. You don't want to have an elephant that was photographed in overcast light placed in a perfectly sunny landscape.
Develop Your Artistic Inspiration

Some mistakenly think that inspiration is some magical thing that comes to you from some mysterious place. While this can happen, inspiration is also something you can and should develop. The best way to do this is draw or paint what you love. If you'r not sure what that is, take some time to think about what excites you, what you find beautiful, even if you have to go all the way back to your childhood.
What inspires you may change over the years. I started out doing mostly wildlife. I also dabbled with figurative work, still life, and did lots of landscapes. It wasn't until years later that it all came together in the historical Native American work I'm doing and loving today.
Keep in mind that your inspiration may not be so much subject-matter related as it is style-related. Many artists will paint anything as long as it's in their style. The subject is just a vehicle for them to express their inner-selves with their chosen medium. That said, if you are stuck in the mud when it comes to inspiration, try a new medium. That alone may be enough to get you fired up again.
Critically Assess Your Results
While inspiration is of utmost importance, you must be able to balance inspiration with a critical evaluation of your work. Just be careful. Looking down on everything you do is just as damaging as thinking you have no room for improvement.
To do this properly you need to conduct a sober self-assessment of where you currently are in your skill level and career. If you are just beginning, then you must consider any serious effort as a victory. This is because if you compare yourself to Rembrandt at this stage you will end up in perpetual frustration.
If you are an experienced painter wanting to asses your work, I recommend putting any almost-complete work away for several days or even a couple weeks and then looking at it with a fresh eye. It's also a good idea to have several works in different stages going at once. This will help keep your eye fresh and yet still maintain productivity.
When you look at your work, try to break down any problems into a technical problem that needs to be solved. If your painting looks flat, you probably have a value problem. If the face doesn't look like the model's, then it's a drawing problem. If the painting looks stiff, it's probably a problem with edges, values, and perhaps drawing. Breaking any issue down into technical terms helps you solve the problem and avoid beating yourself up.
Establishing Your Artistic Voice
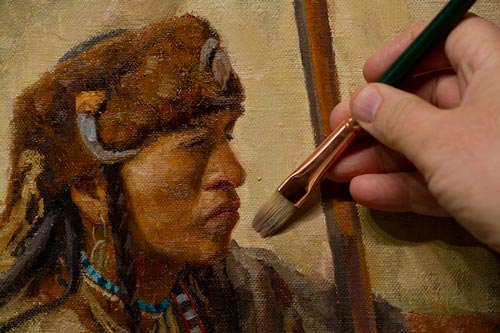
This doesn't happen for a while, and you don't want to try too hard to get there because then it won't happen naturally, but you do eventually want to arrive at your own voice or style of work. Most any successful artist has developed a style that is instantly recognizable. As indicated above, sometimes this is strongly tied to a particular subject matter, other times subject matter is somewhat irrelevant because the style is so strong.
Those little imperfections that you constantly see in your work that are not "mistakes" may just be your voice trying to cry out. Try taking those little things and turning them into something positive. For example, maybe you aim to have more color in your work but it always ends up being more muted. It may be that a muted palette is your natural voice. Try working with that palette and seeing if it can become a strength for you rather than a hindrance.
Developing a Production Process
I know, I probably just ruined the whole thing by bringing up pragmatics, but most good artwork is born of many hours and years of consistent production. Even if you don't go heavily commercial, or commercial at all, you still want to have some process in place that will keep you disciplined and engaged. It may be only an hour each day, it may be 10 hours a day, but develop some type of routine or schedule to allow yourself to create.
I heard it once said that you have to make about 10,000 mistakes before you become a good artist, so why not hurry up and get them all made? You will then be that much closer to creating the work that is inside you screaming to get out.
Jason Tako is a nationally known fine artist who specializes in western, wildlife, plein air, and Historical Native American subject matter. He spent his learning years sketching the wetlands and wooded areas of rural Minnesota. He has been featured in Plein Air Magazine and Western Art Collector Magazine and he was the Featured Artist for the 2020 Southeastern Wildlife Expo. See his work at www.JasonTako.com and his demonstrations on his YouTube Channel.
If you want to learn how to get better at drawing as quickly as possible, you need to focus on subjects and methods that will challenge your artistic growth. Below we will look at 10 subjects to improve your drawing skills.
Learn to Draw the Human Figure
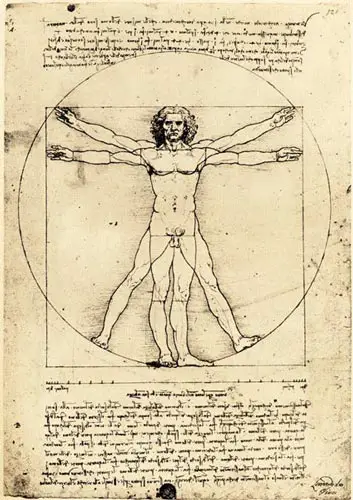
This is probably the most time-tested process for improving your drawing. For centuries masters would have apprentices draw the human figure both by copying other masterworks and from life. Think of Michelangelo, da Vinci, or any of the other Renaissance Masters. They are known for their great figurative work. More recent masters like John Singer Sargent and William Bouguereau also displayed unsurpassed draftsmanship.
The human figure has always shown to be one of the best, if not the best way to master organic forms, subtle curvature, and complex organic structure.
Not only is the human figure one of the most complex and subtle of all organic forms, but the fact that we humans are so prone to human recognition makes it almost impossible to slack off on drawing other people. If you move a branch down an inch on a tree, it's no big deal; if you move a person's nose down an inch, it's a very big deal. The human figure demands precision, especially if you are trying to capture a likeness.
There are many great resources for learning how to draw the human figure. One of the best, in my opinion, is the Charles Bargue and Jean-Leon Gerome: Drawing Course. This is a classical drawing course that was developed in the 19th century. See a more detailed review on my post Books That Changed My Artistic Life.
On top of doing the master copies that the Bargue Drawing Course offers, you will want to draw the human figure from life. Drawing nudes has always been preferred because you learn so much, not only about human anatomy but also about curvature, form, and how light affects form. Some art associations or classes offer nude modeling. If this is not possible, then drawing the clothed figure is the next best thing.
See the types of pencils, charcoal, and paper I use on the Drawing and Sketching Resources Page.
Learn to Draw Drapery
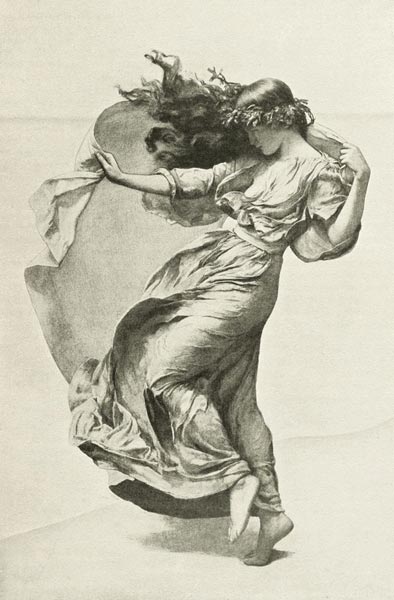
Even if you never plan to draw drapery or the clothed human figure, drawing drapery is highly recommended because, like the human figure, it teaches you so much about the subtlety of form and lighting. While it doesn't possess the challenge of trying to capture a human likeness, some of the most complex lighting and form situations can be found in drapery.
Drapery was also studied in-depth by the all the masters prior to the advent of modern art. They used its organic flow extensively for directional movement and compositional purposes in their art. This is something we rarely see in contemporary work.

The great thing about drapery is that you can set up it and it won't move or need a bathroom break like a human model. Taking a white sheet and hanging it over a couple of hooks on a wall with some dramatic lighting can provide hours or exceptional study in lighting and form.
Learn Linear Perspective
Every form is in perspective, meaning all form has a depth which follows the rules of perspective. Even when drawing the human figure standing straight up, if your eyes are level with the model's head, the feet will appear to sharply angle toward the vanishing point on the horizon line which is level with your eyes.
The rules of perspective will apply to anything you want to draw in a realistic manner, though some to a greater degree than others. If you are drawing a country landscape the rules still apply, but they do not have as obvious an effect as they do on a city scene with buildings and streets.
Knowing these rules, or at least being cognitive of them when drawing will greatly improve your results. When I draw, I don't draw a bunch of lines going to a vanishing point. I just try to draw everything the correct angle and size, which will give you the same effect. However, there are times when I'm drawing something where I need to refer to these rules to help solve problems like foreshortening and depth.
There are many great resources, books, and even YouTube videos that can help you learn these principles. Learning this stuff is not as fun or romantic as other forms of drawing, but you cannot escape them. No matter what you do or try to master, there are always parts of it that are not as exciting, or even downright boring, but once mastered they are indispensable. This is how perspective was for me. Learn it, you won't be sorry.

Draw Landscapes
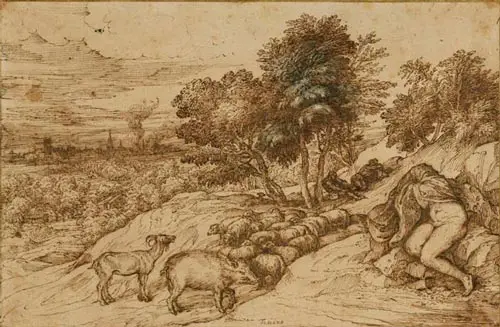
Drawing landscapes can help you learn to draw organic forms and arrange those forms into a pleasing composition. Start out by just drawing one tree or some clouds, then build upon that by drawing a whole landscape. Once you've got a handle on that, try arranging the elements to make a pleasing composition. Don't be afraid to eliminate things or even add things to make a nice picture.
Learn to Draw Architecture
The art I do today has nothing to do with modern cityscapes, yet drawing cityscapes and buildings not only helped me win awards like Best Architectural Painting at Plein Air Easton, it also helped me to paint barns well, and apply perspective to my Native American scenes. If you want to test your perspective skills, this is the way to go. Once again, start off with just one building or a house, the move onto full city scapes or interiors.
Draw Mechanical Objects
I've done crazy things like monochromatic watercolor drawings of plumbing in really old buildings, marking sure to paint every bolt and pipe accurately, which was in perspective of course. I didn't do this because it excited me; I did it because I knew it was a weakness of mine and drawing it would help me improve my focus and patience.
Draw from Life to Improve
I can't emphasize enough to draw from life. Photos are a great source of reference, but they are not life. Even if you end up drawing or painting mostly from photos, drawing and painting from life will help you put life into a lifeless photo.
Photos also distort things and cause foreshortening issues. I've seen many paintings where the artist just copied the photo, not realizing that the reason the horse's head looks so big is not that it was that big in life, but because of the foreshortening problems in the photo.
Draw from life as much as possible, you won't be sorry.
Copy Master Drawings
This was touched on above, but I wanted to point out that this is a great way to improve your drawing skills. Copying another artist's work can help you get inside their head. Many masters made it a lifetime practice. In fact, that is one of the reasons why museums were initially built, and many still allow it, provided the work is in public domain.
A word on copyright. You can copy any artist's work as much as you want, but only for practice. Baring permission or works in the public domain, you cannot in any way publish (even on social media), market, or sell that work in any way without breaking copyright laws and risking a lawsuit. I've copied the work of deceased and living artists, but I never publish or sell it. It usually ends up either in the trash. If you copy, use it for a private learning experience and nothing more.

Practice Drawing Techniques and Exercises
Whether it's contour drawing, gesture drawing, or memory drawing, practicing different techniques can, along with the right subject matter, improve your drawing skills. I cover this more in-depth in my article Sketching Exercises To Help Beginners Learn and Pros Improve.
Practice Focus and Patience While Drawing
I touched on this above, but focus and patience are two of the most important things you can develop to improve your drawing, and these come from challenging yourself, and lots of practice.
There is nothing physical about drawing beyond holding a pencil. You don't need to condition your muscles like an athlete or even as a musician would. So any problems you may have with drawing are most likely mental. Learning focus and patience will help you achieve the knowledge and experience you need to make you a better artist.
I hope that helps. Please leave your questions or comments below on what your experiences have been on learning to draw and sketch.
Keep Drawing!
Jason Tako is a nationally known fine artist who specializes in western, wildlife, plein air, and Historical Native American subject matter. He spent his learning years sketching the wetlands and wooded areas of rural Minnesota. He has been featured in Plein Air Magazine and Western Art Collector Magazine and he was the Featured Artist for the 2020 Southeastern Wildlife Expo. See his work at www.JasonTako.com and his demonstrations on his YouTube Channel.
Getting good at sketching or drawing requires dedication, determination, and inspiration, but it's also something that can be done by anyone. Let's take a closer look at how long this process can take and what it takes.
You can get good at sketching or drawing by committing to doing 5 sketches a day, or for drawing at least a half-hour a day for 5 years. This is best accomplished if you draw from life, and learn the principles of drawing such as perspective, proportions, composition, and anatomy.
Of course there are many variables to the above statement which we will discuss below.
10,000 Hours or 20 Hours?
Some say it takes 10,000 hours to master something, others say it only takes 20 hours to learn something. A distinction should be made between the terms learn and master. I learned how to ride a bicycle pretty quickly once the training wheels were off, and while I can still ride a bike, I would not call myself a master bicyclist. That term seems better applied to those young kids who can do all those jumps and flips without breaking bones.
In the medieval craft guilds, one would be an apprentice for about seven years before being declared a journeyman. Only after creating something deemed a masterpiece by the guild masters could a journeyman be considered a master. While we don't have such guilds today, learning to draw and mastering drawing requires similar dedication.
The Ability to Draw Versus Mastering Drawing
Learning to draw is basically being able to create a faithful representation of what you see or intend, utilizing some type of instrument that can make makes on a surface that can receive those marks. If you can look at something, or imagine something and replicate it correctly, or even somewhat correctly on paper, you have the ability to draw.
Mastering drawing is different. A master can not only faithfully replicate something in front of them or in his/her imagination, but they can also communicate something beyond just mere physical appearances, whether it's transporting the viewer to a moment or location, or capturing the emotion in a child's face. This can take many years or even a lifetime to accomplish.

The Good News and the Bad News About Getting Good at Drawing
If you commit to drawing every day, learning as much as you can about it, and putting that into practice, you will get better and you will learn how to draw, no matter what your current skill level. I used to draw ducks that had necks like giraffes. I was tight and tense, and my pencil would run off the page more times than I'd like to admit. But eventually, I got better, and you will too.
The bad news is that masters are rarely if ever satisfied with their work. I have read many interviews with artists I admire and consider the top in their field, and they pretty much all admit they wish they could draw or paint better. From personal experience, the only way I know I've improved is by not being as horrified by my current work as I am by my past work. But this mentality keeps us moving forward.
See the types of pencils, charcoal, and paper I use on the Drawing and Sketching Resources Page.
Doing Five Sketches a Day for Five Years
Claire Walker Leslie, in her book The Art of Field Sketching, described how when master wildlife artist Maynard Reece was a young man, he was advised by Ding Darling to do five sketches a day for five years in order to become an artist. I took this advice to heart when I started doing art again, and it helped tremendously. At times I had to revise it to sketching one thing for a half-hour, due to a hectic schedule, but either way, it kept me going.
I also supplemented the above practice with the fairly rigid and very fruitful routine laid out in Kimon Nicolaides book, The Natural Way to Draw. This jump-started me and helped me know what to look for when I sketched something.

Enjoy The Journey of Drawing
We have all heard the saying, "It's a journey, not a destination." This is very true when it comes to being an artist. Becoming a good artist is not the same thing as becoming the CEO of a company. There never comes a point when you say, "I've finally become good enough." You will have successes, and even times, when the "good enough" temptation will whisper in your ear until someone else's great work of art knocks you back into reality.
Learn to enjoy the process of learning, because becoming better will never end unless you stop drawing.
I once heard it said that you must make at least 10,000 mistakes before you become a good artist. So I resolved to get those mistakes made as soon as possible. I don't know if I've made 10,000 yet (hopefully I have), but I've come to the understanding that I will always make mistakes, everyone does.
But My Drawing Isn't Getting Any Better
If you are not seeing any improvement in your drawing or sketching there are several things you will want to consider.
Challenge Yourself
Some subjects are easier to draw than others, and some people will be better at drawing certain things than others. An apple is easier to draw than a human face. If you have been drawing only apples, then you cannot expect to see much improvement.
Challenge yourself by sketching something you are unfamiliar with, or that you find difficult. For example, if you have been sketching facial profiles, switch to the front, or the whole human figure. If you sketch mostly nature, head into town and do some sketching.
Get Inspired
I cover this topic in more detail in my article Sketchbook Ideas: 10 Great Ideas To Maintain Your Artistic Inspiration.
Take a Break
Sometimes it may not be a lack of improvement, but a lack of objectivity. We can be our own worst critic, and if we look at something long enough, we will find something wrong with it or just get down on ourselves and fail to see our improvements.
Consider taking a break for a day or two. Before you start up again, take out your first sketches or drawing and look at them. You will most likely see that improvement has been made.
Get Educated
There is only so much we can accomplish on our own. While some artists are self-taught, no one is ever purely self-taught. I never went to school for fine art, but I benefited tremendously from several workshops I took, along with the books I've read and just hanging out with other artists.
If you have a local art association, sign up for a class. You can also buy some books and even check out YouTube (here I must make a shameless plug for my YouTube channel.) But keep in mind there are many resources out there to fit any budget and it's never too late to start.

Maintaining a Balance
As said above, you must learn to enjoy the journey. That journey should be a combination of motivation, dedication, inspiration, and education.
If, in the beginning, you only draw what inspires you, you may delay your improvement and miss out on other subjects that inspire you. I didn't start out doing historical Native American subjects, but I found I love doing them. Had I only drawn nature and animals, and excluded figure drawing, I wouldn't be able to do the work I love doing today.
The most important thing you can do is not worry about how long it takes to get good, but to just keep sketching. When I was younger I met spent an afternoon with a very accomplished taxidermist/artist. When I showed him my attempts at finished paintings he wasn't too impressed, but when I showed him my sketchbook he asked if I sketch every day from life, which I affirmed. Pointing to my sketchbook he said, "This is what will get you to where you want to be." He was right.
Keep Sketching!
Jason Tako is a nationally known fine artist who specializes in western, wildlife, plein air, and Historical Native American subject matter. He spent his learning years sketching the wetlands and wooded areas of rural Minnesota. He has been featured in Plein Air Magazine and Western Art Collector Magazine and he was the Featured Artist for the 2020 Southeastern Wildlife Expo. See his work at www.JasonTako.com and his demonstrations on his YouTube Channel.
Whether you just started or have been sketching for some time, it can be challenging for artists to keep up their sketchbooks. Here are some sketchbook ideas: 10 great ideas to maintain your artistic inspiration so you never run out of ideas on what to sketch.
Change Your Sketching Environment
Getting into a different environment can reawaken your enthusiasm for sketching. If you are tired of doing still lifes, go outside and try drawing some trees, clouds, or even animals. Sketching can be combined with bird watching or even fishing, especially when the fish aren't biting.
If you primarily do country sketching, take a drive in town and challenge yourself with some intense perspective, geometric shapes, or crowds of people.

Try Roadside Sketching
This somewhat ties into the previous suggestion, but one of my favorite pastimes is taking long country drives and looking for things to sketch. It’s a nice way to relax and internalize the beautiful discoveries you have made. It doesn’t always have to be someplace new. Light is always changing and changing how things look. There may now be an animal on that same country road you always travel. Or you can finally go down that one road you have always wondered about.
For your safety, I recommend doing this on quiet country roads, preferably dirt roads, or if you are sketching in the city, find a safe place to park and either sit in your car or bring a small fold-up chair. Don't park along busy roads with little or no shoulder as this can be dangerous.
If you are going to park by somebody’s house, you may want to knock on their door and introduce yourself with a business card and an explanation of what you are doing so as not to raise any alarm. I’ve found that most people are very welcoming and will even want to see your sketches when they are done. I’ve even been brought cookies and hot chocolate by friendly residents while sketching out in the cold.
Get A Different Kind Of Sketchbook
If your current sketchbook has a cheap, uninspiring feel, you may get inspiration from a good quality sketchbook. If your sketchbook is really nice and you are afraid to sketch in it, do the opposite and buy a cheap one so you won’t be afraid of making mistakes on good paper.
Insider Tip: There is a wide variety of sketch pads and sketch journals available on the market. Rough paper works well for watercolors, pastels, and heavily textured drawings; smooth paper works create for pencil, ink, and drybrush watercolor techniques. You can try toned paper such as tan, gray, blue, and even black, which can be used with white charcoal.

Try Sketching With A New Medium
A new medium can open a world of possibilities. If you have been sketching in pencil, try charcoal or pen and ink. You can also dive into watercolor, though this may require a different type of sketchbook. And you can go all out and begin oil painting outside, though this requires a lot more equipment.
I started sketching in pencil, then a couple of years later I sketched in a ball-point pen to force myself to work without an eraser. After that, I did watercolor and kept that going for years. My first watercolor sketchbooks were atrocious, but eventually, I got better. The goal is to experiment until you find something you really connect with.
Don’t judge yourself by your first attempts at a new medium. If you enjoy it, continue to use it.
Practice Contour And Gesture Exercises
Contour and gesture exercises will sharpen your skills of observation and are a great way to learn how to draw.
Contour drawing is where you don’t look at your paper as you try to draw the outline and surface of your subject without removing your pencil from the paper. Yes, there are times when the pencil will run off the paper, and results may look like you just got back to your dorm room from a college kegger, but you are not doing this for results, it’s an exercise in observation.
Gesture drawing is when you try to capture the overall shape and feel of the entire object by moving your pencil over the paper in a very loose and rapid fashion using the full motion of your arm. The results will be a bunch of scribbles, but you should not pause to erase or make corrections. The goal is to capture the essence and movement of the form.
Gesture drawing is a time-honored method utilized by master artists such as Rembrandt, Michelangelo, Degas, and others.
The two above methods were the primary means I learned to draw when I first stated. Kimon Nicoladies book, The Natural Way to Draw is a great resource for learning these methods. See my review of this classic book.

Try A New Sketching Technique
There are as many styles of sketching and drawing as there are people doing it. But experimenting with a new approach or style may be just what you need. If you tend to sketch with outlines, try eliminating them and sketch just the light and shadow shapes of the subject using a shading technique, or vice versa. I go into further detail on this approach in the article Drawing Without Boundaries.
You can also try holding your pencil differently. Rather than holding it as if you were writing, try holding it as if you were picking it up and drawing more with the side of the tip. Another method that works well with charcoal is to rub some broad strokes of vine charcoal on paper then draw out the lighter areas with a kneaded eraser.

Go On A Sketching Vacation
We all can become too familiar with our surroundings. If this has happened to you, and you have the means, take a trip somewhere and bring along your sketch gear. It doesn’t have to be to Europe, it can just be a weekend trip to a different part of your state, a camping trip or a visit to a state or national park.
Insider Tip: One trick I use for finding interesting places to sketch is by using Google Maps to search the surrounding area for photos of parks or recreational areas. If you scroll over the name of a park, a hyperlink may appear. Click on that link and you may get a photo that appears in the upper left corner. Clicking on that photo usually brings up multiple photos that you can scroll through. See below.

Go Sketching With a Group
The life of an artist can be a lonely business, so call up another friend and ask them to go sketching. They don’t necessarily have to be an artist. Perhaps it can be a neighbor or family member that you can share your sketches with. You may even inspire them to start their own sketchbook.
While most of my sketching these days is a solo affair, I have fond memories of the plein air painting events I used to do. It was great looking over the shoulders of other artists and talking shop with them later in the cafe. We would also share painting locations with each other… most of the time.
See the types of pencils, charcoal, and paper I use on the Drawing and Sketching Resources Page.
Practice Meditative Sketching
The act of sketching can be very relaxing but sometimes you can get too analytical. A great way to regenerate your inspiration is to use sketching as a form of meditation. This is described briefly in Clare Walker Leslie's classic, The Art of Field Sketching. Click here to see my review of this great book.
To do this, go outside with your sketchpad to a peaceful place that has no distractions. Sit quietly, breathe deeply, listen, and let go, becoming fully aware of your surroundings. When you notice something, sketch it, focusing more on the subject than the paper. The goal is not the resulting sketch, but to get to know your subject in a deeply intimate way.
Get Inspired By Other Artist's Work
So many artists, both visual and musical can trace their desire to create back to seeing or hearing another artist's work. We stand on the shoulders of others. If you're in a slump, make a visit to a museum or art gallery. If this is not possible, there is an infinite amount of inspiration on websites like Pinterest where you can just type the term sketches or pencil drawings and spend hours looking at different work.
Jason Tako is a nationally known fine artist who specializes in western, wildlife, plein air, and Historical Native American subject matter. He spent his learning years sketching the wetlands and wooded areas of rural Minnesota. He has been featured in Plein Air Magazine and Western Art Collector Magazine and he was the Featured Artist for the 2020 Southeastern Wildlife Expo. See his work at www.JasonTako.com and his demonstrations on his YouTube Channel.
Overcoming doubts about your art may be one of the most difficult aspects on the road to being a successful artist. Nothing can cripple your creative ability like self-doubt, especially if this mindset becomes habitual. Below is the story of my struggle and how it was overcome.
From Accomplishments to Doubt
It was my first and only commercial art gallery at the time and the owner was a respected artist who wasn't afraid to speak her mind. With very few accomplishments on my short resume, my ego was still fragile. The gallery owner had previously offered compliments and encouragement, but this day proved to be different. The paintings brought to the gallery that day were not my best, the terrible result of trying to please. When the gallery owner saw the paintings, she stated, "This isn't you," and she rejected them.
The fact that she was trying to encourage me is something I now realize, but at that time it was devastating. The events that followed over the next couple of years didn't help. The Great Recession kicked in, along with serious family health issues. Sales flattened which resulted in ejections from various shows and the previously mentioned gallery. I started chasing all kinds of things: new subject matter, new techniques, and new styles; anything to raise my spirits and career. It didn't help much. Minimal likes on social media increased the discouragement. Giving up was a serious consideration.
Room for Improvement
We artists tend to be a pretty sensitive bunch. Sensitivity can be our greatest asset and our greatest enemy. It works in our favor when creating great art yet works against us when we receive criticism. Being so close to our work can turn rejection into an insult.
Don't get me wrong. There was room for improvement and rejection can be a good motivator to improve. Looking back, I'm now grateful for those rejections. The years of frustration and struggle, even the somewhat scattered pursuit of varied subject matter, which consisted of wildlife, landscape, still life, and the human figure prepared me for historical Native American subject matter.
From Doubt to Confidence
Native American subject matter was not something I had ever considered; it was almost discovered by accident. Mediocrity was the initial result, but persistence was key. Public reception was uncertain, but at that point, it didn't matter. Regardless of how it would be received, I decided to persevere. Trying to please the phantom critique that resided in my mind, and obsessing over social media affirmation had become old.
Ironically, it was at this point when things started to turn around. Instead of critiquing work from the imaginary perspective of another person, it was critiqued from my perspective alone. I wanted to paint something that I would enjoy on my wall, nothing else. Not only was art enjoyable again, but it was well-received by the public. In less than two years, I ended up becoming the featured artist for the most prestigious wildlife art show in the world.
A Plan for Overcoming Doubts
There are several strategies for overcoming doubts about your art. Study great art, not to bring yourself down, but to learn what good art is. Assess your work with this knowledge, not the phantom perspective of others. Also, create for yourself an art routine. When I decided to become an artist, I committed to do five sketches a day every day for five years, advice derived from the book The Art of Field Sketching. If you would rather paint, then perhaps commit to painting an hour a day, or something similar. Don't focus so much on the results, rather consider yourself successful for having fulfilled the commitment, even if you do a bad painting that day.
It has been said that you must make about 10,000 mistakes to become a good artist, so get them made and consider it an accomplishment when you do. This will help you focus on what will make you successful. And finally, if possible, seek out good instruction through workshops, videos, or mentorship. It will not promise you financial success, but it will eventually lead to confidence and enjoyment in your work. Combine that with self-promotion, marketing, and some business sense, and you are much more likely to find artistic and even financial success and more of all help you in overcoming doubts about your art.
Please leave your comments and experiences below. I would love to hear from you! Also, see my artwork at www.jasontako.com and be sure to check out my YouTube channel.
Jason Tako is a nationally known fine artist who specializes in western, wildlife, plein air, and Historical Native American subject matter. He spent his learning years sketching the wetlands and wooded areas of rural Minnesota. He has been featured in Plein Air Magazine and Western Art Collector Magazine and he was the Featured Artist for the 2020 Southeastern Wildlife Expo. See his work at www.JasonTako.com and his demonstrations on his YouTube Channel.
Avoiding the Coloring Book Method
When learning to draw, many artists begin with outlines and fill these in with shading. This method is something we all learned from doing coloring books as children. While there can be some merit to this approach (we all need to start somewhere), there is another method that may help you to obtain a likeness more quickly and accurately, and give your work a less academic look. This is drawing without boundaries. As discussed in the previous post Empty Headed Drawing: The Optical Approach, the human eye doesn’t see outlines, rather it sees shapes and edges; the outlines merely represent the edges of shapes. And when you indicate light and shadow early on in your drawing, you can more critically assess the accuracy of the drawing, and distance yourself from the coloring book method.

Drawing Without Boundaries-Beyond the Coloring Book
To demonstrate, I did a small 4x4 inch drawing (see below) based on an old photograph (above) by the early 20th century photographer Edward Curtis. Edward was a master at setting up beautiful lighting for portraits and using variety of values and edges to their fullest extent; his photos are well worth studying. This drawing was done with charcoal on a Strathmore Toned Tan 4x4 Artist Tile. The great thing about this paper is it’s very forgiving, especially with charcoal, and the tan color goes well with nostalgic subject matter.
This stage of the drawing shows only about 10-15 minutes of work. While it’s still very rough, the indication of the shadows early on show that I’m already achieving a very close likeness to the subject. This is because the value shapes are what make up the image, not outlines. The loose, light, sketchy approach keeps me feeling free and relaxed and allows for easy correction. Most of all it breaks my mind free from the boundaries of the coloring book method.

At this early stage of the drawing, you should be critically assessing the large shapes and proportions. Ask questions like, “How large is the length of the nose compared with the length of the forehead? Are the eye sockets placed too high or too low? Is the forehead too slanted or not slanted enough?” These are the types of questions you must be asking yourself and answering before you proceed any further. Looking at your drawing with a mirror can also help. This is the essence of drawing without boundaries.
Finishing Up
Once you are certain that the large shapes and proportions are correct, you can start to define these shapes with more precision. The shadows can be applied with more pressure and darkness since the need to erase and make corrections has diminished. The next step is to apply half tones, subtle value shifts and smaller value shapes. This process will lead to drawing details in a more natural manner since details are really just smaller shapes of value. As stated in a previous post, The Most Important Elements of Drawing, detail doesn’t mean anything if it’s in the wrong place.
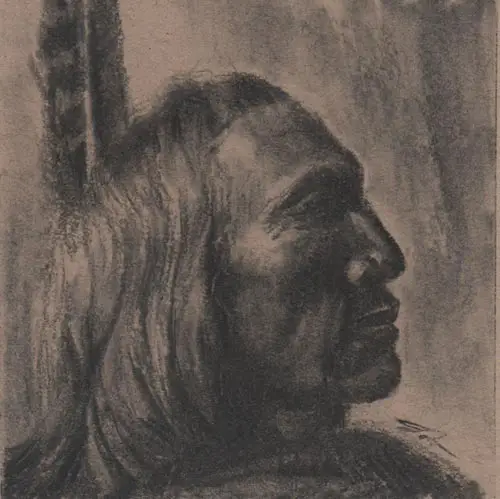
So next time you are drawing something, check and see if there are strong shapes of value (light and dark) that you can grab on to. Lightly sketch in those shapes, and draw without boundaries!
Tell Me Your Struggles
Let me know what you are struggling with in your drawing by commenting below.
Jason Tako is a nationally known fine artist who specializes in western, wildlife, plein air, and Historical Native American subject matter. He spent his learning years sketching the wetlands and wooded areas of rural Minnesota. He has been featured in Plein Air Magazine and Western Art Collector Magazine and he was the Featured Artist for the 2020 Southeastern Wildlife Expo. See his work at www.JasonTako.com and his demonstrations on his YouTube Channel.
Disclosure: Bear in mind that some of the links in this post are affiliate links and if you go through them to make a purchase I will earn a commission. Keep in mind that I link these companies and their products because I use them, because of their quality, and not because of the commission I receive from your purchases. The decision is yours, and whether or not you decide to buy something is completely up to you.
Seeing the Light
The most important element of drawing, aside from composition, should be the large shapes and the placement of those shapes in proportion to one another. Using portraits as an example, what will make your drawing look most like your subject are the accurate reproduction of the lights and darks, the large shapes that make up the head of the subject, the distance between the eyes, nose, and mouth, overall hairstyle, etc.
Master artist Morgan Weistling makes a good point about likeness and recognition: take your high school yearbook and look at the group photo of the entire graduating class. Even though your classmate’s heads may be no larger in diameter than an eighth of an inch, you can probably still name all your friends in the photo. That’s because details are inconsequential when it comes to recognition. This applies not just to portraits, but to most anything you draw.

To capture these essential shapes, you must simplify the lights and darks in your subject matter to abstract shapes while at the same time suspending in your mind the intellectual names of those objects. So, when looking at a face, you do not draw a nose, an eye, or a mouth. Instead, you draw a particular shape that is so big, has such and such angles, and is a particular distance from the other shape on the page.
The Misconception
You hear it all the time; you may believe it yourself. Someone will see a good painting or drawing and comment, “Wow! Look at the detail!” The concept of detail has a tendency to charm and even seduce artist and non-artist alike. I say the concept of detail because many lovers of detail are incorrect. It’s not the detail that makes something “look like a photograph.” And honestly, while I know that very common saying is meant to be a compliment, if one of my paintings or drawings actually looked just like a photograph, I would probably consider it a failure. I would rather hear a comment such as, “It feels like I’m there,” or “It looks like I could just reach out and touch it.” Those comments come from painting reality as the human eye sees it, not by reproducing all the details captured in a photo. This comes from focusing on the most important element of drawing.

So, what are details? Simply put, they are the little shapes or lines in a subject and work of art. While these little shapes can be charming, they are far from what makes a drawing seem real, and even farther from what makes something a work of art.
The primary emphasis of photographic detail fails because the human eye doesn’t see like a camera does. When you look at the world, your eye focuses on details in only a very narrow range of view. Much of your field of vision is more peripheral and therefore somewhat fuzzy. Therefore, our brain recognizes value and color shapes first, and if you get those shapes and relationships correct, you are much further along.
Details can enhance a drawing, but they should never be the first consideration. Those finely drawn eyelashes don’t mean a hill of beans if the eye is in the wrong place.
Drawing by Feeling
So what is empty-headed drawing? When I decided to take up drawing seriously in my mid-20s, I dove head-first into Kimon Nicolaides classic, The Natural Way to Draw. This book led me through a rigid, daily discipline of approximately three hours of drawing exercises. These exercises proved to be invaluable in teaching me to see and draw shape and form in a very tactile manner. With Kimon’s method, you are supposed to make your best attempt to feel the outline and form by imagining that your pencil is touching the edge of the subject. Other exercises ask you to imagine you are sculpting the form of the subject with your pencil. That exercise really resonated with me and I spent hours “sculpting” everything I could from trees to the human form. I later learned this was the tactile approach to drawing, as defined by master artist and teacher Ted Seth Jacobs.
The Limitations of Touch
I never completely finished Kimon’s book. And while it still sits on my bookshelf periodically inspiring feelings of nostalgia, I got far enough through it to solidify my drawing skills. However, as more and more subjects entered the pages of my sketch journal, I realized there was a serious limitation to the tactile approach. Tactile by its very nature involves the sense of touch, but if there is no form to touch, the tactile approach loses its benefit. And there is one primary element that we see all the time that has absolutely no visible form, and that element is light.

Drawing by Seeing
Thankfully, there is another approach to drawing that solves this dilemma, and that is the optical approach. To put it simply, while the tactile approach implies drawing how something feels, the optical approach implies drawing how something looks. The first is more intellectual, the second is strictly visible.
To demonstrate, let’s say you are drawing a face in a dark room that is intensely lit from one side. In this scene, the light side of the face is visible, while the dark side is barely visible. A strict tactile approach would require you to indicate the outline of the entire face, even the barely visible shadow side; the fact that one side of the face is in light and the other in dark is secondary, if not disregarded. A strict optical approach would de-emphasize the outlines of the form and focus merely on capturing the light and dark abstract shapes, which when assembled correctly on paper, look like the face you are drawing.

Empty Headed Drawing: The Optical Approach
You could almost say that the tactile approach is more intellectual and requires the artist to draw what he or she knows about the face, while the optical approach only requires the artist to draw what he or she sees and nothing more. In a way, the optical approach requires one to suspend their knowledge of things and their prejudice of what they think they know about them and see and draw only abstract shapes. I dare say the optical approach is empty-headed drawing. By using this term, I don’t mean to imply that the artist who uses the optical approach lacks in intellectual capability, only that it requires one to not think intellectually about the subject they are drawing. They must merely see, and draw what they see, nothing more.
You Are Seeing Shapes
Admittedly, many artists use a combination of both the tactile and optical approach when drawing. I believe this is because the pencil, unlike the brush, makes thin, precise lines. Therefore, many artists tend toward outlining form and afterwards imply light and shadow through various means of shading. Neither this, nor a strict tactile approach is inferior by any means. A well-drawn contour line contains a delicate, lyrical form of expressive beauty that cannot be replicated by mere shapes of light and dark. But despite all its beauty and expression, it is ultimately not how the eye sees reality. When you look at an object, you are not seeing an outline, rather a shape that meets another shape, even if that shape is empty space. The edge where one shape meets another shape may be expressed with a line, but it may also be expressed with shapes of light and dark, which is the essence of the optical approach.
Which Approach is Best?
So, does it matter which approach I take, or what degree of the two approaches I implement? In the matter of art and self-expression, neither approach is superior to the other. However, representational art consists almost entirely how you look at things and interpret them. And having a better understanding of how you are viewing reality will give you better chance at expressing it. The great thing about the optical approach is that you don’t need to attempt to draw something you can barely see, and you can also draw things that don’t have defined borders, such as atmosphere. But most importantly, you don’t need to be a scientific expert on what you are drawing, you only need to draw the abstract shapes of light and dark in front of you. You don’t need to draw a hand, but the lights and darks that when assembled correctly look like a hand. And this can give the artist a tremendous sense of freedom.
We will talk more next time on the practical applications of these two approaches. Till next time, keep drawing.
If you enjoyed this article, be sure to check out Drawing Without Boundaries. To see my artwork, visit www.JasonTako.com and visit my YouTube channel.
Jason Tako is a nationally known fine artist who specializes in western, wildlife, plein air, and Historical Native American subject matter. He spent his learning years sketching the wetlands and wooded areas of rural Minnesota. He has been featured in Plein Air Magazine and Western Art Collector Magazine and he was the Featured Artist for the 2020 Southeastern Wildlife Expo. See his work at www.JasonTako.com and his demonstrations on his YouTube Channel.
